
PeopleSoft 9.2: Data Transformer
March 2013
PeopleSoft 9.2: Data Transformer
CDSKU fscm92pbr0
Copyright
©
1992-2013, Oracle and/or its affiliates. All rights reserved.
Trademark Notice
Oracle and Java are registered trademarks of Oracle and/or its affiliates. Other names may be trademarks
of their respective owners.
Intel and Intel Xeon are trademarks or registered trademarks of Intel Corporation. All SPARC trademarks
are used under license and are trademarks or registered trademarks of SPARC International, Inc.
AMD, Opteron, the AMD logo, and the AMD Opteron logo are trademarks or registered trademarks of
Advanced Micro Devices. UNIX is a registered trademark of The Open Group.
License Restrictions Warranty/Consequential Damages Disclaimer
This software and related documentation are provided under a license agreement containing restrictions
on use and disclosure and are protected by intellectual property laws. Except as expressly permitted
in your license agreement or allowed by law, you may not use, copy, reproduce, translate, broadcast,
modify, license, transmit, distribute, exhibit, perform, publish, or display any part, in any form, or by any
means. Reverse engineering, disassembly, or decompilation of this software, unless required by law for
interoperability, is prohibited.
Warranty Disclaimer
The information contained herein is subject to change without notice and is not warranted to be error-free.
If you find any errors, please report them to us in writing.
Restricted Rights Notice
If this is software or related documentation that is delivered to the U.S. Government or anyone licensing it
on behalf of the U.S. Government, the following notice is applicable:
U.S. GOVERNMENT END USERS: Oracle programs, including any operating system, integrated
software, any programs installed on the hardware, and/or documentation, delivered to U.S. Government
end users are "commercial computer software" pursuant to the applicable Federal Acquisition Regulation
and agency-specific supplemental regulations. As such, use, duplication, disclosure, modification,
and adaptation of the programs, including any operating system, integrated software, any programs
installed on the hardware, and/or documentation, shall be subject to license terms and license restrictions
applicable to the programs. No other rights are granted to the U.S. Government.
Hazardous Applications Notice
This software or hardware is developed for general use in a variety of information management
applications. It is not developed or intended for use in any inherently dangerous applications, including
applications that may create a risk of personal injury. If you use this software or hardware in dangerous
applications, then you shall be responsible to take all appropriate fail-safe, backup, redundancy, and
other measures to ensure its safe use. Oracle Corporation and its affiliates disclaim any liability for any
damages caused by use of this software or hardware in dangerous applications.
Third Party Content, Products, and Services Disclaimer
This software or hardware and documentation may provide access to or information on content, products,
and services from third parties. Oracle Corporation and its affiliates are not responsible for and expressly
disclaim all warranties of any kind with respect to third-party content, products, and services. Oracle
Corporation and its affiliates will not be responsible for any loss, costs, or damages incurred due to your
access to or use of third-party content, products, or services.
Alpha and Beta Draft Documentation Notice
If this document is in preproduction status:
This documentation is in preproduction status and is intended for demonstration and preliminary use only.
It may not be specific to the hardware on which you are using the software. Oracle Corporation and its
affiliates are not responsible for and expressly disclaim all warranties of any kind with respect to this
documentation and will not be responsible for any loss, costs, or damages incurred due to the use of this
documentation.
Copyright
©
1992-2013, Oracle and/or its affiliates. All rights reserved. v
Contents
Preface..........................................................................................................................................................ix
Understanding the PeopleSoft Online Help and PeopleBooks............................................................. ix
PeopleSoft Hosted Documentation................................................................................................. ix
Locally Installed Help..................................................................................................................... ix
Downloadable PeopleBook PDF Files............................................................................................ix
Common Help Documentation........................................................................................................ix
Field and Control Definitions.......................................................................................................... x
Typographical Conventions.............................................................................................................. x
ISO Country and Currency Codes.................................................................................................. xi
Region and Industry Identifiers...................................................................................................... xi
Access to Oracle Support...............................................................................................................xii
Documentation Accessibility..........................................................................................................xii
Using and Managing the PeopleSoft Online Help...............................................................................xii
PeopleSoft Enterprise Components Related Links.............................................................................. xii
Contact Us.............................................................................................................................................xii
Follow Us.............................................................................................................................................xiii
Chapter 1: Getting Started with PeopleSoft Data Transformer...........................................................15
PeopleSoft Data Transformer Overview...............................................................................................15
PeopleSoft Data Transformer Business Processes............................................................................... 15
PeopleSoft Data Transformer Implementation..................................................................................... 15
Setting Up Core PeopleSoft Data Transformer Features...............................................................16
Creating Source Data Objects........................................................................................................ 16
Chapter 2: Setting Up Core PeopleSoft Data Transformer Features...................................................17
Defining Remote Database Connections.............................................................................................. 17
Page Used to Define Remote Database Connections.................................................................... 17
Understanding Remote Database Connections.............................................................................. 17
High-Level Steps for Setting Up Data Transformation................................................................. 17
Remote Database Access Management Page.................................................................................22
Defining Installation Options................................................................................................................24
Page Used to Define Installation Options......................................................................................24
Data Transformation Installation Options page............................................................................. 24
Defining Subject Areas.........................................................................................................................25
Page Used to Define Subject Areas...............................................................................................25
Understanding Subject Areas......................................................................................................... 26
Subject Areas Page.........................................................................................................................26
Chapter 3: Creating Source Data Objects.............................................................................................. 29
Understanding Source Data Objects.....................................................................................................29
Common Elements Used to Create Source Data Objects..............................................................29
Creating Basic Source Data Objects.................................................................................................... 29
Pages Used to Create Basic Source Data Objects......................................................................... 30
Source Data Object Page............................................................................................................... 30
Fields Page......................................................................................................................................32
Preview Page.................................................................................................................................. 33
View Query Page............................................................................................................................33
(Optional) Creating Expressions...........................................................................................................34
Page Used to Create Expressions.................................................................................................. 34
Understanding Expressions............................................................................................................ 34
Contents
vi Copyright
©
1992-2013, Oracle and/or its affiliates. All rights reserved.
Expressions Page............................................................................................................................ 37
(Optional) Creating Filters....................................................................................................................40
Page Used to Create Filters........................................................................................................... 40
Understanding Filters..................................................................................................................... 40
Filters Page..................................................................................................................................... 41
(Optional) Joining Records................................................................................................................... 42
Page Used to Join Records............................................................................................................ 42
Understanding Joins....................................................................................................................... 43
Join Conditions Page......................................................................................................................43
Chapter 4: Preparing to Create Maps.....................................................................................................45
Understanding the Mapping Process.................................................................................................... 45
Target Field Default Value Setup...................................................................................................45
Translation Set Setup......................................................................................................................46
Transformation Creation.................................................................................................................46
Map Rule Setup..............................................................................................................................46
Setting Up Target Field Default Values............................................................................................... 47
Page Used to Set Up Target Field Default Values.........................................................................47
Set Target Field Defaults Page.......................................................................................................47
Setting Up Translation Sets.................................................................................................................. 48
Page Used to Set Up Translation Sets........................................................................................... 49
Translation Sets Page..................................................................................................................... 49
Creating Transformations by Using the Transformation Wizard......................................................... 51
Pages Used to Navigate Transformation Wizard........................................................................... 51
Understanding the Transformation Wizard.................................................................................... 52
Common Element Used in This Section........................................................................................53
Transformation Wizard - Transformation Definition Page............................................................ 53
Transformation Wizard - Look Up Page....................................................................................... 54
Transformation Wizard - Edit Page............................................................................................... 55
Transformation Wizard - Comments Page.....................................................................................56
Transformation Wizard - Source Condition Page..........................................................................57
Transformation Wizard - Look Up Condition Page...................................................................... 58
Using Transformation PeopleCode.......................................................................................................59
Creating Map Rules.............................................................................................................................. 61
Page Used to Create Map Rules.................................................................................................... 61
Understanding Map Rules.............................................................................................................. 61
Map Rule Definitions Page............................................................................................................62
Chapter 5: Creating Maps........................................................................................................................ 65
Creating Map Definitions..................................................................................................................... 65
Pages Used to Create Map Definitions..........................................................................................65
Map Information Page....................................................................................................................66
Map Field Detail Page................................................................................................................... 67
Map Edits Page.............................................................................................................................. 70
Preview Map Results Page.............................................................................................................71
Map Options Page.......................................................................................................................... 71
Map Definition - Comments Page................................................................................................. 73
Chapter 6: Running the Data Transformation Process and Correcting Errors..................................75
Defining Map Groups and Map Group Chunking Criteria.................................................................. 75
Pages Used to Define Map Groups and Chunking Criteria...........................................................75
Map Groups Page...........................................................................................................................75
Map Group Filter Page.................................................................................................................. 77
Extracting, Transforming, and Loading Source Data...........................................................................78
Contents
Copyright
©
1992-2013, Oracle and/or its affiliates. All rights reserved. vii
Pages Used to Extract, Transform, and Load Source Data............................................................78
Understanding Extracting, Transforming, and Loading Source Data............................................ 78
Run Data Transformations Page.................................................................................................... 78
Run Data Transformations - Run Summary Page......................................................................... 80
Handling Data Transformation Process Errors.....................................................................................83
Page Used to Handle Data Transformation Process Errors........................................................... 83
Understanding Data Transformation Process Errors......................................................................83
Error Correction Page.....................................................................................................................84
Appendix A: Setting PeopleSoft Data Transformer Security................................................................85
Understanding Security.........................................................................................................................85
User Profiles, Roles, and Permission Lists....................................................................................85
Delivered Roles and Permission Lists........................................................................................... 86
Implementing Security.......................................................................................................................... 87
Understanding Security Tasks........................................................................................................ 87
Associating the EOEW1000 Permission List with a Role.............................................................87
Assigning the Map Specialist Role to a User Profile.................................................................... 87
Contents
viii Copyright
©
1992-2013, Oracle and/or its affiliates. All rights reserved.

Copyright
©
1992-2013, Oracle and/or its affiliates. All rights reserved. ix
Preface
Understanding the PeopleSoft Online Help and PeopleBooks
The PeopleSoft Online Help is a website that enables you to view all help content for PeopleSoft
Applications and PeopleTools. The help provides standard navigation and full-text searching, as well as
context-sensitive online help for PeopleSoft users.
PeopleSoft Hosted Documentation
You access the PeopleSoft Online Help on Oracle’s PeopleSoft Hosted Documentation website, which
enables you to access the full help website and context-sensitive help directly from an Oracle hosted
server. The hosted documentation is updated on a regular schedule, ensuring that you have access to the
most current documentation. This reduces the need to view separate documentation posts for application
maintenance on My Oracle Support, because that documentation is now incorporated into the hosted
website content. The Hosted Documentation website is available in English only.
Locally Installed Help
If your organization has firewall restrictions that prevent you from using the Hosted Documentation
website, you can install the PeopleSoft Online Help locally. If you install the help locally, you have more
control over which documents users can access and you can include links to your organization’s custom
documentation on help pages.
In addition, if you locally install the PeopleSoft Online Help, you can use any search engine for full-
text searching. Your installation documentation includes instructions about how to set up Oracle Secure
Enterprise Search for full-text searching.
See PeopleTools 8.53 Installation for your database platform, “Installing PeopleSoft Online Help.” If you
do not use Secure Enterprise Search, see the documentation for your chosen search engine.
Note: Before users can access the search engine on a locally installed help website, you must enable the
Search portlet and link. Click the Help link on any page in the PeopleSoft Online Help for instructions.
Downloadable PeopleBook PDF Files
You can access downloadable PDF versions of the help content in the traditional PeopleBook format.
The content in the PeopleBook PDFs is the same as the content in the PeopleSoft Online Help, but it has
a different structure and it does not include the interactive navigation features that are available in the
online help.
Common Help Documentation
Common help documentation contains information that applies to multiple applications. The two main
types of common help are:
• Application Fundamentals

Preface
x Copyright
©
1992-2013, Oracle and/or its affiliates. All rights reserved.
• Using PeopleSoft Applications
Most product lines provide a set of application fundamentals help topics that discuss essential information
about the setup and design of your system. This information applies to many or all applications in the
PeopleSoft product line. Whether you are implementing a single application, some combination of
applications within the product line, or the entire product line, you should be familiar with the contents
of the appropriate application fundamentals help. They provide the starting points for fundamental
implementation tasks.
In addition, the PeopleTools: PeopleSoft Applications User's Guide introduces you to the various
elements of the PeopleSoft Pure Internet Architecture. It also explains how to use the navigational
hierarchy, components, and pages to perform basic functions as you navigate through the system. While
your application or implementation may differ, the topics in this user’s guide provide general information
about using PeopleSoft Applications.
Field and Control Definitions
PeopleSoft documentation includes definitions for most fields and controls that appear on application
pages. These definitions describe how to use a field or control, where populated values come from, the
effects of selecting certain values, and so on. If a field or control is not defined, then it either requires
no additional explanation or is documented in a common elements section earlier in the documentation.
For example, the Date field rarely requires additional explanation and may not be defined in the
documentation for some pages.
Typographical Conventions
The following table describes the typographical conventions that are used in the online help.
Typographical Convention Description
Bold Highlights PeopleCode function names, business function
names, event names, system function names, method names,
language constructs, and PeopleCode reserved words that must
be included literally in the function call.
Italics
Highlights field values, emphasis, and PeopleSoft or other
book-length publication titles. In PeopleCode syntax, italic
items are placeholders for arguments that your program must
supply.
Italics also highlight references to words or letters, as in the
following example: Enter the letter O.
Key+Key Indicates a key combination action. For example, a plus sign (
+) between keys means that you must hold down the first key
while you press the second key. For Alt+W, hold down the Alt
key while you press the W key.
Monospace font Highlights a PeopleCode program or other code example.
. . . (ellipses) Indicate that the preceding item or series can be repeated any
number of times in PeopleCode syntax.

Preface
Copyright
©
1992-2013, Oracle and/or its affiliates. All rights reserved. xi
Typographical Convention Description
{ } (curly braces) Indicate a choice between two options in PeopleCode syntax.
Options are separated by a pipe ( | ).
[ ] (square brackets) Indicate optional items in PeopleCode syntax.
& (ampersand) When placed before a parameter in PeopleCode syntax,
an ampersand indicates that the parameter is an already
instantiated object.
Ampersands also precede all PeopleCode variables.
⇒
This continuation character has been inserted at the end of a
line of code that has been wrapped at the page margin. The
code should be viewed or entered as a single, continuous line
of code without the continuation character.
ISO Country and Currency Codes
PeopleSoft Online Help topics use International Organization for Standardization (ISO) country and
currency codes to identify country-specific information and monetary amounts.
ISO country codes may appear as country identifiers, and ISO currency codes may appear as currency
identifiers in your PeopleSoft documentation. Reference to an ISO country code in your documentation
does not imply that your application includes every ISO country code. The following example is a
country-specific heading: "(FRA) Hiring an Employee."
The PeopleSoft Currency Code table (CURRENCY_CD_TBL) contains sample currency code data. The
Currency Code table is based on ISO Standard 4217, "Codes for the representation of currencies," and
also relies on ISO country codes in the Country table (COUNTRY_TBL). The navigation to the pages
where you maintain currency code and country information depends on which PeopleSoft applications
you are using. To access the pages for maintaining the Currency Code and Country tables, consult the
online help for your applications for more information.
Region and Industry Identifiers
Information that applies only to a specific region or industry is preceded by a standard identifier in
parentheses. This identifier typically appears at the beginning of a section heading, but it may also appear
at the beginning of a note or other text.
Example of a region-specific heading: "(Latin America) Setting Up Depreciation"
Region Identifiers
Regions are identified by the region name. The following region identifiers may appear in the PeopleSoft
Online Help:
• Asia Pacific
• Europe
• Latin America

Preface
xii Copyright
©
1992-2013, Oracle and/or its affiliates. All rights reserved.
• North America
Industry Identifiers
Industries are identified by the industry name or by an abbreviation for that industry. The following
industry identifiers may appear in the PeopleSoft Online Help:
• USF (U.S. Federal)
• E&G (Education and Government)
Access to Oracle Support
Oracle customers have access to electronic support through My Oracle Support. For information, visit
http://www.oracle.com/pls/topic/lookup?ctx=acc&id=info or visit http://www.oracle.com/pls/topic/
lookup?ctx=acc&id=trs if you are hearing impaired.
Documentation Accessibility
For information about Oracle's commitment to accessibility, visit the Oracle Accessibility Program
website at http://www.oracle.com/pls/topic/lookup?ctx=acc&id=docacc.
Using and Managing the PeopleSoft Online Help
Click the Help link in the universal navigation header of any page in the PeopleSoft Online Help to see
information on the following topics:
• What’s new in the PeopleSoft Online Help.
• PeopleSoft Online Help acessibility.
• Accessing, navigating, and searching the PeopleSoft Online Help.
• Managing a locally installed PeopleSoft Online Help website.
PeopleSoft Enterprise Components Related Links
PeopleSoft Information Portal on Oracle.com
My Oracle Support
PeopleSoft Training from Oracle University
Contact Us
Send us your suggestions Please include release numbers for the PeopleTools and applications that you
are using.


Copyright
©
1992-2013, Oracle and/or its affiliates. All rights reserved. 15
Chapter 1
Getting Started with PeopleSoft Data
Transformer
PeopleSoft Data Transformer Overview
PeopleSoft Data Transformer enables organizations to extract, transform, and load data from remote or
local data sources to a target data source. Tasks that you perform in PeopleSoft Data Transformer, to
prepare the data for transfer, include:
• Setting up default target fields.
• Defining transformation and filtering rules to convert data.
• Creating map rules.
• Creating map definitions.
PeopleSoft Data Transformer Business Processes
Image: PeopleSoft Data Transformer business process flow
The following process flow illustrates the PeopleSoft Data Transformer business processes.
PeopleSoft Data Transformer Implementation
The PeopleSoft Data Transformer implementation can be divided into two phases:
• Setting up core PeopleSoft Data Transformer features.
• Creating source data objects.
Complete these phases to support PeopleSoft Data Transformer features.
In the planning phase of your implementation, take advantage of all PeopleSoft sources of
implementation, including the installation guides and business process maps.

Getting Started with PeopleSoft Data Transformer Chapter 1
16 Copyright
©
1992-2013, Oracle and/or its affiliates. All rights reserved.
Setting Up Core PeopleSoft Data Transformer Features
To set up core PeopleSoft Data Transformer features, perform the following steps:
Step Reference
Define remote database connections. See Defining Remote Database Connections.
Define installation options. See Defining Installation Options.
Define subject areas. See Defining Subject Areas.
Creating Source Data Objects
To set up source data objects, perform the following steps:
Step Reference
Create basic source data objects. See Creating Basic Source Data Objects.
(Optional) Create expressions. See (Optional) Creating Expressions.
(Optional) Create filters. See (Optional) Creating Filters.
(Optional) Join records. See (Optional) Joining Records.

Copyright
©
1992-2013, Oracle and/or its affiliates. All rights reserved. 17
Chapter 2
Setting Up Core PeopleSoft Data
Transformer Features
Defining Remote Database Connections
This section provides an overview of remote database connections and discusses how to define remote
database connections.
Page Used to Define Remote Database Connections
Page Name Definition Name Navigation Usage
Remote Database Access
Management
REMOTEDB Enterprise Components,
Data Transformation, Setup
Remote Database Connection,
Remote Database Access
Management
Define remote database
connections.
Understanding Remote Database Connections
Data sources represent the location of the source data that is extracted, transformed, and loaded to the
target. Remote data source data is extracted from a separate (remote) database and migrated into the local
database. You must define remote database connections to source data from a database other than your
local PeopleSoft database instance.
The Remote Database Access Management page enables you to define connectivity information for
relational databases to be used for sourcing data for PeopleSoft Data Transformer. You can define
connectivity information only for databases of the same type as the Target PeopleSoft database instance.
For example, if the PeopleSoft database instance is Oracle, then you can define only Oracle remote
connections. Remote database connections are established once for a local connect and once for each
database that will be sourced. You must define one local connection for the current PeopleSoft instance.
This connection is used during remote database access to retrieve information for the target database.
Note: If you are accessing data from a local database, then you do not need to set up remote database
connections.
High-Level Steps for Setting Up Data Transformation
Here is a recommended procedure for setting up data transformation in an environment (be sure to replace
the sample information used in this procedure with your environment and database information):
1. Install JDBC driver for the test database.
Setting Up Core PeopleSoft Data Transformer Features Chapter 2
18 Copyright
©
1992-2013, Oracle and/or its affiliates. All rights reserved.
For SQL Server, download the appropriate JDBC driver version from the Microsoft Download Center.
After the installation, three jar files are created under the JDBC driver library directory, for example,
C:\Program Files\Microsoft SQL Server 2000 Driver for JDBC\lib. To make these files accessible to
the application server, either copy them to <ps_home>\class, or add them to the CLASSPATH line in
the psappsrv.cfg file (application server configuration file), for example:
CLASSPATH=C:\Program Files\Microsoft SQL Server 2000 Driver for JDBC\lib\msbase.jar;C:
\Program Files\Microsoft SQL Server 2000 Driver for JDBC\lib\mssqlserver.jar;C:\Program Files
\Microsoft SQL Server 2000 Driver for JDBC\lib\msutil.jar
2. Set up a local database connection (for example, H881C338).
In PIA, navigate to Enterprise Components, Data Transformation, Setup Remote Database
Connection, Remote Database Access Management. Add a local database connection with sample
information as follows:
Name: H881C338
Local Connect: Selected
Description: H881C338
Server: ECHAN2091903
User ID: sa
Password: Peoples0
Save the page and click the Test Connection button to verify that the connection information entered
is correct. The Good Connection message appears if the information is correct.
3. Set up a remote database connection (for example, HC881TM1)
Navigate to Enterprise Components, Data Transformation, Setup Remote Database Connection,
Remote Database Access Management. Add a remote database connection with sample information as
follows:
Name: HC881TM1
Description: HC881TM1
Server: ADDB0106
User ID: satst
Password: satst
Save the page and click the Test Connection button to verify that the connection information entered
is correct.
4. Set up data transformation installation options.
Navigate to Enterprise Components, Data Transformation, Data Transformation Installation Options.
On the Data Transformation Installation Options page, enter the following sample information:
Maximum Rows to Preview: 10
Chapter 2 Setting Up Core PeopleSoft Data Transformer Features
Copyright
©
1992-2013, Oracle and/or its affiliates. All rights reserved. 19
Tablespace Name: EOECLRG
Message Set Number: 18024
Save the page.
5. Define subject area.
Navigate to Enterprise Components, Data Transformation, Setup Subject Areas. Add a subject area
by entering the following sample information:
Subject Area: NACNV
Description/More Information: Enter some text
Default Subject Area: Selected
Create Temporary Table: Selected
Save the change.
6. Define source data object.
Navigate to Enterprise Components, Data Transformation, Define Source Data Objects, Source Data
Object. Add a new source data object by entering the following sample information:
Source Data Object: DEPARTMENT
Subject Area: NACNV
Description: Department
Data Source Type: Remote
Data Source Name: HC881TM1
Source Record (left field): PS_DEPT_TBL
Source Record (right field): Department Table
Navigate to the Fields page and click the Synchronize fields button. Select these fields:
SETID, DEPTID, EFFDT, EFF_STATUS, DESCR, DESCRSHORT, and COMPANY
Save the page.
7. Set default values for target fields.
Navigate to Enterprise Components, Data Transformation, Set Target Field Defaults. Add two target
fields using the following sample information:
Target Field: SETID
Source Input Value: SNSZZ
Target Field: DEPTID
Setting Up Core PeopleSoft Data Transformer Features Chapter 2
20 Copyright
©
1992-2013, Oracle and/or its affiliates. All rights reserved.
Source Input Value: ABCDE
Save the change.
8. Define map information.
Navigate to Enterprise Components, Data Transformation, Define Maps. Add a map object using the
following sample information:
Map Object: DEPT
Subject Area: NACNV
Description: Department ETL
Source: DEPARTMENT
Target: DEPT_TBL
Navigate to the Map Field Detail page and click the Apply AutoMapper button. Next, click the Source
Input Type column heading twice to bring the rows with non-blank source input type to the top of
the list. Change the source input type for the SETID and DEPTID target fields to Default. Change
the source input type for the EFFDT target field to Source and select EFFDT as the source prompt
because the Auto Field Mapper sets this to blank by default. Now there should be seven fields with
non-blank source input types. Navigate to the Preview Map Results page and click the Preview
button. Note that 10 rows of DEPT_TBL in HC881TM are displayed with SETID and DEPTID
showing the default values set up in step 7.
9. Test the data transformation setup.
When testing the Data Transformer ETL, note that:
— The 3 jar files in step 1 will need to be added to psprcs.cfg (process scheduler configuration file) if
they were not copied into <ps_home>\class
— A successful run depends on what data exists in the source table and the target table, otherwise the
job may end with a duplicate error.
To verify that the ETL can correctly access the remote table data, delete all the rows in my local
PS_DEPT_TBL, set the seven fields in the map to use Source as source input type and run the ETL.
To do so, navigate to Enterprise Components, Data Transformation, Run Data Transformations, Run
Data Transformations. Add a run control using the following sample information:
Data Transformer Object Type: Map
Map Object: DEPT
Target Load Option: Full Load
Destructive Load: Clear
Parallel Processing: Selected
Click the Run button. Two processes are executed: EOEW_ETL_EXE and EOEW_ETL_RUN.

Chapter 2 Setting Up Core PeopleSoft Data Transformer Features
Copyright
©
1992-2013, Oracle and/or its affiliates. All rights reserved. 21
Note that as the two processes run to Success, in Query Analyzer, the PS_DEPT_TBL rowcount
matches that in the source table.
Note: If the data transformation process is not loading data into target tables, the problem may originate
from the CLASSPATH, which was defined in your system. Also, this behavior can be caused by the
process scheduler if it doesn't have the right access to the JDBC drivers.
Oracle Database Considerations
If you are using an Oracle database, you need to update the content of both psappsrv.cfg and psprcs.cfg
to reflect your Oracle connectivity settings. Basically you should determine the Oracle home directory
and specify it in both psappsrv.cfg and psprcs.cfg by adding the following two lines under the ;JavaVM
Shared Library= section:
; RDBA Oracle JDBC driver
Add to CLASSPATH=
Add to CLASSPATH=
PREPARE TO CONFIGURE ORACLE -
Before you can use remote data access with Oracle, the appropriate database connectivity software must
be installed on the system where the application server or batch server is running. The minimum database
connectivity that needs to be installed is the Oracle Client Net9i 9.2.0.2.0 Connectivity Package.
To connect to a remote Oracle database, you must manually edit the application server configuration
file, psappsrv.cfg, as described below. If the batch server is being used, you must manually edit the batch
server configuration file, psprps.cfg, as well.
From the Remote Database Connection page (PeopleTools, Utilities, Administration, Remote Database
Connection), you can specify an Oracle datasource as specific or with TNSNAMES. Specific doesn't
require a TNSNAMES entry, and will use the Oracle "thin" JDBC driver. If TNSNAMES is configured
for the remote database, you can use the TNSNAMES style entry.
CONFIGURING ORACLE 9i OR ORACLE 10g ON UNIX -
Determine the Oracle home directory and specify it in the configuration files by adding the following two
lines under the ;JavaVM Shared Library= section:
; RDBA Oracle JDBC driver
Add to CLASSPATH=%ORACLE_HOME%\jdbc\lib\ojdbc14.jar
Add to CLASSPATH=%ORACLE_HOME%\jdbc\lib\orai18n.jar
CONFIGURING ORACLE 9i OR ORACLE 10g on WINDOWS -
Determine the Oracle home directory and specify it in the configuration file. For example, if Oracle the
home directory is C:\Apps\DB\Oracle901, add the following lines under the ;JavaVM Shared Library=
section:
; RDBA Oracle JDBC driver
Add to CLASSPATH=C:\Apps\DB\Oracle901\jdbc\lib\ojdbc14.jar

Setting Up Core PeopleSoft Data Transformer Features Chapter 2
22 Copyright
©
1992-2013, Oracle and/or its affiliates. All rights reserved.
Add to CLASSPATH=C:\Apps\DB\Oracle901\jdbc\lib\orai18n.jar
Remote Database Access Management Page
Use the Remote Database Access Management page (REMOTEDB) to define remote database
connections.
Navigation
Enterprise Components, Data Transformation, Setup Remote Database Connection, Remote Database
Access Management
Image: Remote Database Access Management page
This example illustrates the fields and controls on the Remote Database Access Management page. You
can find definitions for the fields and controls later on this page.
Important! Different fields may appear on the page based on the database DB type. The preceding page
shows fields for Microsoft, DB2 (OS/390), DB2/UNIX, and Sybase.
This table illustrates the page variance by database type:
Database Type Required Information
Microsoft, DB2 (OS/390), DB2/UNIX, and Sybase Enter a description, server, database, userID, and password.
Informix Enter a description, server, user ID, password, and Inf Svr (
Informix Server) name.

Chapter 2 Setting Up Core PeopleSoft Data Transformer Features
Copyright
©
1992-2013, Oracle and/or its affiliates. All rights reserved. 23
Database Type Required Information
Oracle
For Oracle and a Connection Type of TNSNames, enter a
description, TNS Entry, user ID and password.
Note: TNS Names is a preconfigured file (tnsnames.ora) with
previously defined database connection information.
Select a connection type of Specific if you want to set up a
database that does not already have a TNS Entry defined, or
when you don't want to use the TNS entry.
Name
Displays the remote DB name entered on the Search page for
your database.
DB Type
Displays the database type of your PeopleSoft database.
Note: Since your remote database must be of the same type, this
field is defaulted to your current local database type.
Local Connect
Select if you are defining the remote connection information
for your local database. All others must be specified as
remote databases. An error displays if you save a page with a
connection checked as a Local Connect and there is already one
identified as such (in the PSREMOTEDBDEFN table).
Important! One connection must be defined as the Local
Connect, the connection information for the current PeopleSoft
instance (the local database). This connection is used during
remote database access to retrieve connection information for
the source and as the target database for the sourced data.
Server
Enter the name of the server where the database resides.
Note: This field is platform specific.
DB Server Port
The DB Server Port number is automatically populated with
a default value based on the database type. It may need to be
changed depending upon your database server configuration.
User ID and Password
Enter the user ID and password that are required to access the
database.
The password is not displayed.
Note: This field is platform specific.
Test Connect
Click to access the remote database by using the information
that you have entered. This will verify that all of the connection
information is correct.

Setting Up Core PeopleSoft Data Transformer Features Chapter 2
24 Copyright
©
1992-2013, Oracle and/or its affiliates. All rights reserved.
Defining Installation Options
This section discusses how to define installation options.
Page Used to Define Installation Options
Page Name Definition Name Navigation Usage
Data Transformation
Installation Options
EOEW_OPTIONS Enterprise Components,
Data Transformation, Data
Transformation Installation
Options
Define installation options.
Data Transformation Installation Options page
Use the Data Transformation Installation Options page (EOEW_OPTIONS) to define installation options.
Navigation
Enterprise Components, Data Transformation, Data Transformation Installation Options
Image: Data Transformation Installation Options page
This example illustrates the fields and controls on the Data Transformation Installation Options page. You
can find definitions for the fields and controls later on this page.
System administrators may use PeopleSoft Data Transformers' installation options to set certain high-
level Data Transformer defaults such as the maximum number of rows to return on a preview of sourced
or transformed data, a table space name to be used to dynamically build temporary tables, and the default
message set number assignment for transformation error correction.
Maximum Rows to Preview
Enter the maximum number of rows of sourced or transformed
data to preview.
Keep this value relatively low, for example 100 rows, as larger
values significantly increase the amount of time it takes to
retrieve data and render the preview pages.

Chapter 2 Setting Up Core PeopleSoft Data Transformer Features
Copyright
©
1992-2013, Oracle and/or its affiliates. All rights reserved. 25
Tablespace Name
Enter the tablespace name for the temporary table that is built
dynamically at runtime. This tablespace name is applied to all of
the temporary tables unless overridden at a lower level.
Note: This name can be overridden at the subject area and map
option levels.
Create Temporary Table
Select to create temporary tables dynamically.
A temporary table is created at runtime—it's needed by the
engine during processing only, then it's deleted at completion.
It is not available in PeopleSoft metadata. If the check box is
cleared, you must specify a temporary table record name on the
map for use at runtime. This temporary table will be available in
PeopleSoft metadata and remain after the engine processing.
Note: Determining which of these options to use needs to
be considered carefully. A dynamic temporary table will
automatically change when the map changes, conversely, a non-
dynamic temporary table will not change and may require more
maintenance.
Message Set Number
Select a message set number that corresponds to a text error
message set. When adding a new transformation and associating
a specific error message with an error, this default message set
number is used as a starting point.
Related Links
Preview Map Results Page
Map Options Page
Transformation Wizard - Edit Page
Defining Subject Areas
This section provides an overview of subject areas and discusses how to define subject areas.
Page Used to Define Subject Areas
Page Name Definition Name Navigation Usage
Subject Areas EOEW_OBJ_OWNER Enterprise Components,
Data Transformation, Setup
Subject Areas
Define subject areas to
group translation sets,
transformations, map rules,
and map definitions.

Setting Up Core PeopleSoft Data Transformer Features Chapter 2
26 Copyright
©
1992-2013, Oracle and/or its affiliates. All rights reserved.
Understanding Subject Areas
Use subject areas as a grouping mechanism on translation sets, transformations, map rules and map
definitions. These objects can only be shared within a subject area. An enterprise subject area can be used
for objects that are to be shared by all subject areas.
You need to carefully plan subject areas when you implement PeopleSoft Data Transformer. For example,
you need to consider how the Data Transformer objects (translation sets, transformations, map rules, map
definitions, and so on) can be grouped most efficiently. Some objects need to be available to all users,
while some only to a specific user or functional group.
Note: Subject areas affect only prompting and object selection and do not reflect object security.
You can set up default tablespaces, or you can dynamically create temporary tables by subject area. If
an implementation requires that only groups of maps dynamically generate temporary tables, or are built
within different tablespaces, you can specify this at the subject area level.
Related Links
Understanding the Mapping Process
Subject Areas Page
Use the Subject Areas page (EOEW_OBJ_OWNER) to define subject areas to group translation sets,
transformations, map rules, and map definitions.
Navigation
Enterprise Components, Data Transformation, Setup Subject Areas
Image: Subject Areas page
This example illustrates the fields and controls on the Subject Areas page. You can find definitions for the
fields and controls later on this page.
Default Subject Area
Select to use this subject area as your default subject area.

Chapter 2 Setting Up Core PeopleSoft Data Transformer Features
Copyright
©
1992-2013, Oracle and/or its affiliates. All rights reserved. 27
Note: Only one subject area can be selected as the default,
which becomes available to all users—it is your enterprise
subject area.
Tablespace Name
Select the tablespace name to use if you want to override the
Data Transformation installation options selection for this
subject area.
Note: This is needed only when an implementation shares
dynamically generated temporary tables over multiple
tablespaces.
For example, the CEW EO temporary tables may be assigned
to a special tablespace because the table size in this area is
expected to be larger than other tables. For that subject area,
an override tablespace name would be entered. The CEW
CM subject area contains unique tables that also need special
segmentation. For that subject area, an override tablespace name
would be entered. All other subject areas would have a blank
tablespace name therefore defaulting to the Data Transformation
installation options tablespace name.
Create Temporary Table
Select if you want to override the Data Transformation
installation options selection for this subject area.
This is needed only when an implementation allows or disallows
the dynamic temporary table creation per subject area.

Copyright
©
1992-2013, Oracle and/or its affiliates. All rights reserved. 29
Chapter 3
Creating Source Data Objects
Understanding Source Data Objects
A source data object is the input to every map definition and defines the data to be extracted from the
source. The business requirement of the map definition dictates the appropriate structure of the source
data object, which can be as basic as requiring only an object definition and the fields to be used in the
extract SQL specified, or quite complex containing expressions, multiple table joins, and filtering criteria.
Common Elements Used to Create Source Data Objects
Data Source
One or more record definitions joined by common fields.
Source Data Object
Enter a unique value of up to 30 characters, with no spaces or
special characters. The system automatically converts the value
to uppercase.
This value, along with the description from the definition page,
appears at the top of each page of the Source Data Object
component.
Creating Basic Source Data Objects
This section discusses how to:
• Define source data objects.
• Specify source data object fields.
• Preview results.
• Preview SQL.
Note: All remote source databases must be of the same database type as the local PeopleSoft database
instance. For example, if your PeopleSoft application is running on DB2/UNIX then you may only define
DB2/UNIX source databases.

Creating Source Data Objects Chapter 3
30 Copyright
©
1992-2013, Oracle and/or its affiliates. All rights reserved.
Pages Used to Create Basic Source Data Objects
Page Name Definition Name Navigation Usage
Source Data Object EOEW_SRCDO Enterprise Components,
Data Transformation, Define
Source Data Objects, Source
Data Object
Create source data object
definitions.
Fields EOEW_SRCFIELD Enterprise Components,
Data Transformation, Define
Source Data Objects, Source
Data Object, Fields
Specify the fields to include in
the source data object.
Preview EOEW_SRCPREVIEW Enterprise Components,
Data Transformation, Define
Source Data Objects, Source
Data Object, Preview
Review the results and check
the validity of the source data
object.
View Query EOEW_SRCQUERY Enterprise Components,
Data Transformation, Define
Source Data Objects, Source
Data Object, View Query
Generate and view the SQL
based on the source data
object definition.
Source Data Object Page
Use the Source Data Object page (EOEW_SRCDO) to create source data object definitions.

Chapter 3 Creating Source Data Objects
Copyright
©
1992-2013, Oracle and/or its affiliates. All rights reserved. 31
Navigation
Enterprise Components, Data Transformation, Define Source Data Objects, Source Data Object
Image: Source Data Object page
This example illustrates the fields and controls on the Source Data Object page. You can find definitions
for the fields and controls later on this page.
Subject Area
Select a subject area.
For new source data objects, the subject area will be set to the
default as defined on the Subject Area page.
Data Source Type
Local: Select to use PeopleSoft-defined records from the current
database.
Remote: Select to access the remote database connection
information and use records from a remote database. Select the
desired data source for remote.
Note: The Data Source Type can only be selected in Add mode.
If you want to change this value, you will need to create a new
Source Data Object.
Source Record
Select the source records from which to extract data. This record
is placed in the From clause in the extract SQL.
If multiple records are selected, join conditions are required.
Note: To change a record that is associated with a source data
object, you must delete the existing record and then add the new
record.

Creating Source Data Objects Chapter 3
32 Copyright
©
1992-2013, Oracle and/or its affiliates. All rights reserved.
Save As
Click to save an existing source data object under a new name.
Use this function to create a new source data object that will
only slightly differ from the original object. Once saved, you
can make the necessary changes to the new object. The new
object is maintained separately.
Related Links
Defining Subject Areas
Fields Page
Use the Fields page (EOEW_SRCFIELD) to specify the fields to include in the source data object.
Navigation
Enterprise Components, Data Transformation, Define Source Data Objects, Source Data Object, Fields
Image: Fields page
This example illustrates the fields and controls on the Fields page. You can find definitions for the fields
and controls later on this page.
The source field information is populated from the source records that you selected on the Source Data
Object page. The selected fields become the select list in the extract SQL.
Source Field Name
Select the fields to include in the source data object.
Note: At least one field must be selected. Use the Select All and
Deselect all icons to make the field selection more efficient.
Field Alias
Change the field alias of any of the selected field names, if
needed.

Chapter 3 Creating Source Data Objects
Copyright
©
1992-2013, Oracle and/or its affiliates. All rights reserved. 33
The field alias is displayed when defining the map, so
descriptive names are important.
Note: All fields in the source data object must have an alias, and
each alias must be unique within the source data object.
Synchronize Fields
Click to synchronize fields with the database record. It
is possible over the life span of a source data object that
customizations are made. If a field is added or removed from the
physical table, the field list must be synchronized.
Select All
Click to select all of the fields that are listed.
Clear All
Click to clear all field selections.
Related Links
Creating Map Definitions
Preview Page
Use the Preview page (EOEW_SRCPREVIEW) to review the results and check the validity of the source
data object.
Navigation
Enterprise Components, Data Transformation, Define Source Data Objects, Source Data Object,
Preview
Click the Preview button to view a subset of the source data object based on the record and fields that are
selected.
Use this feature to check the validity of the defined source data object. It is especially helpful in
determining if your expressions are defined correctly.
Note: Attempting to preview complex data sources can quickly consume processing and memory
resources on your application server.
The preview maximum row count is set using the Data Transformer Installation Options page. Large row
counts take more time and resources to preview. Consider setting your preview row count relatively low.
If no data is returned, verify the SQL that it being used to extract the data is accurate.
Related Links
Defining Installation Options
View Query Page
Use the View Query page (EOEW_SRCQUERY) to generate and view the SQL based on the source data
object definition.

Creating Source Data Objects Chapter 3
34 Copyright
©
1992-2013, Oracle and/or its affiliates. All rights reserved.
Navigation
Enterprise Components, Data Transformation, Define Source Data Objects, Source Data Object, View
Query
Click the Generate SQL button to generate SQL text in the Query text box.
Use this to preview the SQL generated by the defined source data object.
Note: The administrator can verify if the extract SQL is correct and adjust the source data object
definition as necessary.
(Optional) Creating Expressions
This section provides an overview of expressions and discusses how to create expression statements.
Page Used to Create Expressions
Page Name Definition Name Navigation Usage
Expressions EOEW_SRCFIELDEXPR Enterprise Components,
Data Transformation, Define
Source Data Objects, Source
Data Object, Expressions
Create expression statements
by selecting operators, fields,
and constant values.
Understanding Expressions
Expressions enable you to create virtual columns that are made up of mathematical calculations based on
actual fields in a record. Expressions are resolved at runtime so that duplicate information is not stored
in the database. Expressions can be numeric, string, date, time, or datetime. Numeric expressions can
combine any number of fields, constant values, and math operators, and results are rounded based on the
decimal position that is selected. String expressions can be concatenations of any number of character
fields and constant values.
Built-in Functions
PeopleSoft delivers built-in functions that you can use to make expressions powerful and flexible. You
can also nest built-in functions and expressions; for example:
• Concatenate two fields, separate them with a comma, drop trailing blanks, and limit this field to 40
characters:
Substring(RTRIM(FirstName) | , | RTRIM(LastName),1,40)
• Sum the multiplication of two fields:
SUM(PROD_COST * PROD_RATE)
This table lists all of the delivered built-in functions with supported meta-SQL and aggregate functions:

Chapter 3 Creating Source Data Objects
Copyright
©
1992-2013, Oracle and/or its affiliates. All rights reserved. 35
Function Explanation Use
ABS(Number) Returns the absolute value of the
specified number.
ABS(-5) returns 5.
AddMonth(Date, Number) Adds a number of months to the
specified date and returns the calculated
date.
AddMonth(“2002–01–10”,2) returns
2002–03–10.
Average(Number) Returns the average value of the
specified number (typically a numeric
column name).
Average(PRICE) returns the average
price of your source data set.
Beginning of Month(Date) Returns a date representing the first day
of the month for the specified date.
Beginning of Month(“2002–10–05”)
returns 2002–10–01.
Beginning of Year(Date) Returns a date representing the first day
of the year for the specified date.
Beginning of Month(“2002–10–05”)
returns 2002–01–01.
Count(col) Returns the number of rows that are
found.
Count(PRODUCT_ID) returns the
number of rows on your source data set.
DateAdd(Date, Days) Adds a number of days to the specified
date and returns the calculated date.
DateAdd(“2002–02–02”,5) returns
2002–02–07.
DateDiff(Date, Date) Returns the number of days that have
elapsed between the first and second
specified dates.
DateDiff(“2002–02–02”,”2002–02–10”)
returns 8.
DtTmDiff(Datetime,Datetime) Returns the number of minutes that have
elapsed between the first and second
specified datetimes.
DtTmDiff(”'2002-01-01 00:00:00.000”,
”2002-01-01 10:00:00.000”) returns 600
(10 hours in minutes).
DIFF_H(Datetime, Datetime) Returns the number of hours that have
elapsed between the first and second
specified datetimes.
DIFF_H(”'2002-01-01 00:00:00.000”,
”2002-01-01 10:00:00.000”) returns 10.
DIFF_S (Datetime, Datetime) Returns the number of seconds that have
elapsed between the first and second
specified datetimes.
DIFF_S(”'2002-01-01 00:00:00.000”,
”2002-01-01 10:00:00.000”) returns
36000 (10 hours in seconds).
End of Month(Date) Returns a date representing the last day
of the month for the specified date.
End of Month(“2002–10–05”) returns
2002–10–31.
End of Year(Date) Returns a date representing the last day
of the year for the specified date.
End of Year(“2002–10–05”) returns
2002–12–31.
GetDay(Date) Returns the day of the month for the
specified date.
GetDay(“2002–10–05”) returns 5.
GetMonth(Date) Returns the month of the specified date. GetMonth(“2002–10–05”) returns 10.

Creating Source Data Objects Chapter 3
36 Copyright
©
1992-2013, Oracle and/or its affiliates. All rights reserved.
Function Explanation Use
GetYear(Date) Returns the year of the specified date. GetYear(“2002–10–05”) returns 2002.
MOD(Number, Number) Returns the modulus (or remainder) of
the first number when it is divided by the
second number.
MOD(14,3) returns 2 (14 divides into 3
four times with a remainder of 2).
Max(Number) Returns the maximum value of the
specified number (typically a numeric
column name).
Max(PRICE) returns the largest price of
your source data set.
Min (Number) Returns the minimum value of the
specified number (typically a numeric
column name).
Min(PRICE) returns the smallest price of
your source data set.
Sum(Number) Returns the sum of the specified number
(typically a numeric column name).
Sum(PRICE) returns the sum of all
prices of your source data set.
RTRIM(String) Returns the specified string, and trims
trailing blank characters.
RTRIM(“Hello “) returns Hello.
Round(Number, Factor) Returns a number representing the
specified number after being rounded to
the given factor or precision.
Round(5.582, 1) returns 5.6.
Round(5.512, 0) returns 6.
Substring(String, StartPos, Length) Returns a section of the specified string
starting at the specified position and
continuing for the specified length.
Substring(“My String Expression“, 4,6)
returns String.
TO_CHAR(Number) Returns a string representation of the
specified numeric expression.
TO_CHAR(59) returns 59.
TO_NUM(String) Returns a numeric representation of the
specified string expression.
TO_NUM(“59”) returns 59.
Note: Trying to apply a TO_NUM built-
in function on a character that does not
translate to a numeric value aborts the
processing of your map.
TrimSubStr(String, Start, Length) Returns a section of the specified string
starting at the specified position and
continuing for the specified length, and
trims trailing blank characters.
Substring(“My String Expression“, 4,7)
returns String.
Truncate (Number, Factor) Returns a number representing the
specified number after being truncated to
the given factor or precision.
Truncate(5.582, 1) returns 5.5.
Truncate(5.512, 0) returns 5.

Chapter 3 Creating Source Data Objects
Copyright
©
1992-2013, Oracle and/or its affiliates. All rights reserved. 37
Function Explanation Use
UPPER(String) Returns the specified string in uppercase
characters.
UPPER(“My String Expression“, 4,7)
returns MY STRING EXPRESSION.
YYMMDD(Date) Returns the string representation of a
specified date in YYMMDD format.
YYMMDD(“2002–10–01”) returns
021001.
Expressions Page
Use the Expressions page (EOEW_SRCFIELDEXPR) to create expression statements by selecting
operators, fields, and constant values.
Navigation
Enterprise Components, Data Transformation, Define Source Data Objects, Source Data Object,
Expressions
Image: Expressions page
This example illustrates the fields and controls on the Expressions page. You can find definitions for the
fields and controls later on this page.
Name
Enter a unique name for this expression.
Expression Field Type
Select to control the set of operators, record fields, and value
objects that can be selected when building the expression.
Numeric: Select to combine any number of record fields, value
objects, and math operators.
String: Select to concatenate any number of character record
fields and value objects.

Creating Source Data Objects Chapter 3
38 Copyright
©
1992-2013, Oracle and/or its affiliates. All rights reserved.
Date: Select to define a constant value or to create a date field
from the source data object or built-in functions.
Expression Statement
Displays your expression as you build it. You cannot type
directly into this edit box. Use operators, data source options,
and the constant values to create your expressions.
You can see what element is being specified by the arrows
surrounding it; the selection is also displayed in the Current
Element group box.
Clear
Click to delete all entries in the Expression Statement edit box.
Operators
Select from the operator buttons to add operators to the
expression.
Data Source
Data Object Column
Select this option to display a list of data object fields. Select a
field and click Insert to have the selected data object appear in
the expression statement.
Built-in Function
Select this option to display a list of built-in functions. Select a
function and click Insert to have the selected built-in function
appear in the expression statement.
Built-in functions let you define numeric calculations like Sum,
Average, or End of Month, and Minimum/Maximum values.
Note: All parameters of the selected built-in function must be
defined.
Constant Value
Select this option to enter your own character, numeric, or date
value. Click Insert to have the value appear in the expression
statement.
Note: Consider how an expression will be used when you want
to specify date related value objects. If the expression will be in
a WHERE clause, then use the %CurrentDateIn value object.
If the expression will be in a SELECT clause, then use the
%CurrentDateOut value object.
Current Element
, , ,
Click to move through the expression statement and identify the
text you want to replace or delete or to move to the position in
the statement where you want to insert text.
Click the Previous or Next button to move one element forward
or backward. Click the First or Last button to move to the
beginning or end of the expression statement.

Chapter 3 Creating Source Data Objects
Copyright
©
1992-2013, Oracle and/or its affiliates. All rights reserved. 39
Note: The element name will be shown in the Current Element
group box as well as surrounded by arrows in the Expression
Statement edit box.
Replace
Click to replace the current element item in the expression
statement with the selected data source.
Insert
Click to insert the selected data source into the expression
statement before the current element item.
Delete
Click to delete the current element item in the expression
statement.
Example: Creating Expressions by Using Data Object Column
This section provides an example of creating an expression by using a data object column.
The company wants to award its employees with a bonus of $1000 for each year that they have been
employed by the company. To calculate the bonus:
1.
Enter BONUS for the expression name, and then enter a description.
2.
Select the Number expression type.
3. Select integer and decimal positions.
4. Select Data Object Column in the Data Source group box.
5.
Select the YEARS_OF_EMP data object column, and click Insert.
The field appears in the Expression Statement edit box.
6. Click the Multiplication (*) operator to insert it at the end of the expression statement.
7. Select Constant Value in the Data Source group box.
8.
Enter a numeric value of 1000, and click Insert.
This creates the following expression statement:
YEARS_OF_EMP * 1000
9. Click Save.
Example: Creating Expressions Using Built-in Functions
This section provides an example of creating an expression by using a built-in function.
You want to define a field called SHORT_DESCR that uses the first 10 characters of the DESCR field.
To define the SHORT_DESCR field:
1.
Enter SHORT_DESCR for the expression name, and then enter a description.
2.
Select the Char expression type.

Creating Source Data Objects Chapter 3
40 Copyright
©
1992-2013, Oracle and/or its affiliates. All rights reserved.
3. Enter the length.
4. Select Built-in Function in the Data Source group box.
5.
Select the Substring (String,Start,Length) built-in function, and click Insert.
The function appears as SUBSTRING ( PARAM1 , PARAM2 , PARAM3 ) in the Expression Statement
edit box.
6. Use the arrow buttons to navigate through the expression statement and identify the PARAM1
element.
7. Select Data Object Column in the Data Source group box.
8.
Select DESCR, and click Replace.
The DESCR field appears in place of PARAM1 in the expression statement.
9. Navigate to PARAM2.
10.
Select Constant Value in the Data Source group box, and enter a numeric value of 1.
11. Click Replace.
12.
Navigate to PARAM3, and replace it with a numeric value of 10.
This creates the following expression statement:
SUBSTRING ( DESCR , 1 , 10 )
13. Click Save.
(Optional) Creating Filters
This section provides an overview of filters and discusses how to create filters.
Page Used to Create Filters
Page Name Definition Name Navigation Usage
Filters EOEW_SRCFILTER Enterprise Components,
Data Transformation, Define
Source Data Objects, Source
Data Object, Filters
Create filters.
Understanding Filters
Filters serves as criteria that the system applies to each row of data in the data source. If the row passes
the criteria, the system uses the data as an input to the data transformer map; if the row doesn't pass, the
system doesn't use the data. A filter compares the value in one of the row's fields to a reference value.
For example, suppose that you need only products whose selling price is greater than $10.00. You would

Chapter 3 Creating Source Data Objects
Copyright
©
1992-2013, Oracle and/or its affiliates. All rights reserved. 41
compare the value in the Price field to the constant value of $10.00. The filter criteria is placed in the
WHERE clause in the extract SQL.
The following table describes the operators that you can use to compare values:
Operator Description
Like The value in the selected field matches a specified string
pattern. The comparison value may be a string that contains
wild card characters. The wild card characters that PeopleSoft
Data Transformer recognizes are percent (%) and underscore (
_).
The % matches any string of zero or more characters. For
example, C% matches any string starting with C, including C
alone.
The _ matches any single character. For example, _ones
matches any 5-character string ending with ones, such as Jones
or bones.
Note: To use one of the wild card characters as a literal
character, (that is, to include % in your string), precede the
character with a backslash (\). For example, percent\%\.
= The value in the selected record field exactly matches the
comparison value.
<> The value in the selected record field is not equal to the
comparison value.
> The value in the record field is greater than the comparison
value.
<= The value in the record field is less than or equal to the
comparison value.
< The value in the record field is less than the comparison value.
>= The value in the record field is greater than or equal to the
comparison value.
When you include multiple filters, link them using AND or OR. When you link two filters with AND, a
row must meet the first and second filter to pass the test. When you link with OR, a row must meet the
first or second filter, but not necessarily both.
Filters Page
Use the Filters page (EOEW_SRCFILTER) to create filters.

Creating Source Data Objects Chapter 3
42 Copyright
©
1992-2013, Oracle and/or its affiliates. All rights reserved.
Navigation
Enterprise Components, Data Transformation, Define Source Data Objects, Source Data Object, Filters
Image: Filters page
This example illustrates the fields and controls on the Filters page. You can find definitions for the fields
and controls later on this page.
To define a filter:
1. Select the record that you want to filter against from the list of records that are defined in the source
data object.
2. Select the field on which to base your filter.
3. Select an operator.
4. Enter a comparison value.
5. Click Save.
6. Click Refresh Filter to save any changes that you made to existing filters and reflect those changes
in the source data object. Refresh Filter also captures changes made for Save and updates drop-down
lists to show your selections on the page.
Note: If the filter begins to get complicated, use the arrow keys to indent subconditions. Subconditions
will be surrounded by parentheses and fully resolved before comparing results with other level results.
(Optional) Joining Records
This section provides an overview of joins and discusses how to define join conditions.
Page Used to Join Records
Page Name Definition Name Navigation Usage
Join Conditions EOEW_SRCJOIN Enterprise Components,
Data Transformation, Define
Source Data Objects, Source
Data Object, Join Conditions
Define join conditions.

Chapter 3 Creating Source Data Objects
Copyright
©
1992-2013, Oracle and/or its affiliates. All rights reserved. 43
Understanding Joins
PeopleSoft Data Transformer enables you to create source data objects that include multiple-table joins.
Joins retrieve data from more than one table, presenting the data as if it came from one table. PeopleSoft
Data Transformer links the tables, based on common record fields, and links the rows on the two tables by
common values in the shared record fields.
Join Conditions Page
Use the Join Conditions page (EOEW_SRCJOIN) to define join conditions.
Navigation
Enterprise Components, Data Transformation, Define Source Data Objects, Source Data Object, Join
Conditions
Note: This page appears only when two or more records are defined in the source data object.
Enter the record name and associated field name for the left and right sides of the join.
The content of the field name drop-down list box is filtered to exclude some fields with data types that
cannot be qualified (for example, image columns). You need to fully qualify the join criteria of the
selected records; otherwise, processing may return unexpected results. The join criteria will become part
of the WHERE clause in the extract SQL.

Copyright
©
1992-2013, Oracle and/or its affiliates. All rights reserved. 45
Chapter 4
Preparing to Create Maps
Understanding the Mapping Process
Mapping translates values from the source data to the format of the target source by using default target
values, transformations, translation sets, and map rules to facilitate the process.
This section discusses:
• Target field default value setup.
• Translation set setup.
• Transformation creation.
• Map rule setup.
Target Field Default Value Setup
Target field default values allow you to set up values, which can be reused across multiple maps, to map
to the target field. This allows having a central location for updating a target field value. For example, the
target field default value for EFF_STATUS is set to A, and is used in 100 maps. At runtime, A is inserted
into the target field for all those maps. If the value for EFF_STATUS is changed to Active, the value is
updated once and when the 100 maps are run again, the new value will be inserted into the target field. No
changes are necessary at the map level.
A default with no value is initialized to a blank, a zero, or the appropriate PeopleSoft null value.
When setting default values, consider the target field data type format:
• Character fields are used for names, codes, and letter values.
Uppercase converts the field value to uppercase and signifies that no other formatting options apply to
the field. Mixed case stores uppercase and lowercase characters as entered.
• Number fields and signed number fields are fixed in field length and allow the entry of positive
numbers.
Only signed numbers allow the entry of negative numbers.
• Date fields contain calendar dates.
A date field has a field length of 10 characters and is maintained by the system.
The default format of a date field is defined by the database and can be overridden by your browser
settings.
The following table discusses data type format considerations:

Preparing to Create Maps Chapter 4
46 Copyright
©
1992-2013, Oracle and/or its affiliates. All rights reserved.
Source Field Target Field Required Considerations User Warning
Date Date NA NA
Date DateTime NA NA
Char Char Truncation occurs as needed. NA
Char Number Data must be numeric in the
character source field.
Appears when the character
field is greater than the
number in bytes.
Number Number NA Appears when the numeric
field is smaller in integer
positions, decimals, or if the
source is signed and the target
is not.
Number Char Character must be big enough. NA
DateTime Date NA NA
DateTime DateTime NA NA
Time Time NA NA
Long Long NA NA
Note: The default value assigned must match the target field format or an error occurs at runtime. For
example, you cannot assign a value of 7A to a numeric field. Specific error messages display during the
save if a datatype conversion error occurs.
Translation Set Setup
Use translation sets to define equivalent values or a code set for data conversion. For example: EA equals
Each, GAL equals Gallon, and IN equals Inch. Translation sets make the data values consistent.
Transformation Creation
When data is copied from the source to the target, the data can be transformed by using edits, look ups, or
PeopleCode. Transformations enable you to change a column's value. The Transformation Wizard guides
you through the process of creating transformations.
Map Rule Setup
You can create rules to be used by the AutoMapper feature in the map field detail definition where it
attempts to match source fields with target fields. Use rules to assign correct default values to target fields
when creating maps. By using map rules, you can assign a literal default, transformation, source field, or
a translation set to a target field. If the map rule is required, you cannot override the rule when you define
map field details.

Chapter 4 Preparing to Create Maps
Copyright
©
1992-2013, Oracle and/or its affiliates. All rights reserved. 47
Related Links
Map Field Detail Page
Setting Up Target Field Default Values
This section discusses how to set up target field default values.
Page Used to Set Up Target Field Default Values
Page Name Definition Name Navigation Usage
Set Target Field Defaults EOEW_SET_DFLT_RUL • Enterprise Components,
Data Transformation,
Setup Target Field
Defaults, Set Target
Field Defaults
• Enterprise Components,
Data Transformation,
Data Transformation
Home, Define Maps,
Map Field Detail
Click the Default link
on the Map Field Detail
page.
Set target field default values
that are used in the map field
detail definition.
Set Target Field Defaults Page
Use the Set Target Field Defaults page (EOEW_SET_DFLT_RUL) to set target field default values that
are used in the map field detail definition.

Preparing to Create Maps Chapter 4
48 Copyright
©
1992-2013, Oracle and/or its affiliates. All rights reserved.
Navigation
• Enterprise Components, Data Transformation, Setup Target Field Defaults, Set Target Field Defaults
• Enterprise Components, Data Transformation, Data Transformation Home, Define Maps, Map
Field Detail
Click the Default link on the Map Field Detail page.
Image: Set Target Field Defaults page
This example illustrates the fields and controls on the Set Target Field Defaults page. You can find
definitions for the fields and controls later on this page.
Target Field
Select the target field for which you want to define defaults.
Source Input Value
Enter the default value for the associated target field.
Note: This field is free text, so you must consider the target
field data type format.
Allow Map Override
Select to allow the field value to be overridden at the map level,
otherwise the row will be protected.
Setting Up Translation Sets
This section discusses how to set up translation sets.

Chapter 4 Preparing to Create Maps
Copyright
©
1992-2013, Oracle and/or its affiliates. All rights reserved. 49
Page Used to Set Up Translation Sets
Page Name Definition Name Navigation Usage
Translation Sets EOEW_CODE_TBL • Enterprise Components,
Data Transformation,
Setup Translation Set,
Translation Sets
• Enterprise Components,
Data Transformation,
Define Maps, Map Field
Detail
Click the Translation link
on the Map Field Detail
page.
• Enterprise Components,
Data Transformation,
Define Maps, Map Field
Detail
Click the Add link on the
Map Field Detail page.
Enter translation set values for
map definition details.
Translation Sets Page
Use the Translation Sets page (EOEW_CODE_TBL) to enter translation set values for map definition
details.

Preparing to Create Maps Chapter 4
50 Copyright
©
1992-2013, Oracle and/or its affiliates. All rights reserved.
Navigation
• Enterprise Components, Data Transformation, Setup Translation Set, Translation Sets
• Enterprise Components, Data Transformation, Define Maps, Map Field Detail
Click the Translation link on the Map Field Detail page.
• Enterprise Components, Data Transformation, Define Maps, Map Field Detail
Click the Add link on the Map Field Detail page.
Image: Translation Sets page
This example illustrates the fields and controls on the Translation Sets page. You can find definitions for
the fields and controls later on this page.
Subject Area
Select a subject area.
For new translation sets, the subject area will be set to the
default as defined on the Subject Area page.
Undefined Value Options
Select how to handle undefined values:
•
Default for undefined values: Rows that contain undefined
source values have the defined default value inserted into
the target field and then loaded in the target.
•
Do not load undefined values: Rows that contain undefined
source values have spaces inserted into the target field and
then loaded in the target table.
•
Retain undefined data values: Rows that contain undefined
source values are retained and loaded in the target.
Translation Set Values
Enter the from and to values for each value that you want translated. If needed, enter the rationale for your
selections in the More Information field.

Chapter 4 Preparing to Create Maps
Copyright
©
1992-2013, Oracle and/or its affiliates. All rights reserved. 51
Related Links
Defining Subject Areas
Creating Transformations by Using the Transformation Wizard
This section provides an overview of the Transformation Wizard, lists common elements, and discuss
how to:
• Create transformation definitions.
• Define edit, look ups or PeopleCode transformations.
• Create message definitions.
• (Optional) Set up source conditions.
• (Optional) Define look up conditions.
Pages Used to Navigate Transformation Wizard
Page Name Definition Name Navigation Usage
Transformation Wizard -
Transformation Definition
EOEW_TRN_DFN_INFO Enterprise Components,
Data Transformation, Define
Transformation Definition
Enter transformation
definition information.
Transformation Wizard - Look
Up
EOEW_TRN_DFN_LU • Click the Next button
on the Transformation
Wizard - Transformation
Definition page.
• Click the Transformation
Wizard - Look Up
page number on the
Transformation Wizard
navigation tool.
Enter a join condition to
establish a relationship
between this transformation
and the look up definition.
Transformation Wizard - Edit EOEW_TRN_DFN_EDIT • Click the Next button
on the Transformation
Wizard - Look Up page.
• Click the Transformation
Wizard - Edit page
number on the
Transformation Wizard
navigation tool.
Select the message definition
to use for edit processing.

Preparing to Create Maps Chapter 4
52 Copyright
©
1992-2013, Oracle and/or its affiliates. All rights reserved.
Page Name Definition Name Navigation Usage
Transformation Wizard -
Comments
EOEW_TRN_DFN_COM • Click the Next button
on the Transformation
Wizard - Edit page.
• Click the Transformation
Wizard - Comments
page number on the
Transformation Wizard
navigation tool.
Enter addition information
about this transformation.
Transformation Wizard -
Source Condition
EOEW_TRN_DFN_SRC • Click the Next button
on the Transformation
Wizard - Comments
page.
• Click the Transformation
Wizard - Source
Condition page number
on the Transformation
Wizard navigation tool.
Define the source input
values for this transformation
condition.
Transformation Wizard - Look
Up Condition
EOEW_TRN_DFN_LUC • Click the Next button
on the Transformation
Wizard - Source
Condition page.
• Click the Transformation
Wizard - Lookup
Condition page number
on the Transformation
Wizard navigation tool.
Enter look up transformation
definition properties.
Understanding the Transformation Wizard
Transformations are created differently based on the transformation type that you select on the definition
page. The Transformation Wizard is a tool that guides you step-by-step through the process of creating
transformations based on transformation type. The wizard enables you to navigate back and forth through
only those pages that are necessary to create the transformation type that you select.
Note: Transformations occur after data has been extracted from your source.
The Transformation Wizard is comprised of up to six steps. The following table lists the steps that are
necessary to complete look up, edit, and PeopleCode transformations:
Look Up Edit PeopleCode
Create a transformation
definition.
Yes Yes Yes
Define look ups. Yes No No
Create a message definition. Yes Yes No
Enter comments. Yes Yes Yes

Chapter 4 Preparing to Create Maps
Copyright
©
1992-2013, Oracle and/or its affiliates. All rights reserved. 53
Look Up Edit PeopleCode
(Optional) Set up source
conditions.
Yes Yes No
(Optional) Define look up
conditions.
Yes No No
Common Element Used in This Section
The Transformation Wizard navigation tool displays the number
of pages that are necessary to create the transformation, and it
highlights the current page.
Click a page number to navigate to that page or click the Next
and Previous buttons to navigate between pages.
Transformation Wizard - Transformation Definition Page
Use the Transformation Wizard - Transformation Definition page (EOEW_TRN_DFN_INFO) to enter
transformation definition information.
Navigation
Enterprise Components, Data Transformation, Define Transformation Definition
Image: Transformation Wizard - Transformation Definition page
This example illustrates the fields and controls on the Transformation Wizard - Transformation Definition
page. You can find definitions for the fields and controls later on this page.
Transformation Object
Enter a unique object name for the transformation. The system
automatically converts the input to uppercase.
For transformation type of PeopleCode, the name of the
transformation object is used to reference the proper method

Preparing to Create Maps Chapter 4
54 Copyright
©
1992-2013, Oracle and/or its affiliates. All rights reserved.
in the PeopleCode transformation class. If the transformation
object name does not contain a period (.) in its name, the
corresponding method must be in the default class called EOEW
_ETL_PUB:PeopleCodeTransformation.
To call a class in a proprietary package, use the name of the
method in addition to the name of the package and class. For
example, if you have created a package called MY_APP_PKG,
with a class called MYPC and a method called SET_UNIT_
PRICE, the transformation object name is specified as MY_APP
_PKG:MYPC.SET_UNIT_PRICE.
Note: For PeopleCode transformations, the transformation
object name must match the name of the Application Class
method.
For any custom built PeopleCode transformations, use your
own Application package and class name. By not putting the
PeopleCode in EOEW_ETL_PUB:PeopleCodeTransformation,
the code will not be affected during an upgrade.
Subject Area
Select a subject area.
For new transformations, the default subject is defined on the
Subject Area page.
Transformation Type
Look up. Performs a look up against an intermediate table and
returns a value. If the value does not exist, an error can be
logged. An option is also available to default a value into the
target field on error conditions.
Edit. Performs edits against the entire source dataset. An edit is
applied at a map level, not at a target field level.
PeopleCode. Allows for a PeopleCode object reference. A
PeopleCode Application Class method can be created to execute
code for transformations that cannot be built with the available
interfaces.
Related Links
Defining Subject Areas
Transformation Wizard - Look Up Page
Use the Transformation Wizard - Look Up page (EOEW_TRN_DFN_LU) to enter a join condition to
establish a relationship between this transformation and the look up definition.

Chapter 4 Preparing to Create Maps
Copyright
©
1992-2013, Oracle and/or its affiliates. All rights reserved. 55
Navigation
• Click the Next button on the Transformation Wizard - Transformation Definition page.
• Click the Transformation Wizard - Look Up page number on the Transformation Wizard navigation
tool.
Image: Transformation Wizard - Look Up page
This example illustrates the fields and controls on the Transformation Wizard - Look Up page. You can
find definitions for the fields and controls later on this page.
Record (Table) Name
Select a record for the intermediary look up table.
Note: This table must exist in the local PeopleSoft database.
Field Name
Select the value to be returned from the transformation and
inserted into the target field. The available values are based on
the record name that you selected.
Join Transformation to Look Up
Source Input Value
Select the source fields that are required for the join.
Look Up Field Name
Associate a look up field name value with a source input value
to complete the join condition.
Transformation Wizard - Edit Page
Use the Transformation Wizard - Edit page (EOEW_TRN_DFN_EDIT) to select the message definition
to use for edit processing.

Preparing to Create Maps Chapter 4
56 Copyright
©
1992-2013, Oracle and/or its affiliates. All rights reserved.
Navigation
• Click the Next button on the Transformation Wizard - Look Up page.
• Click the Transformation Wizard - Edit page number on the Transformation Wizard navigation tool.
Image: Transformation Wizard - Edit page
This example illustrates the fields and controls on the Transformation Wizard - Edit page. You can find
definitions for the fields and controls later on this page.
Check If Edit Required
Select if you require an edit to be performed with transformation
errors. If this check box is cleared, the edit will still execute at
run-time but the results will not be available.
Message Set Number and Message
Number
Select a message set number and a message number to be
logged with any transformation errors.
Transformation Wizard - Comments Page
Use the Transformation Wizard - Comments page (EOEW_TRN_DFN_COM) to enter addition
information about this transformation.

Chapter 4 Preparing to Create Maps
Copyright
©
1992-2013, Oracle and/or its affiliates. All rights reserved. 57
Navigation
• Click the Next button on the Transformation Wizard - Edit page.
• Click the Transformation Wizard - Comments page number on the Transformation Wizard navigation
tool.
Image: Transformation Wizard - Comments page
This example illustrates the fields and controls on the Transformation Wizard - Comments page. You can
find definitions for the fields and controls later on this page.
Use the Comments field to enter commentary specific to this transformation. Try to thoroughly describe
this edit to help others reuse it.
Transformation Wizard - Source Condition Page
Use the Transformation Wizard - Source Condition page (EOEW_TRN_DFN_SRC) to define the source
input values for this transformation condition.

Preparing to Create Maps Chapter 4
58 Copyright
©
1992-2013, Oracle and/or its affiliates. All rights reserved.
Navigation
• Click the Next button on the Transformation Wizard - Comments page.
• Click the Transformation Wizard - Source Condition page number on the Transformation Wizard
navigation tool.
Image: Transformation Wizard - Source Condition page
This example illustrates the fields and controls on the Transformation Wizard - Source Condition page.
You can find definitions for the fields and controls later on this page.
Use source conditions to further qualify the source data that is used for this transformation. You can enter
additional criteria to restrict the rows of the source data that are used in the join to the look up table.
Transformation Wizard - Look Up Condition Page
Use the Transformation Wizard - Look Up Condition page (EOEW_TRN_DFN_LUC) to enter look up
transformation definition properties..

Chapter 4 Preparing to Create Maps
Copyright
©
1992-2013, Oracle and/or its affiliates. All rights reserved. 59
Navigation
• Click the Next button on the Transformation Wizard - Source Condition page.
• Click the Transformation Wizard - Lookup Condition page number on the Transformation Wizard
navigation tool.
Image: Transformation Wizard - Look Up Condition page
This example illustrates the fields and controls on the Transformation Wizard - Look Up Condition page.
You can find definitions for the fields and controls later on this page.
Record and Field
Displays the record and field to be used to return a value.
Default
Enter the value for the target field if the look up fails or returns a
null value.
Return Look Up Record Field Conditions Grid
The look up condition further qualifies the look up table data that is used for this transformation. You
can enter additional criteria to restrict the rows of the look up table that are used in the join to the look up
table. The target field is populated based on the look up values that are provided.
Using Transformation PeopleCode
This section provides sample code delivered with your PeopleSoft product and discusses how to use
transformation PeopleCode.

Preparing to Create Maps Chapter 4
60 Copyright
©
1992-2013, Oracle and/or its affiliates. All rights reserved.
Note: If you need to create your own package and class, ensure that they adhere to the same format as
shown here.
The FUNCLIB object must be imported and your methods must take this object as its only parameter.
The HashTable class is a utility providing some of the internal information that you need to code your
PeopleCode transformation. PeopleSoft Data Transformer creates a temporary table at runtime to store
the fields from your source data object and from which you can access your PeopleCode transformation.
In addition, the name of this temporary table is dynamically assigned and cannot be hard-coded into your
program. For these reasons, PeopleSoft delivers helper methods for you to access and modify the content
of your data:
• GetSourceFieldList() method returns a HashTable object containing a name-value pair for accessing
your Source Data Object fields.
• GetTransformFieldList() method returns a HashTable object containing a name-value pair for
accessing target fields that have transformations associated with them.
• GetTempTableName() returns the name of the temporary table that is used by PeopleSoft Data
Transformer.
Sample PeopleCode Transformation
The following example updates the EOEC_CCI_UNITPRICE field on the target with a value of the
source data object PROD_PRICE field plus a constant of 100, by issuing an UPDATE statement on the
PeopleSoft Data Transformer temporary table.
Because the target field, EOEC_CCI_UNITPRICE, has an associated transformation, the actual name on
the temporary table is resolved with a GetValue(EOEC_CCI_UNIT_PRICE) call on the transformation
field's hash table. Similarly, the PROD_PRICE source data object field is resolved by making a
GetValue(PROD_PRICE) call on the source field's hash table.
import EOEW_ETLAPI:COMMON:FUNCLIB;
import EOEW_ETLAPI:COMMON:HashTable;
class PeopleCodeTransformation
method SET_UNIT_PRICE(&COMM As FUNCLIB);
method MY_OTHER_PCODE_TRANS(&COMM As FUNCLIB);
end-class;
method SET_UNIT_PRICE
/+ &COMM as EOEW_ETLAPI:COMMON:FUNCLIB +/
Local HashTable &SDOFields, &TranFields;
Local string &SQLStatement;
/* Retrieve the hashtable containing ALIASNAME->TEMPFIELDNAME
value pair */
&SDOFields = &COMM.GetSourceFieldList();
&TranFields = &COMM.GetTransformFieldList();
/* Update the EOEW_CCI_UNITPRICE to: SDO.PROD_PRICE + SomeNumber
This would resolve into something like:
UPDATE ETL_TEMP_TBL SET ETL_TEMP_1 = EOEW_FP_N3_0 + 100
*/
&SQLStatement = "UPDATE " | &COMM.GetTempTableName() | " SET " |
&TranFields.GetValue("EOEC_CCI_UNITPRICE") | " = " |
&SDOFields.GetValue("PROD_PRICE") | " + 100";
SQLExec(&SQLStatement);
end-method;
method MY_OTHER_PCODE_TRANS

Chapter 4 Preparing to Create Maps
Copyright
©
1992-2013, Oracle and/or its affiliates. All rights reserved. 61
.
.
.
end-method;
Creating Map Rules
This section provides an overview of map rules and discusses how to define map rules.
Page Used to Create Map Rules
Page Name Definition Name Navigation Usage
Map Rule Definitions EOEW_RULE_DFN Enterprise Components, Data
Transformation, Define Map
Rules, Map Rule Definitions
Define map rules.
Understanding Map Rules
AutoMapper uses the rules that you create in the map field detail definition. Rules may be based on the
subject area, the source, the target, or any combination, depending on the business rule being applied.
AutoMapper considers only map rules that are defined with a subject area matching the map's subject area
or those that are assigned the default enterprise subject area. The rules are made up of transformations,
constant default values, translation sets, and field map hints. If the map rule is required, you will not have
access to override the rule on the Map Field Detail page.
This order of precedence and conditions applies when you assign different rules to a single target field:
• Source
The source field must exist on the source data object that is associated with the map. The source field
type must be compatible with the target field type.
• Transformation
The fields that are defined as joins or constraints from the source data object must exist on the source
data object that is associated with the map.
• Translation Set
The fields that are defined as the join to the from value of the translation set must exist on the source
data object that is associated with the map.
If no rules were found to match a given target field, processing occurs in this order:
• Exact name match of target field.
• Default value for the target field.
• A zero or NULL is assigned to the field depending on its data type.
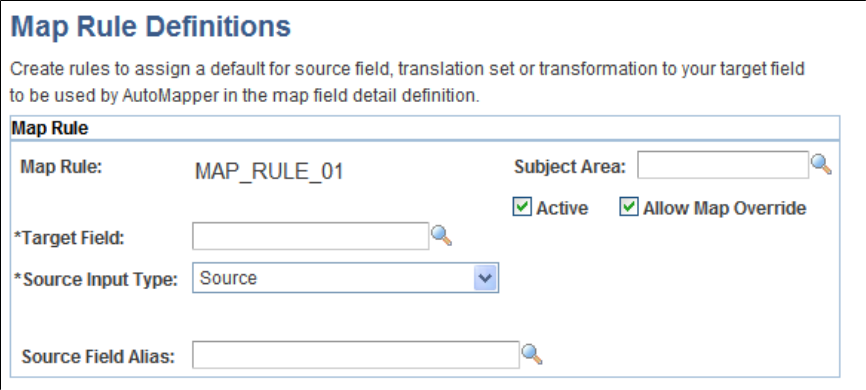
Preparing to Create Maps Chapter 4
62 Copyright
©
1992-2013, Oracle and/or its affiliates. All rights reserved.
Map Rule Definitions Page
Use the Map Rule Definitions page (EOEW_RULE_DFN) to define map rules.
Navigation
Enterprise Components, Data Transformation, Define Map Rules, Map Rule Definitions
Image: Map Rule Definitions page
This example illustrates the fields and controls on the Map Rule Definitions page. You can find
definitions for the fields and controls later on this page.
Active
Select to make the rule active. Only active rules get used during
an AutoMapper run.
Allow Map Override
Select to allow the rule to be overridden on the Map Field Detail
page.
Target Field
Select the target field on which to base this rule.
Subject Area
Select a subject area.
For new rules, the default subject area is defined on the Subject
Area page.
Source Input Type
Source: Select to enable the Source Field Alias field, where
you enter an alias for your source field if one is defined. If not,
leave this field blank. AutoMapper always maps the alias into
the selected target field.
Transformation: Select to enable the Source field, where you
enter a transformation object. AutoMapper always maps this
transformation into the selected target field.
Translation Set: Select to enable the Source Field Alias and
Source fields, where you enter an alias and translation set. When
Chapter 4 Preparing to Create Maps
Copyright
©
1992-2013, Oracle and/or its affiliates. All rights reserved. 63
AutoMapper sees the alias on the source, it always maps this
translation set into the selected target field.

Copyright
©
1992-2013, Oracle and/or its affiliates. All rights reserved. 65
Chapter 5
Creating Maps
Creating Map Definitions
This section discusses how to:
• Define map information.
• Define map field details.
• Perform map edits.
• Preview map results.
• Update map processing options.
Pages Used to Create Map Definitions
Page Name Definition Name Navigation Usage
Map Information EOEW_MAP_DFN Enterprise Components,
Data Transformation, Define
Maps, Map Information
Enter general mapping
information.
Map Field Detail EOEW_MAP_FLD Enterprise Components,
Data Transformation, Define
Maps, Map Information,
Map Field Detail
Enter field-level mapping
details.
Map Edits EOEW_MAP_EDIT Enterprise Components,
Data Transformation, Define
Maps, Map Information,
Map Edits
Edit map source input
values that are used in
transformations.
Preview Map Results EOEW_TARPREVIEW Enterprise Components,
Data Transformation, Define
Maps, Map Information,
Preview Map Results
View a subset of your data
based on the defined map.
Map Options EOEW_MAP_OPT Enterprise Components,
Data Transformation, Define
Maps, Map Information,
Map Options
Override or select options at
the map level.
Map Definition - Comments EOEW_MAP_COMMENT Enterprise Components,
Data Transformation, Define
Maps, Map Information,
Comments
Enter comments that are
related to the map definition.

Creating Maps Chapter 5
66 Copyright
©
1992-2013, Oracle and/or its affiliates. All rights reserved.
Map Information Page
Use the Map Information page (EOEW_MAP_DFN) to enter general mapping information.
Navigation
Enterprise Components, Data Transformation, Define Maps, Map Information
Image: Map Information page
This example illustrates the fields and controls on the Map Information page. You can find definitions for
the fields and controls later on this page.
Subject Area
Select a subject area.
For new maps, the subject area will be set to the default as
defined on the Subject Area page.
Source
Enter the source data object for this map.
Note: The source data object prompt is restricted by subject
area. You see only those objects that are in the map definition's
current subject area and those in the default subject area.
Add Source Data Object
Click to navigate to the Source Data Object component and
create a new source data object to use as the source.
Update Source Data Object
Click to navigate to the Source Data Object component and
change the source data object that you selected as the source.
Target
Select the target data object.
This value controls the target fields that are available on the
Map Field Details page.
Error Handling
No error handling needed: Select to have the system perform no
data validation and insert all rows into the target table.

Chapter 5 Creating Maps
Copyright
©
1992-2013, Oracle and/or its affiliates. All rights reserved. 67
Identify error row: Select to have the system perform data
validation and insert both valid and invalid rows into the target
table. You must select a target field to contain the error flag on
the Map Field Detail page.
Note: The error flag will not be available for any other type of
mapping.
Correct data error & reprocess: Select to have the system
perform data validation, insert valid rows into the target table,
and insert invalid rows into a user-defined error table. You will
be prompted to create an error record on the Map Field Detail
page.
Note: The system administrator must build the user-defined
error table in PeopleSoft Application Designer before you load
the defined map.
The create error record push button will create a record in
PeopleSoft metadata that has all of the necessary columns
needed at runtime. It must then be build using Application
Designer. If your map changes (different transformations,
translation sets, and so on), you will need to recreate the error
table because it must match exactly.
Related Links
Defining Subject Areas
Understanding Extracting, Transforming, and Loading Source Data
Map Field Detail Page
Use the Map Field Detail page (EOEW_MAP_FLD) to enter field-level mapping details.

Creating Maps Chapter 5
68 Copyright
©
1992-2013, Oracle and/or its affiliates. All rights reserved.
Navigation
Enterprise Components, Data Transformation, Define Maps, Map Information, Map Field Detail
Image: Map Field Detail page
This example illustrates the fields and controls on the Map Field Detail page. You can find definitions for
the fields and controls later on this page.
Source Input Type
Blank: If this field is left blank, the description field will default
to a blank, zero, or the appropriate PeopleSoft null value. This
null value will be inserted to the target field.
Source: Select if the value is from the source file. You are
prompted to select a source prompt field from the source data
object.
Constant: Select if the value is a constant value, and then enter
that value. If a constant needs to be applied to more than one
map, a default target field should be created.
Default: Select to use a default value, and then select a source
prompt to select the appropriate target field default. Click the
Default link to access the Set Target Field Default page to see
the actual prompt value.
Transformation: Select to use a transformation, and then select a
source prompt to select the appropriate transformation. Click the
Transform link to view transformation definitions, or click the
Add link to add a new definition by using the Transformation
Wizard.
Translation Set: Select to use a translation set, and then select a
source prompt to select the appropriate source data object field.
Select a description which will be the appropriate translation set
to apply to the source field. Click the Translation link to view
translation set values, or click the Add link to add a new set.
Source Prompt
Select a source prompt based on your source input type. The
prompt will change based on the source input type. Be aware of
the mapping that you are setting up.

Chapter 5 Creating Maps
Copyright
©
1992-2013, Oracle and/or its affiliates. All rights reserved. 69
Note: Translation set and transformation source prompts are
restricted by subject area and transformation type. Only objects
that are in the map definition's current subject area and those in
the default subject area appear on the page. Only Look Up and
PeopleCode type transformations appear.
Description
The description will change based on the source input type and
source prompt selected. Be aware of the mapping that you are
setting up.
Enter a description if you selected Constant as the input type.
The description is the value that you want mapped to the target
field.
Enter a translation set if you selected Translation Set as the
input type.
Target Field
Lists the name of all of the fields in your target file.
Detail
Displays the Transform, Default, or Translation link, based on
the selected input type. This link transfers to the definition page
of the selected item.
Add
Appears if the selected input type is Transformation or
Translation Set. This link transfers to the definition page of the
selected item in Add mode.
Save Map As
Click to save an existing map definition under a new map name.
Use this function to create a new map definition that will only
slightly differ from the original map. Once saved, you can
make the necessary changes to the new map. The new map is
maintained separately.
Apply AutoMapper
Click to initially define map field details.
AutoMapper automatically attempts to match the source to
the target field list. It also applies any required map rules,
including target field defaults, translation set values, and
transformations. AutoMapper then maps remaining target fields
with constant values from the PSRECFIELD.DBFIELDNAME.
SQL assembler and coordinates the transformation steps.
If you must modify the mapping that is defined by AutoMapper,
you can make these changes using the fields on this page.
Warning! Rerunning the AutoMapper overrides any mappings
that you have already done. Use caution before doing this-it is
as if you are starting over with an Add function.
Synchronize fields
Click to realign the source and target fields on the map with any
changes that may have occurred since its origination.

Creating Maps Chapter 5
70 Copyright
©
1992-2013, Oracle and/or its affiliates. All rights reserved.
You can add new fields to the target with PeopleSoft
Application designer once a map has been saved. Using
Synchronize fields will insert these new fields in the map
field detail grid. Additional synchronization is done on source
fields (based on the current source data object definition) and
prompts. Selecting this button will not override previously saved
mappings.
Show/Hide Fields Details
Click to expand the grid to include field format and length
information for both source and target fields. Click again to
avoid the horizontal scroll.
Related Links
Understanding the Mapping Process
Map Edits Page
Use the Map Edits page (EOEW_MAP_EDIT) to edit map source input values that are used in
transformations.
Navigation
Enterprise Components, Data Transformation, Define Maps, Map Information, Map Edits
Image: Map Edits page
This example illustrates the fields and controls on the Map Edits page. You can find definitions for the
fields and controls later on this page.
Source Input Value
Select an Edit transformation.
Note: The source input value prompt is restricted by subject
area and transformation type. You see only those objects that
are in the map definition's current subject area and those in the
default subject area. You also see only edit transformations.

Chapter 5 Creating Maps
Copyright
©
1992-2013, Oracle and/or its affiliates. All rights reserved. 71
Detail
Click to access the Transformation Definition page and edit
transformation definition information.
Add
Click to access the Transformation Definition page and add a
new transformation.
Related Links
Creating Transformations by Using the Transformation Wizard
Preview Map Results Page
Use the Preview Map Results page (EOEW_TARPREVIEW) to view a subset of your data based on the
defined map.
Navigation
Enterprise Components, Data Transformation, Define Maps, Map Information, Preview Map Results
Click the Preview button to view a subset of the results based on your map definition.
Use this feature to check the validity of the map. By previewing what the results of running the map
would be against a small set of data, you can determine if your mappings are defined correctly.
Note: Attempting to preview complex maps can quickly consume processing and memory resources on
your application server.
The preview maximum row count is set using the Data Transformer Installation Options page. Large row
counts take more time and resources to preview. Consider setting your preview row count relatively low.
Related Links
Data Transformation Installation Options page
Map Options Page
Use the Map Options page (EOEW_MAP_OPT) to override or select options at the map level.

Creating Maps Chapter 5
72 Copyright
©
1992-2013, Oracle and/or its affiliates. All rights reserved.
Navigation
Enterprise Components, Data Transformation, Define Maps, Map Information, Map Options
Image: Map Options page
This example illustrates the fields and controls on the Map Options page. You can find definitions for the
fields and controls later on this page.
Note: Only system administrators may access this page.
Duplicate Row Handling
Copy Duplicates to Error Table: Select to have the system copy
all duplicate rows to the error table.
Copy first row to Target: Select so that if the system finds a
duplicate row in the error table, it inserts only the first row of
the duplicates into the target.
Copy last row to Target: Select so that if the system finds a
duplicate row in the error table, the system inserts only the last
row of the duplicates into the target.
Reject all duplicate rows: Select to have the system reject all
duplicate rows and not log them in the error table.
Note: Values are based on the error handling that is specified on
the Map Information page. If you don't see all of the preceding
values, adjust the error handling option.
(Optional) Create Temporary Table
Select if you want to override the Data Transformer installation
options and Subject Area selections for this map to create a
temporary table at runtime.

Chapter 5 Creating Maps
Copyright
©
1992-2013, Oracle and/or its affiliates. All rights reserved. 73
This is needed only when an implementation allows or disallows
the dynamic temporary table creation per subject area.
This temporary table is only needed by the engine and will be
deleted at engine completion. It is not available in PeopleSoft
metadata.
Note: If you do not select this check box, you will be required
to specify a temporary table record name on the map for use at
runtime. This record will be available in PeopleSoft metadata
and live permanently after the engine execution. Determining
which of these options to used needs to be carefully considered.
A dynamic temporary table will automatically change when
the map changes, a non-dynamic temporary table requires
maintenance.
Override Tablespace Name From
Subject Area Default
Select to override the Data Transformer installation options and
Subject Area options for specific maps. This is only necessary if
the implementation chooses to spread the temporary tables that
are generated at runtime over multiple tablespaces.
Select Date/Time Field Name To
Be Used For Incremental Load
Processing
Only datetime field types appear in the prompt. This field
is used at run time to determine the next segment of data to
incrementally load.
Related Links
Defining Installation Options
Defining Subject Areas
Map Definition - Comments Page
Use the Map Definition - Comments page (EOEW_MAP_COMMENT) to enter comments that are
related to the map definition.

Creating Maps Chapter 5
74 Copyright
©
1992-2013, Oracle and/or its affiliates. All rights reserved.
Navigation
Enterprise Components, Data Transformation, Define Maps, Map Information, Comments
Image: Map Definition - Comments page
This example illustrates the fields and controls on the Map Definition - Comments page. You can find
definitions for the fields and controls later on this page.
Use the Comments field to provide details about the purpose of the map definition.

Copyright
©
1992-2013, Oracle and/or its affiliates. All rights reserved. 75
Chapter 6
Running the Data Transformation Process
and Correcting Errors
Defining Map Groups and Map Group Chunking Criteria
This section discusses how to:
• Define map groups.
• Define chunking criteria.
You can configure the data transformation process to run on maps as a group. A map group may
contain map groups within the main map group, as well as one or more individual maps. Map groups
are submitted as a job unit and can run either in serial or parallel mode. To optimize performance by
processing data more efficiently, you can define chunking criteria on the Map Group Filter page.
Pages Used to Define Map Groups and Chunking Criteria
Page Name Definition Name Navigation Usage
Map Groups EOEW_GRP_DFN Enterprise Components, Data
Transformation, Define Map
Groups, Map Groups
Create map groups.
Map Group Filter EOEW_GRP_FLTR Click the Chunking link on
the Map Groups page.
Define chunking criteria for
maps.
Map Groups Page
Use the Map Groups page (EOEW_GRP_DFN) to create map groups.

Running the Data Transformation Process and Correcting Errors Chapter 6
76 Copyright
©
1992-2013, Oracle and/or its affiliates. All rights reserved.
Navigation
Enterprise Components, Data Transformation, Define Map Groups, Map Groups
Image: Map Groups page
This example illustrates the fields and controls on the Map Groups page. You can find definitions for the
fields and controls later on this page.
Subject Area
Select a subject area.
For new maps groups, the subject area will be set to the default
as defined on the Subject Area page.
Parallel Processing For Group
Select to run the process in parallel mode, which runs the
processes simultaneously. Clear to run it in serial mode, which
runs each process in the map group sequentially.
Group Type and Map Object
Select the maps and/or map groups that you want in the order in
which you want them to run.
Note: Map object prompts are restricted by subject area. Only
objects that are in the map group's current subject area and those
in the default subject area appear.
(Optional) Chunking
Click to access the Map Group Filter page to define chunking
criteria for the associated map.
See Map Group Filter Page.
Note: The Chunking link is only available for Group Types
of Map. If you want to chunk a group, you need to go to that
group's definition to define the criteria.
Related Links
Defining Subject Areas

Chapter 6 Running the Data Transformation Process and Correcting Errors
Copyright
©
1992-2013, Oracle and/or its affiliates. All rights reserved. 77
Map Group Filter Page
Use the Map Group Filter page (EOEW_GRP_FLTR) to define chunking criteria for maps.
Navigation
Click the Chunking link on the Map Groups page.
Image: Map Group Filter page
This example illustrates the fields and controls on the Map Group Filter page. You can find definitions for
the fields and controls later on this page.
Chunking is a mechanism that makes large amounts of processing easier through the use of multiple small
parallel processes. By enabling chunking, multiple jobs are spawned from one job stream. These jobs run
in parallel or serial to process data efficiently. It is an optional mechanism to help with performance. The
user is responsible to define chunks that include all of the source data without duplicating any rows. The
system will not verify this. The map group is still the unit of work. The group job is not complete until all
of the chunks are also complete.
Parallel Processing
Select to run the process in parallel mode, which runs the
processes simultaneously. Clear to run it in serial mode, which
runs each process in the chunk sequentially.
Column Alias
Select a column alias. Available values are derived from the
source data object for the map you are currently chunking.
Operator
Select an operator to define the chunking condition.
Field Value
Enter the field value that completes criteria for the chunk
number.
And/Or Switch
Select And or Or to compound multiple sets of criteria.
Note: The chunks you define must be configured to capture all of the source data without duplicating
rows.

Running the Data Transformation Process and Correcting Errors Chapter 6
78 Copyright
©
1992-2013, Oracle and/or its affiliates. All rights reserved.
Extracting, Transforming, and Loading Source Data
This section provides an overview of source data extraction, transformation and loading, and discusses
how to:
• Run the data transformation process.
• View the run summary.
Pages Used to Extract, Transform, and Load Source Data
Page Name Definition Name Navigation Usage
Run Data Transformations EOEW_RUN_ETL Enterprise Components, Data
Transformation, Run Data
Transformations, Run Data
Transformations
Define run control criteria
for and run the data
transformation process.
Run Data Transformations -
Run Summary
EOEW_RUN_ETL_SUM Click the Run Summary
link on the Run Data
Transformations page.
View information about only
the jobs related to a particular
data transformation process
run control.
Understanding Extracting, Transforming, and Loading Source Data
The data transformation process can be run to extract, transform and load source data by a single
map or by map groups. When a map or group is executed, it is compiled at runtime. No SQL or code,
only metadata, is stored. This reduces the risk of encountering problems late in a multi-map process,
guarantees that each parallel process is executing the same version, and insulates the current running job
from any changes to the actual map definition.
The data transformation process is run using the Data Transformation Application Engine process
(EOEW_ETL_EXE).
Run Data Transformations Page
Use the Run Data Transformations page (EOEW_RUN_ETL) to define run control criteria for and run the
data transformation process.

Chapter 6 Running the Data Transformation Process and Correcting Errors
Copyright
©
1992-2013, Oracle and/or its affiliates. All rights reserved. 79
Navigation
Enterprise Components, Data Transformation, Run Data Transformations, Run Data Transformations
Image: Run Data Transformations page
This example illustrates the fields and controls on the Run Data Transformations page. You can find
definitions for the fields and controls later on this page.
Note: The data transformation process uses the Data Transformation Application Engine process
(EOEW_ETL_EXE).
Data Transformer Object Type
Select a Data Transformer object type. You can run either a Map
or Map Group.
Note: PeopleSoft Catalog Management uses the run control ID
RUN_MAP to load partner source data. When using this run
control ID, the Data Transformer object type must be Map.
Map Object
Select a map object. The prompt for available field values is
based on the Data Transformer object type.
Target Load Option
Select a target load option.
Full Load. Extracts all data from the source as defined by the
source data object and inserts into the target.
Incremental Update. Copies all rows from the source table that
have been updated or modified since the last load, based on the
date/time the row was updated or modified. The Map Options
page must have a date/timestamp field defined in order to use
incremental load.
Destructive Load
Select to delete all rows from the target table before the new
rows are inserted.

Running the Data Transformation Process and Correcting Errors Chapter 6
80 Copyright
©
1992-2013, Oracle and/or its affiliates. All rights reserved.
Warning! Use this option with caution, as this will delete all
rows in the target table.
Parallel Processing
Select to run the process in parallel mode, which runs the
processes simultaneously. Clear to run it in serial mode, which
runs each process in the chunk sequentially.
Note: This option is only available if the Object Type is Map.
Chunking Criteria
Click to access the Map Group Filter page to define chunking
criteria for the associated map.
See Map Group Filter Page.
Note: This link is only available for Group Types of Map. If you
want to chunk a group, you need to go to that group's definition
to define the criteria.
Run
Click to run the data transformation process. A process request
is submitted.
Click the Process Monitor link to monitor the status of the
request.
Run Summary
Click to view information that is related to the status of the data
transformation process.
For more information, refer the product documentation for PeopleTools: PeopleSoft Process Scheduler.
Run Data Transformations - Run Summary Page
Use the Run Data Transformations - Run Summary page (EOEW_RUN_ETL_SUM) to view information
about only the jobs related to a particular data transformation process run control.

Chapter 6 Running the Data Transformation Process and Correcting Errors
Copyright
©
1992-2013, Oracle and/or its affiliates. All rights reserved. 81
Navigation
Click the Run Summary link on the Run Data Transformations page.
Image: Run Data Transformations - Run Summary page
This example illustrates the fields and controls on the Run Data Transformations - Run Summary page.
You can find definitions for the fields and controls later on this page.
After running a data transformation process by clicking Run on the Run Data Transformations page, you
can access the Run Summary page just as you would access Report Manager or Process Monitor.
Although the Process Monitor provides information regarding a process run, the Run Summary feature
offers a more granular view of the individual subprocesses, such as chunks, that are not exposed in the
Process Monitor. For example, a single map containing chunks or a group can spawn numerous jobs. If
you use the Process Monitor to view these jobs, you find that the numerous jobs that are associated with a
single map are mixed in with all of the other jobs that are currently running. Depending on the number of
jobs that are running, this can make it difficult to view only those jobs that are associated with a particular
Data Transformer process run control.
However, by using the Run Summary feature you can view all of the jobs that were spawned for the run
control that is associated with a particular run on of the Data Transformer process. The Run Summary
feature is especially useful when running parallel processes that are associated with multiple maps. By
using the Run Summary feature, you can associate a process instance with each chunk as it runs.
The Run Summary feature enables you to see:
• Which subprocesses are involved within a particular data transformation process run control.
• When a particular subprocess (chunk or map) begins.
• When a particular subprocess (chunk or map) completes.
• Which subprocesses didn't complete successfully.

Running the Data Transformation Process and Correcting Errors Chapter 6
82 Copyright
©
1992-2013, Oracle and/or its affiliates. All rights reserved.
• Which process instance is associated with a particular chunk or map.
Main Information
Select the Main Information tab.
Process Instance
Displays the PeopleSoft Process Scheduler process instance
that is assigned to the individual process. This value also
appears on the Times and Chunking Criteria tabs for consistent
identification.
Note: For parallel processes, you see different process
instances; for serial processes, you see the same process
instance.
Run Status
Reflects the same status that appears in the Process Monitor.
If the run status displays an error, go to the Process Monitor to
troubleshoot and restart the process.
Times
Select the Times tab.
Use these times to track the performance of the processes.
Chunking Criteria
Select the Chunking Criteria tab.
Chunking Where clause
Displays information about the chunking criteria that is
specified for a particular map, including:
• Relational operators (=, <, >, and so on).
• Boolean operators (AND and OR).
Note: This page also displays information that is relevant only
to the internal aspects of the PeopleSoft mapping functionality.
The field names that are used for chunking are converted to an
internal format; therefore, the format of the Chunking Where
clause may not necessarily be a true reflection. That is, it may
contain an extra “AND (“), for example. However, determining
the chunking criteria that is used can be very useful when you
are troubleshooting.
Also, values that are similar to EOEW_FP_CHAR30_0 are used
internally by the PeopleSoft system to store data in a temporary
table while the data is being transformed and loaded.

Chapter 6 Running the Data Transformation Process and Correcting Errors
Copyright
©
1992-2013, Oracle and/or its affiliates. All rights reserved. 83
Handling Data Transformation Process Errors
This section provides an overview of data transformation process errors and discusses how to view and
correct data transformer process errors.
Page Used to Handle Data Transformation Process Errors
Page Name Definition Name Navigation Usage
Error Correction EOEW_CORRECTION Enterprise Components, Data
Transformation, Correct
Errors, Error Correction
View and correct data
transformation process errors.
Understanding Data Transformation Process Errors
After you run the data transformation process for a map with the Correct data error & reprocess option
selected, use the Error Correction page to check for any errors that were logged during runtime. You
can correct these errors online and rerun the data transformation process with the Include Errors option
selected.
The Error Correction page sources its information from a PeopleSoft table specified on the Map Field
Detail page. When the data transformation process runs and finds an error (such as a look-up or edit on an
entry not found), it writes an entry into this error table.
The error table comprises:
• Two key fields, PROCESS_INSTANCE and EOEW_ETL_SEQNUM.
• Error message fields from the EOEW_ERRMSG_SBR subrecord
(EOEW_ERR_MSG01..EOEW_ERR_MSG10).
• All the fields being sourced from the Source Data Object.
Whenever an error is encountered for a look-up or edit transformation, the data transformation
process stores the associated error message set number and message number in the error fields
(EOEW_ERRMSG_XX) that are found in the error table so that the user can then troubleshoot the rows
with errors.
By default, PeopleSoft allocates 10 error messages on the EOEW_ERRMSG_SBR subrecord (each error
message field includes the message set number and message number), but users can delete or add more
error message fields on the subrecord, as needed.
If more errors are encountered during the data transformation process run than are allocated on the error
table, those errors that are encountered after the limit was reached are not written to the error table. Every
error record must include one or more EOEW_ERRMSG_XX fields. The errors that are encountered
during the data transformation process appear on the Error Correction page. The Error Correction page
displays error messages that are associated with each specific row of data that is found to be in error by
the data transformation process.
For more information, refer the product documentation for PeopleTools: PeopleCode Language
Reference.
Running the Data Transformation Process and Correcting Errors Chapter 6
84 Copyright
©
1992-2013, Oracle and/or its affiliates. All rights reserved.
Error Correction Page
Use the Error Correction page (EOEW_CORRECTION) to view and correct data transformation process
errors.
Navigation
Enterprise Components, Data Transformation, Correct Errors, Error Correction
After you use this page to correct all errors, rerun the map.
Edit
Select for the row that you want to correct. The Field list
appears at the top of the page with the associated error message
for that row.
Delete
Select to remove the current row. This will physically delete the
error row from the error table.
Delete All Rows
Select to remove all current rows. This will physically delete all
error rows from the error table.
Field
Select the field you want to edit. Enter the new, corrected value
for the field.
Update
Click to save the correction to the field.

Copyright
©
1992-2013, Oracle and/or its affiliates. All rights reserved. 85
Appendix A
Setting PeopleSoft Data Transformer
Security
Understanding Security
This section discusses:
• User profiles, roles, and permission lists.
• Delivered roles and permission lists.
User Profiles, Roles, and Permission Lists
You assign roles to user profiles. Roles link user profiles to permission lists, which group authorizations.
Permission lists store sign-on times, page access, PeopleTools access, and so on. You can assign multiple
roles to a user profile, and you can assign multiple permission lists to a role.
Image: Security definition hierarchy
This diagram illustrates the interaction between user profile, roles, and permission lists.

Setting PeopleSoft Data Transformer Security Appendix A
86 Copyright
©
1992-2013, Oracle and/or its affiliates. All rights reserved.
Delivered Roles and Permission Lists
Access to PeopleSoft Data Transformer is based on roles and permission lists that are attached to user
IDs.
PeopleSoft delivers the following roles that are configured to perform PeopleSoft Data Transformer
functions:
Role Permission List Access Responsibilities
Enterprise Administrator EOEW9000 Has access to all warehouse objects and
performs all tasks that are related to
PeopleSoft Data Transformer, including
creating and maintaining source data
objects, default target values, translation
set values, and map definitions, and
running Data Transformer maps.
Map Specialist EOEW1000 Performs all tasks that are related to
PeopleSoft Data Transformer, but
typically does not set up complex source
data objects or transformations.
Permission lists are delivered to support all PeopleSoft Data Transformer features. This table lists the
components that are attached to each of the delivered permission lists.
Note: Both permission lists have access to all PeopleSoft Data Transformer-related components.
Permission List Component Component Name
EOEW1000
EOEW9000
EOEW_TOOLS_HOMEPG
EOEW_OPTIONS
EOEW_OBJ_OWNER
EOEW_SRCDO
EOEW_SET_DFLT
EOEW_CODE_SET
EOEW_LU_DFN_INFO
EOEW_TRN_DFN_WIZ
EOEW_RULE_DFN
EOEW_MAP_DFN
EOEW_GRP_DFN
EOEW_CORRECTION
EOEW_RUN_ETL
Warehouse Tools Home Page.
ETL Installation Options.
Subject Area.
Source Data Object.
Set Default Values.
Translation Set Values.
Look up Definition Info.
Transformation Definition.
Map Rule Definition.
Map Definition.
Map Group.
Error Correction.
Run Data Transformer.
Although both permission lists have access to all PeopleSoft Data Transformer-related components, the
following pages are not accessible for permission list EOEW1000:

Appendix A Setting PeopleSoft Data Transformer Security
Copyright
©
1992-2013, Oracle and/or its affiliates. All rights reserved. 87
Component Page
EOEW_OPTIONS
EOEW_OBJ_OWNER
EOEW_RULE_DFN
EOEW_MAP_DFN
EOEW_MAP_DFN
ETL Installation Options - Display Only.
Subject Area Owner - Display Only.
Map Rule Definition - No Access.
Map Options - No Access.
Publish Map Option - No Access.
Implementing Security
This section provides an overview of security tasks and discusses how to:
• Associate the EOEW1000 permission list with a role.
• Assign the Map Specialist role to a user profile.
For more information refer the product documentation for PeopleTools: Security Administration.
Understanding Security Tasks
To allow map specialists to perform data transformer activities you must:
•
Associate the permission list EOEW1000 with all roles that are assigned to be map specialists.
Note: PeopleSoft delivers the Map Specialist role for this purpose.
• Assign the Map Specialist role to the necessary user profiles.
Associating the EOEW1000 Permission List with a Role
To associate the EOEW1000 permission list with a role:
1. Select PeopleTools, Security, Permissions & Roles, Roles.
2. Enter a role.
3. Access the Permission List page.
4. Add the EOEW1000 permission list to the list of permission lists that are currently attached to the
role.
5. Click Save.
Assigning the Map Specialist Role to a User Profile
To assign the Map Specialist role to a user profile:
1. Select PeopleTools, Security, User Profiles, User Profiles.
Setting PeopleSoft Data Transformer Security Appendix A
88 Copyright
©
1992-2013, Oracle and/or its affiliates. All rights reserved.
2. Enter a user profile.
3. Access the Roles page.
4. Add the Map Specialist role to the list of roles that are currently attached to the user profile.
5. Click Save.
