
1
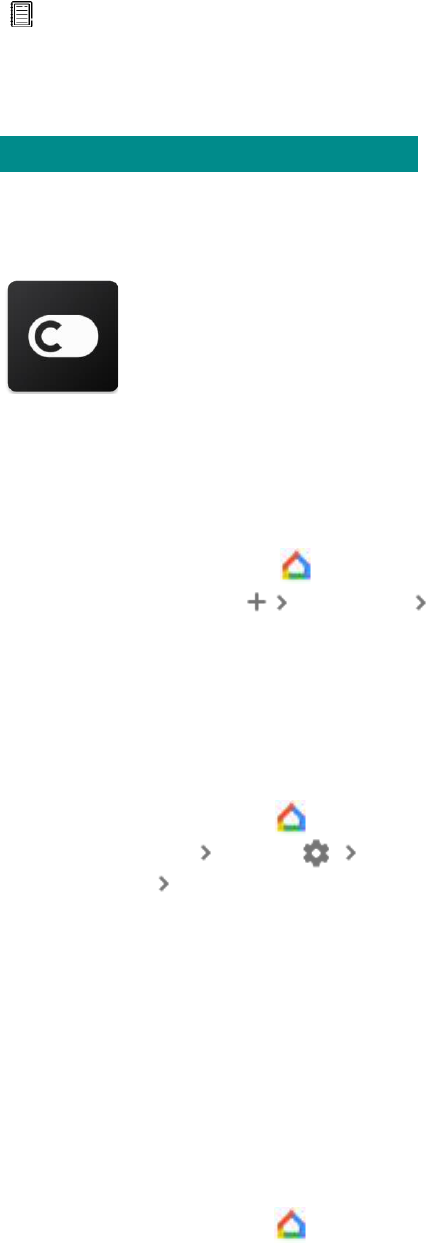
ConnectLife Home
Appliance
WiFi Instruction
Note:
Read this owner's manual thoroughly before operating the appliance
2
Table of Contents
Welcome ..................................................................................................................................................................3
How to install WiFi module ................................................................................................................................3
System Operation Requirements .......................................................................................................................4
A. Smartphone System Requirements.....................................................................................................4
B. Wireless Router requirements ..............................................................................................................4
C. In-Home WiFi Network Connectivity Tips ......................................................................................5
D. Other Requirements and Precautions .................................................................................................5
WiFi Module Performance Parameters ............................................................................................................5
How to install ConnectLife .................................................................................................................................6
How to add appliances and delete appliances ................................................................................................6
Automation Function Introduction ....................................................................................................................7
Troubleshooting .....................................................................................................................................................8
Voice Control .........................................................................................................................................................9
A. Work with Amazon Alexa ................................................................................................................. 10
B. Work with Google Assistant .............................................................................................................. 14
About Software Services ......................................................................................................................... 18
Other instruction........................................................................................................................................ 18

3
Welcome
Thank you for your purchase! We’re happy that you chose ConnectLife product, and
we are confident that you’ll be completely satisfied with your new Air Home Appliance
for many years to come. ConnectLife proudly stands behind our products and welcome
your suggestions and feedback that will help us to continue meeting your expectations.
We look forward to you sharing the positive experience you’ve had with our
product and our service!
How to install WiFi module
For Mini Split AC Only
1)Open air conditioner panel, and use tools to dismantle the terminal cover;
2)Connect the wire terminals of the module and of the internal machine;
3)Fix WiFi module with tools;
4)Fix the terminal cover with tools, and then WiFi module installation is finished.
For the installation of some products, the wifi module needs to be installed on the card
socket on the panel.

4
Notice: Please refer to actual product for specific installation method. This
instruction is only served as reference.
System Operation Requirements
A. Smartphone System Requirements
The following are the minimum specifications needed to successfully run the app on a
smartphone:
Table 1 Smartphone requirements
Terminal device
Android
IOS
OS
Android 6 or higher
IOS 11 or higher
Resolution
1920*1080 or higher
960*640 or higher
B. Wireless Router requirements
Table 2: Wireless Router requirements
Standard
IEEE 802.11b/g/n
Frequency Range
2.402-2.483.5GHz
Security
128 bits WPA-PSK/WPA2-PSK
Output Power
802.11b: 11dBM(11Mbps)
802.11g: 15dBM(54Mbps)
802.11n: 11dBM(72.2Mbps)
Data Rate
802.11b: 11Mbps
802.11g: 54Mbps
802.11n: 72.2Mbps
Sensitivity
802.11b: 11Mbps
802.11g: 54Mbps
802.11n: 72.2Mbps
Modulation
QPSK+OFDM
Notice:
*Please try to use a certified 2.4G wireless router.
*The wireless router requirements are a general specification.
*Depending on the environment, there might be multiple WiFi access points available.
It is important to ensure that the correct one is being used.
*A router firewall may have high security or parental controls configured, and these

5
settings may block some required network ports for the device.
*The following network ports should be opened/whitelisted on your
router:80/443/55020/55030(Check the router’s user manual for instructions on
configuring firewalls.)
* The WiFi module does not support a new Wi-Fi certifed specifcation and non-standard
Wi-Fi certifcation type.
C. In-Home WiFi Network Connectivity Tips
*Locate the home appliance as close to the wireless router as possible.
*If the WiFi signal strength is weak, the App and WiFi module may be disconnected
depending on the Wi-Fi signal strength.Purchase a Wi-Fi repeater(range extender) to
improve the Wi-Fi signal strength.
*Check that no metal objects are attached to the appliance, or otherwise interfering with
the WiFi signal.
*Due to dynamic network connectivity request may time out. In this event, re-run the
network.
*Due to dynamic network connectivity control processes may time out, App and
product may display conflicting setting information. Reconnect to sync information.
D. Other Requirements and Precautions
* The smartphone must be connected with WiFi instead of 3G/4G/5G when it is paired
to the home appliances for the first time;
* When using the Application, cellular data use may generate expenses if the mobile
phone is connected with 3G/4G/5G data service;
* The internet connection may fail due to presence of any firewalls. If this is the case,
it’s recommended to contact your internet service provider;
* If your internet service provider requires an ID or a password to connect to the internet,
you must enter your ID or password when connecting to the internet.
WiFi Module Performance Parameters
Table 3: Internal WiFi module Performance Parameters
WiFi Model
AEH-W4G1/AEH-W4G2
AEH-W0G1/AEH-W0G2
Transmission frequency
2.4GHz
2.4GHz
Transmission power
≤19dBm
≤19dBm

6
Power supply
5V/450mA
3.3V/400mA
Operating temperature
-20℃~70℃
-20℃~70℃
Operating humidity
20%~85%
20%~85%
How to install ConnectLife
Search for the ConnectLife application from the Google Play Store or Apple App Store
on a smart phone. Follow instructions to download and install the application. Or scan
the below QR code.
Android QR code iOS QR code
How to add appliances and delete appliances
Add appliances
1) Open the ConnectLife app.
2) Go to menu in the upper left corner → Appliances → click ‘ + ‘ in the upper right
corner or picture in the bottom → ADD NEW APPLIANCE → Air treatment →
select your appliance.
3) Follow the instructions of STEPS → NEXT → go to Settings of smartphone,
connect smartphone to the device(start with ‘HIS-’) →back to app and click
SETTING → select wireless router in the list and input the password, then waiting
for pairing.
* One appliance can only be paired by one account. If anther account wants to pair the
appliance, the appliance must be unbound by the first account.
Notice:
Before pairing your device, please make sure your device is connected to the Internet
through a wireless router. The smartphone and the appliance can not be paired through
3G/4G/5G cellular data service.
For an Air Conditioner: press Horizon Airflow button 6 times on the remote and the

7
buzzer will sound 5 times, wait until the display shows "77". Or press the "Sleep" button
8 times in the wire remote controller, you can pair after hearing the air conditioning
distribution network tone.
For a Portable Air Conditioner: click "SWING" button 6 times on the remote and the
buzzer will sound 5 times , wait until the display shows "77";
For a Window Air Conditioner: Long press "CONNECT" button on the device panel
for 5 seconds and the WiFI light will flash;
For a Dehumidifier: press "mode" and "fan" button at the same time and the buzzer
will sound 3 times, wait until the display shows "P2".
When the device completes the above operation, the wifi module will actively clear the
old cache information, which includes the SSID and PASSWORD of the wireless router
recorded in the previous network configuration.
Delete appliances
1) Open the ConnectLife app.
2) Go to menu in the upper left corner → Preferences → APPLIANCE SETTINGS
select appliance and click Unpair.
Automation Function Introduction
There are three selections in Automation:Manually triggered; Time based; Appliance
status. User can add them in ConnectLife app as below.
1) Open the ConnectLife app.
2) Go to menu in the upper left corner → Automation → ADD SCENE.
Manually triggered: User can use this function to turn on/off the scene manually. Once
user has set the actions, the user can manually trigger these actions. Manually triggered
can support multi-device operation.
Time based: It is a 7*24 Timer. User can set a start time and select days of a week, and
then set the device actions, when the set time requirement is reached, the actions will
be executed.
Appliance status: Users can set different judgment conditions for home appliances
such as power,mode,temperature(humidity),fanspeed status, when the conditions set by
the users are met, the home appliance will work according to the rules set by the users.
Notice:
* ALL Automation Function can support multi-device operation.

8
Troubleshooting
1.Cannot register to become a member
The reason:
1) The account name or password is wrong;
2) Incorrect e-mail format ;
3) Can’t receive a code from email to active account
Solution:
1) Please follow the prompt;
2) Register by correct e-mail format;
3) Please find email in your Mail garbage box or other box Or Contact local service
for help;
2.Cannot log into the account
Reason:
1) Network anomaly;
2) Account password is wrong;
3) The account isn’t active;
Solution:
1) Make sure connection is ok;
2) Input correct password;
3) Check whether the code in registered mailbox has been used;
3. Home appliance cannot be paired with the App
Reason:
1) Home appliance is not powered on;
2) Wireless communication signals are weak because the wireless router is out of range;
3) Wireless network cannot be connected to the Internet;
4) The appliance is not in “Pair” mode;
5) APP works abnormally;
6) Incorrect password of wireless router;
Solution:
1) Ensure that the device is powered;
2) Adjust location of wireless router or the appliance;
3) Contact your local Internet Service Provider (ISP);
4) Please refer to ‘Add appliances’
5) Close WiFi of smartphone and then re-open it Or Restart the smartphone ;
6) Input correct password of wireless router;
4. The home appliance is offline all the time
Reason:
1) The home appliance is not powered on;
2) Network anomaly;

9
3) The home appliance operates abnormally;
4) App communication is abnormal;
Solution:
1) Ensure that the device is powered;
2) Adjust the location of wireless router or of the appliance or Contact your local
Internet Service Provider (ISP);
3) Please unplug the unit for 10 seconds and power on again;
4) Restart the App, or dis-able and re-enable WiFi on the smartphone;
5. The appliance doesn’t respond to remote control
Reason:
1) The home appliance is not powered on;
2) The wireless router is not powered on;
3) Network anomaly;
4) App communication is abnormal;
Solution:
1) Ensure that the device is powered;
2) Ensure that the wireless router is powered;
3) Adjust location of wireless router or the appliance or Contact your local Internet
Service Provider (ISP);
4) Restart the App, or dis-able and re-enable the WiFi on the smartphone;
6. The App closes unexpectedly
Reason:
1) The smartphone app suddenly shuts down due to memory limitations of the
smartphone;
2) Due to a network error or server load, the connection is unstable;
3) Android or iOS system update;
Solution:
1) Close any unnecessary apps that may be running in the background before using
app;
2) Try to log in again at a later time;
3) Please contact the service;
Voice Control
Voice control brings better interactive experience. ConnectLife smart appliance can be
controlled by amazon alexa speaker and google home speaker.

10
A. Work with Amazon Alexa
Connect with Amazon Echo
Users must have a ConnectLife Account through the ConnectLife App. To
establish an account, please download the ConnectLife APP in the Play Store
(Android) or App Store (IOS), and create a Cloud Account for your home appliance.
Step 1: Sign-in to the ConnectLife app
Sign in to ConnectLife app using your ConnectLife account. Make sure the account is verified
and appliances which need to be controlled through Echo should be saved to your account.
Step 2: Set good device names
It’s important to use unique, distinctive names which are easy to remember and discern from your
other connected home products, such as “Bedroom portable” or “cooler”. If product names are too
generic or similar, you may have a difficult time controlling specific devices using your voice.
Try to avoid using similar sounding names or appending numbers to your appliance names. The
name like “air conditioner 1”,” air conditioner 2”, etc. may prove challenging to control. Since Alexa
uses trigger words to activate devices, stay away from command verbs in your home appliance
names.
Step 3: Go to “Skills & Games” in your Alexa app
Open the Alexa app on your phone. Tap the menu More in the bottom and select Skills & Games
from the list.
Step 4: Enter “ConnectLife” in the search box and tap the first result. Tap “Enable Skill”. Login to
your ConnectLife account and tape “Sign in”. Or Follow the on-screen instructions to complete the
linking process.
Step 5: Discover your ConnectLife Appliances
Tap “Discover Devices” on the Smart Home page. Alexa will search for appliances. Or Say,
"Discover my devices."
Step 6: Completion!
Alexa will take a few seconds to discover your home appliances. Once complete, you can find all
your appliances in Device page.
About voice commands
When using the Alexa skill, specify by name which appliance to use. There are two ways to define
it/them:
1) Use the home appliance names you have set up. They are shown in the ConnectLife app and
can be changed;

11
2) Create a group to control. Select the Devices icon . Use pre-set group names, or create
your own, and then select Next. Select the devices you want to include and then Save. To
create a group, the appliances need to be added one at a time. For more information, please
visit http://amzn.to/2965dCE.
Once the names of devices/appliances are established, you need to start with the wake-word “Alexa”,
and then tell Amazon Echo what skill you want your devices/appliances to perform.
Current Alexa Voice Commands for ConnectLife products are as bellow (Stay tuned as we continue
to add more voice commands):
For air conditioner:
ON/OFF control:
“Alexa, turn on <appliance name>”
“Alexa, power on <appliance name>”
“Alexa, turn off <appliance name>”
“Alexa, power off <appliance name>”
Temperature setting (required in cool and heat mode) :
“Alexa, set <appliance name> temperature to (25) degrees”
“Alexa, set <appliance name> to (25) degrees”
Mode setting:
“Alexa, set <appliance name> to cool”
“Alexa, set <appliance name> to heat”
Turn Up/Down the temperature a set amount:
“Alexa, increase < appliance name > by (2~4) degrees”
“Alexa, decrease < appliance name > by (2~4) degrees”
“Alexa, make < appliance name > warmer”
“Alexa, make < appliance name > cooler”
Ask the status of appliance :
“Alexa, what’s the temperature of < appliance name > ?”
“Alexa, what’s the < appliance name > set to? ”
“Alexa, what’s the mode of < appliance name > ?”
For dehumidifier:
ON/OFF control:
“Alexa, turn on <appliance name>”
“Alexa, power on <appliance name>”
“Alexa, turn off <appliance name>”
“Alexa, power off <appliance name>”

12
Humidity setting: (required in manual set mode)
“Alexa, set <appliance name> to (30,35,40,45,50,55,60,65,70,75,80) percent”
Mode setting:
“Alexa, set <appliance name> to manual set”
“Alexa, set <appliance name> to continuous”
“Alexa, set <appliance name> to auto dry”
Fan speed setting:
“Alexa, set fanspeed of <appliance name> to high/low /auto.”
Ask the status of appliance :
“Alexa, what mode is <appliance name> set to?”
“Alexa, what is the fanspeed of <appliance name>?”
“Alexa, what is the target humidity of bedroom?”
Amazon Alexa Troubleshooting
1)What’s the range of temperature setting?
For Celsius, the temperature is 16°C~32°C; For Fahrenheit, the temperature is 61°F~90°F.
2)How can the temperature be changed between Fahrenheit and Celsius?
1) Open Alexa app;
2) Tap on “More” in the bottom;
3) Select “Device settings”;
4) Find “Measurement Units”, select Celsius or Fahrenheit.
3)How do I delete or reset the connection between Amazon Echo and my home appliances?
On the Smart Home page, you can delete the connection. Please follow the below steps to delete the
connection:
1) Select the Devices icon .
2) Click “YOUR SMART HOME SKILLS”;
3) Tap your skill, click “Disable SKILL” next to the skill you want to delete. In the confirmation
box, confirm “DISABLE” or you don’t want to reset the connection, select “CANCEL” ;
Or select Devices . Select your smart home device type or select All Devices. Select your smart
home device, and then select Settings . Select Trash .
4)What should I do when Alexa is saying “Sorry, <appliance name> is not responding”?
The most likely reason is your ConnectLife product is offline. Please check your network and

13
appliance power supply. Login to the ConnectLife app and ensure your appliance is online.
5)What should I do when Alexa is saying “Sorry, I can only set the temperature between (X)
and (X) degrees”?
Alexa will follow the minimum and maximum temperatures according to the appliance’s built-in
logic. You will receive an error message in the below cases:
▪ If the minimum temperature is 16°C (61°F), and you ask Alexa to set the temperature to 15°C
(60°F) or lower;
▪ If the minimum temperature is 16°C (61°F) and current temperature is 17°C (62°F), and you ask
to decrease temperature by 2 degrees;
▪ If the maximum temperature is 32°C(90°F), and you ask Alexa to set the temperature to 33°C
(91°F) or higher;
▪ If the maximum temperature is 32°C(90°F), and current temperature is 31°C (89°F) , and you ask
increase temperature by 2 degrees.
6)What should I do when Alexa is saying “Sorry, I did not understand the request”?
Please speak slowly and clearly and also make sure the background noise as small as possible. You
can also go “Settings-Alexa Privacy” and check if the content Alexa has recorded is what you want
to say, if not, you can send more detailed feedback, this called “Voice Training”.
7)What should I do when Alexa is saying “XX is in a mode that doesn’t accept requests.
Please change its mode in the App or on the device”?
The temperature setting and query must be in cool or heat mode.
8)What should I do when Alexa is saying “Please try again, using percent for brightness, or
degrees for temperature”?
For the temperature setting, the “degrees” needs to follow the value.
9)What should I do when Alexa is saying “Sorry, I could not find any devices or groups named
<appliance name> in your account”?
This reply means Alexa might not understand the name of your appliance. Please make sure you are
using the correct appliance name and your appliance name is easy to understand (follow the content
of “Set good device names”).
10)What should I do when Alexa is saying “Discovery is complete. I couldn’t find any devices”?
If Alexa can’t discover your appliances. Follow below steps:
a) Make sure that Amazon Echo and your appliance are connected to a WiFi network. Make sure
the appliance is in your ConnectLife Life account and it’s online;
b) Make sure your “ConnectLife” skill is in “Your Smart Home Skills” , and “Enable” the skill,
input the Email and Password, and tap ”Authorize”.
11)How can I check if my appliance and my Amazon Echo are connected?
Please select the Devices icon . You will find the appliances list.
14
12)Do my home appliances and my Amazon Echo need to be on the same WiFi network?
There is no need for these two to connect in the same WiFi network, they can be on separate WiFi
networks.
Notice:
* Not all countries can support Amazon voice control. Please contact local service.
B. Work with Google Assistant
Connect with Google Assistant
Users must have a ConnectLife Account through the ConnectLife App. To
establish an account, please download the ConnectLife APP in the Play Store
(Android) or App Store (IOS), and create a Cloud Account for your home appliance.
Step 1: Sign-in to the ConnectLife app
Sign in to ConnectLife app using your ConnectLife account. Make sure the account is verified
and appliances which need to be controlled through Echo should be saved to your account.
Step 2: Connect smart home devices to your speakers
1) Open the Google Home app .
2) At the top left, tap Add Set up device Have something already set up?
3) Search ‘ConnectLife’ and Select it from the list.
4) Follow the in-app steps to complete setup.
Step 3: Manage your smart home devices
Set nicknames for devices
You can choose names to call your smart home devices.
1) Open the Google Home app .
2) Select your device Settings Name.
3) Enter a name tap Save.
Note: Nicknames are alternate ways to reference smart devices in the Google Home app.
Nicknames you've assigned to smart devices in the Google Home app are not reflected in the
device maker’s app.
Assign devices to a room
To control your devices more easily, assign them to a room in a home. You can create a new home,
or add your devices to an existing room. You can add each device to one room only.
Note: All members of the home can control all devices in the home.
Add the device to a room in your current home
15
1) Open the Google Home app .
2) Tap the device you want to add to a room Settings Room choose a room Save.
Change a device’s room
1) Open the Google Home app .
2) Tap the device Settings Room choose a room Next.
Add the device to a new room in your current home
1) Open the Google Home app .
2) Tap the device you want to add to a room Settings Room scroll to the bottom and
tap Add a custom room enter the room name tap Save.
Add the device to a room in a different home
1) Open the Google Home app .
2) Tap the device you want to add to a room Settings Home choose a home
Next choose a room Next.
Note: This action will remove the device from the room in the first home. The device will still
be linked in the first home, but it will appear under “Local devices” instead of the room name.
Create and manage rooms
Create a new room
1) Open the Google Home app .
2) At the top, select the home you want to add a room to.
3) At the top right, tap your account.
4) Tap Assistant settings Assistant Home control.
5) Tap any of your devices Room.
Note: The device you choose will be removed from its current room and added to the new one.
You can move the device back to the first room after the new room is created.
6) Scroll and tap Add new room enter a room name OK.
Rename a room
1) Open the Google Home app .
2) At the top, select the home with the room you want to rename.
3) Tap the name of the room you want to change.
4) Tap Settings Name enter a name Save.
Delete a room
1) Open the Google Home app .
2) At the top, select the home with the room you want to delete.
3) Tap the name of the room you want to delete.
4) Tap Settings Delete room Remove.
Note: Any devices in the room will be removed from the room. You can add them to a different
room.

16
Check for new devices
Sync all devices: ‘Sync my devices’
Step 4: Control your smart home devices
After you set up your devices, you can use voice commands and the Google Home app to control
them. Learn how to control your smart home devices with Google Nest and Home devices.
Step 5: Disconnect devices from the Google Home app
When you remove a device from a home:
▪It will disconnect the device from members in the home.
▪It will be unlinked from your Google Account.
▪Data associated with this device, such as video history, will be deleted. Note: Some basic device
data may remain associated with the home.
1) Open the Google Home app .
2) Tap your device Settings Unlink or Remove device Unlink or Remove.
About voice commands
Once the names of devices/appliances are established, you need to start with the wake-word “OK
Google”, and then tell Google Home what action you want the your devices/appliances to perform.
Current Google Voice Commands for Hisense Home Appliances are as bellow (Stay tuned as we
continue to add more voice commands):
For air conditioner:
ON/OFF control:
“OK Google, turn on/off <appliance name>.”
Temperature setting: (required in cool and heat mode)
“OK Google, set <appliance name> temperature to (75) degrees.”
“OK Google, set <appliance name> to (75) degrees.”
“OK Google, increase/ decrease < appliance name > by (2~4) degrees.”
Mode setting:
“OK Google, set <appliance name> to cool/heat.”
Fan speed setting:
“OK Google, set <appliance name> fan to low/medium/high.”
Ask the status of appliance :

17
“OK Google, what’s the temperature of < appliance name > ?”
“OK Google, what’s the < appliance name > set to? ”
“OK Google, what’s the fanspeed of < appliance name > ?”
“OK Google, what’s the mode of< appliance name >? ”
For dehumidifier:
ON/OFF control:
“OK Google, turn on <appliance name>.”
“OK Google, turn off <appliance name>.”
Humidity setting: (required in manual set mode)
“OK Google, set <appliance name> to (30,35,40,45,50,55,60,65,70,75,80) percent”
Mode setting:
“OK Google, set <appliance name> mode to manual set”
“OK Google, set <appliance name> mode to continuous”
“OK Google, set <appliance name> mode to auto dry”
Fan speed setting:
“OK Google, set fanspeed of <appliance name> to high/low /auto.”
Ask the status of appliance :
“OK Google, what mode is <appliance name> set to?”
“OK Google, what is the fanspeed of <appliance name>?”
“OK Google, what is the target humidity of bedroom?”
Google Assistant Troubleshooting
1) What’s the range of temperature setting?
For Fahrenheit, the temperature is 61°F~90°F; For Celsius, the temperature is 16°C~32°C.
2) What should I do when Google Home is saying “<appliance name> can't be set to that
temperature.”?
Google Home will follow the minimum and maximum temperatures according to the appliance’s
built-in logic. You will receive an error message in the below cases:
▪ If the minimum temperature is 61°F (16°C), and you ask Google Home to set the temperature to
60°F (15°C) or lower;
▪ If the minimum temperature is 61°F (16°C) and current temperature is 62°F (17°C), and you ask
Google Home to decrease temperature by 2 degrees;
▪ If the maximum temperature is 90°F (32°C), and you ask Google Home to set the temperature to
91°F (33°C) or higher;
▪ If the maximum temperature is 90°F (32°C), and current temperature is 89°F (31°C) , and you
ask Google Home to increase temperature by 2 degrees.

18
3) What should I do when Google Home is saying “That mode isn't available for the
<appliance name>.”?
For AC, the temperature setting and query must be in cool or heat mode.
4) Do my Hisense HiSmart appliances and my Google Home need to be on the same Wi-Fi
network?
There is no need for these two to connect in the same Wi-Fi network, they can be on separate Wi-Fi
networks.
Notice:
* Not all countries can support Google voice control. Please contact local service.
About Software Services
The Software services include app software update service and wireless communication module
software update service. The software service period is 5 years from the product production date.
The service period is not static,we will extend it according to the actual situation and update it in
this user manual.
The introduction of connectlife, privacy, vulnerabilities, etc. can be accessed
https://en.connectlife.io/.
Other instruction
For air conditioning products, ambient temperature sensor and ambient humidity sensor can detect
the temperature and the humidity of the space where the home appliance is located. The temperature
and humidity values are used for home appliance control to create a comfortable environment for
users.
