© 2017 Thermo Fisher Scientific Inc.
All rights reserved.
This guide shows you how to create a study, an analysis, and a workflow; and how to perform a search. For complete
details on how to use the Thermo Proteome Discoverer™ application, refer to either the Proteome Discoverer User
Guide or the Help available in the Proteome Discoverer application.
Contents
• Configuring the Search Engine Parameters
• Configuring Temporary Files Parameters
• Downloading the FASTA Files
• Creating a Study
• Creating an Analysis
• Performing the Search
•Trademarks
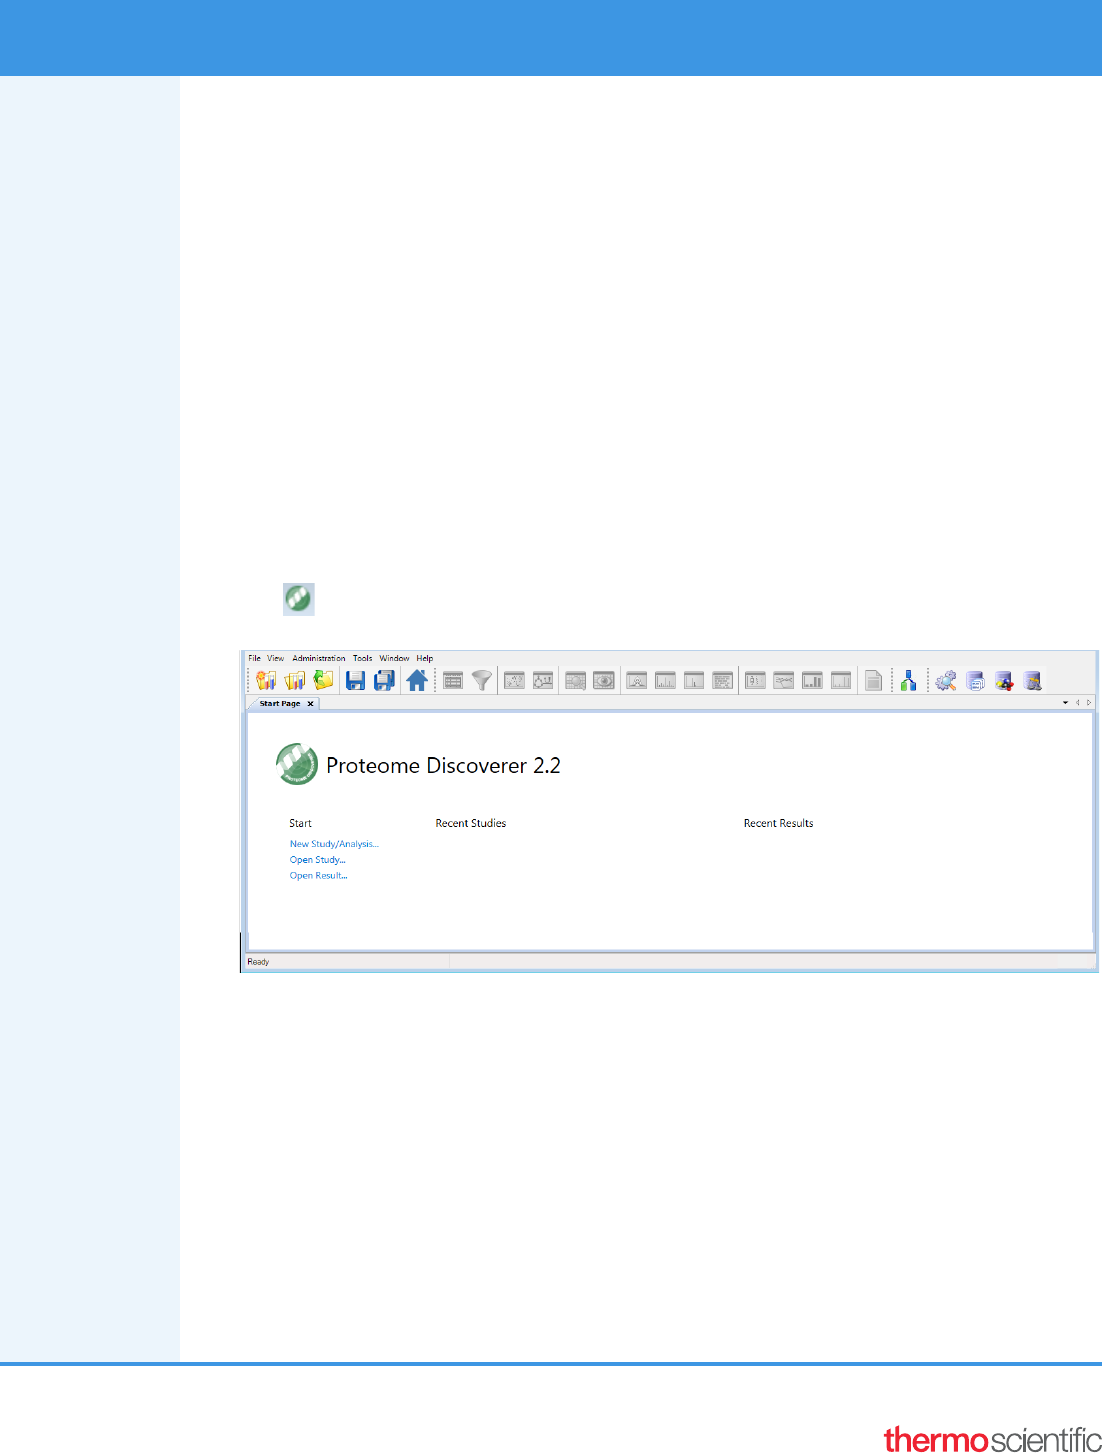
To open the Proteome Discoverer application
From the Start menu, choose Programs > Thermo Proteome Discoverer 2.2, or click the Proteome Discoverer
icon, , on your desktop.
The Proteome Discoverer Start Page opens.
Configuring
the Search
Engine
Parameters
If you use the Sequest™ HT and Mascot
SM
search engines, you can configure certain search parameters for them
before you begin your search. This guide provides an example that uses the Sequest HT search engine. For
information on setting the parameters, refer to the Proteome Discoverer User Guide.
Configuring
Temporary
Files
Parameters
The Proteome Discoverer application generates many temporary files until it creates the final result file, especially
when experiments involve label-free and precursor ion quantification. If the input raw data files and the temporary
result files generated by your experiment might be too large for the default directory on your hard drive, you can
select another drive and folder for storing the temporary files.
By default, the application stores temporary files in the C:\ProgramData\Thermo\Proteome Discoverer 2.2\Scratch
directory.
Proteome Discoverer 2.2 Quick Start
Revision A XCALI-97809

2
To select a temporary folder
1. In the main menu, choose Administration > Configuration.
2. In the left pane, under Server Settings, click Tempo r ar y File s .
3. In the New Directory box, type the drive, path, and name of the folder where you want to store the temporary
files; or browse to the location of the folder and click OK.
The new folder must be named Scratch. If it is not, the application creates a subfolder named Scratch.
4. Restart the Proteome Discoverer application.
If a problem occurs during the initialization of the temporary folder, the application displays an error message in
the Temporary Files pane, as shown in the next figure. When you use an invalid Scratch folder as the current
directory, job processing fails.
Downloading
the FASTA
Files
Before conducting a search with the Sequest HT search engine, you must add a FASTA file to the Proteome
Discoverer application.
Before conducting a search with the Mascot search engine, you must add a FASTA file to the server that is running
Mascot.
You can download FASTA files from two sources:
• Download a controlled protein database directly from the ProteinCenter™ database service and add it to a
FASTA file. These controlled databases provide the latest information about proteins, peptides, and genes. They
also give you the ability to select proteins of a specified taxonomy to download and use as a FASTA file.
• Add a FASTA file that you download from other sources onto your hard drive and then register it.
To download a FASTA file from ProteinCenter
1. Configure the Proteome Discoverer application for protein annotation only if you need to use a server other than
the default server. For instructions, refer to the Proteome Discoverer User Guide.
2. Choose Administration > Maintain FASTA Files, or click the Maintain FASTA Files icon, .
The Administration page appears with the FASTA Files view.
3. Click .
The Proteome Discoverer application updates the available databases in the job queue.
IMPORTANT Ensure that the new temporary folder location is accessible and that you have write
permission. Read/write performance must be high to prevent data processing from slowing down. Use local
drives for storage, as storing on USB drives or network shares can cause slow performance.

3
4. Click FASTA Files under Content Management in the Configuration view to return to the FASTA Files view.
The Download icon on the FASTA Files view becomes available.
5. Click to open the Download from ProteinCenter dialog box.
6. In the Taxonomy ID box, do the following:
a. Type the taxonomy identification number of the appropriate organism-specific sequence database in
ProteinCenter.
The taxonomy identification number is a unique number identifying a biological species, a special
subspecies, or a bacterial strain. You can find the organism’s taxonomy identification number on the
UniProt™ website (http://www.uniprot.org/taxonomy) or at the NCBI.
i. In the box to the right of the Taxonomy menu on the UniProt website, type the name of the organism
that you are interested in, for example, Baker’s yeast.
ii. Click the Search icon, .
iii. (Optional) Under the Taxon heading, click the name of the subspecies that you are interested in, for
example, Saccharomyces cerevisiae.
The taxonomy identification number appears on the Taxon Identifier line, as shown in this figure.
b. (Optional) To include data for a subspecies or subcategory of the selected species in the downloaded
database, select the Include All Subcategories check box in the Download from ProteinCenter dialog box.
c. From the Database list in the Download from ProteinCenter dialog box, select the name of the original
source database to download the proteins from.
The default is SwissProt.
Taxonomy
identifier
number

4
This figure shows the completed Download from ProteinCenter dialog box.
d. Click Import.
The application now displays the download as a job that is running in the job queue.
7. When the job queue displays “Completed” in the Execution State column, click FASTA Files under Content
Management in the Configuration view to return to the FASTA Files view.
The downloaded database appears in the FASTA Files view. It might take several minutes to appear.
8. If you do not see the downloaded database after a few minutes, click .
In this figure, the Saccharomyces cerevisiae (4932) species database has been downloaded from the SwissProt
database.
To download a FASTA file from sources other than ProteinCenter
1. Choose Administration > Maintain FASTA Files, or click the Maintain FASTA Files icon, .
The Administration page appears with the FASTA Files view.
2. Click .
3. In the Open dialog box, browse to and select the FASTA file that you want to process, and then click Open.
The FASTA file that you selected appears as a job in the job queue. To cancel the addition of this file,
click .
When you see “Completed” in the Execution State column, the database has finished downloading.
4. To add another FASTA file, wait until the Execution State column indicates that the addition of the FASTA file
is completed, click FASTA Files in the left pane of the Administration page under Content Management, and
then click Add.
The amount of time required to import a FASTA file depends on the file size. When the application finishes
importing a FASTA file, it displays “Available” in the Status column. The FASTA file is now available to use for a
protein or peptide search with the Proteome Discoverer application.
Creating a
Study
For illustrative purposes, this section uses an example study called Bailey_2014, which uses a publicly available data
set from the Chorus Project (http://chorusproject.org)
1
. This project resides under the Elution Order Algorithm
project and includes data about the following:
• Two sets of biological replicates
Four mice (replicates) were sacrificed and dissected. Individual organs of interest from them were homogenized,
and the proteins were extracted from them and labeled. Then the differentially labeled organ-specific proteomes
were mixed together if they came from the same mouse. Each pooled mouse sample was then run twice, using
different acquisition method parameters.
For information on replicates, refer to the Proteome Discoverer User Guide.
Database downloaded
from ProteinCenter
1
Bailey, D.J.; McDevitt, M.T.; Westphall, M.S.; Pagliarini, D. J; Coon, J. J. Intelligent data acquisition blends targeted and discovery methods.
Journal of Proteome Research, 2014, 13 (4): 2152–2161.

5
• The custom TMT™ 8plex quantification method
• Label switching
• One biological factor: different tissues
• One technical factor: different acquisition methods
The following figure shows how different tissue samples are distributed over four biological mouse replicates.
To create a study
1. On the Start Page, click New Study/Analysis, choose File > New Study/Analysis, or click the Create New
Study/Analysis icon, .
The New Study and Analysis dialog box opens.
In this example, you specify only the name of the study and a root directory where you save the study.
Optionally, you can specify a processing workflow, a consensus workflow, and a quantification method.
2. In the Study Name box, specify the mandatory study name.
The example uses the study name of Bailey_2014.
The application generates a default study name by searching for the common part of the file names when you
add multiple files at once and using this part for the name of the new study.
3. In the Study Root Directory box, specify the folder where you will store the study folder:
a. Click the Browse button (...) to open the Select Folder dialog box.
b. Specify the folder and click Select Folder.
4. Click OK.

6
The application creates a new study folder in the folder that you specified as the root directory and opens a new
page with the study name (Study: Bailey_2014 in the example). It appends .pdStudy to the study file name.
On the Study Definition page, you add a description of your study, select the quantification method or methods to
use in the study, and set up the new factors that describe and distinguish your samples.
See these topics:
• Adding a Description
• Adding a Quantification Method to the Study
• Adding the Study Factors
• Adding the Input Files
• Specifying the Quantification Method for Multiple Input Files
• Setting the Factor Values for the Samples
• Setting Values for Multiple Samples at the Same Time
• Saving a Study
Adding a
Description
(Optional) Add a description of the study by typing it in the Study Description area of the Study Definition page.
Adding a
Quantification
Method to the
Study
A quantification method contains the specification of the available quantification channels. The Proteome
Discoverer application currently supports precursor ion-based quantification methods and MS/MS reporter
ion-based quantification methods. It also supports peak area calculation detection. You can specify a quantification
method for each of the input files.
The example used in this guide uses a custom TMT 8plex method, which you must create.
To create a quantification method
1. Choose Administration > Maintain Quantification Methods, or click the Maintain Quantification Methods
icon, .
The Quantification Methods view opens. It lists all of the available methods for both precursor ion and reporter
ion quantification.
2. Click .

7
The Create New Quantification Method dialog box opens.
3. Select the From Existing Method option, and select TMT 10plex from the adjacent list.
4. Click Create.
The Quantification Method Editor opens.
5. In the Active column to the right, clear the check boxes for the following two channels:
• 128N
• 130N
6. Click OK.
7. In the Save Quantification Method dialog box, type the name of the quantification method that you want to
create: TMT 8plex.

8
The application adds the TMT 8plex method to the Quantification Methods view.
To select the quantification method to use in the study
1. Click the Study Definition tab in the study if it is not already selected.
2. Select the check box corresponding to the quantification method or methods that you want to use.
In this example, the samples are labeled with the custom TMT 8plex quantification method, so you would select
the TMT 8plex check box, as shown.
If the Quantification Methods pane does not include the TMT 8plex method, choose File > Save All, and close
and reopen the study.
3. If you selected more than one quantification method in step 2, after you add the input files, specify the
quantification method for each input file. For instructions, refer to the Proteome Discoverer User Guide.
Adding the
Study Factors
In this step, you add the study factors that you want to use for your samples.
A factor is a single biological or technical parameter that you control, for example, genotype, diet, environmental
stimulus, age, column length, spray voltage, or collision energy.
The experiment in the example dataset was performed by using eight different tissues and two different acquisition
methods, so you would add two categorical factors, “Acquisition” and “Tissue,” to the study.
New custom TMT 8plex method in
the Quantification Methods view

9
To add categorical study factors
1. Add the first categorical (non-numeric) factor (Acquisition in the example), as follows:
a. In the Study Factors area of the Study Definition page, choose Add > Categorical Factor.
The categorical factor dialog box appears, and [new factor] is highlighted.
b. Type a name over [new factor] for the new categorical factor, for example, Acquisition. (See the next figure.)
c. In the box to the left of the Add button, type the name of the first value and click Add.
In this example, the value is the acquisition method, and the first acquisition method is intelligent data
acquisition (IDA).
d. In the same box, type the name of the second acquisition method and click Add.
The completed categorical factor dialog box follows. In this example, the second acquisition method is
data-dependent acquisition (DDA).
e. Click Apply in the categorical factor dialog box.
Confirm that the Study Definition page resembles this figure.
Note If the full categorical box becomes compressed, click Edit to restore it to its original size.
Type the categorical factor name.
Type the name of the value.

10
2. Add the second categorical factor (Tissue in the example), as follows:
a. In the Study Factors area of the Study Definition page, choose Add > Categorical Factor.
The categorical factor dialog box appears, and [new factor] is highlighted.
b. Type a new name over [new factor], for example, Tissue.
c. In the box to the left of the Add button, type the name of the first type of tissue and click Add.
In this example, the first type of tissue is Cerebellum.
d. In the same box, type the name of any additional types of tissue and click Add after each one.
The example adds the following types of tissue to the study:
e. Click Apply in the Tissue dialog box.
Confirm that the Study Definition page resembles this figure.
Adding the
Input Files
Add the input files from the example data set to your study. (You can add input files to the study at any point.) For
the types of input files supported, refer to the Proteome Discoverer User Guide. You can add individual input files,
multiple unrelated input files, or fractions. To add fractions, also refer to the Proteome Discoverer User Guide.
To add a single input file or multiple unrelated input files
Drag the input file or files from Windows Explorer to the Input Files page.
–or–
1. Click .
2. In the Add Files dialog box, browse to the location of the input files and select them.
3. Click Open.
• Cerebellum
• Cerebrum
•Heart
•Kidney
•Liver
• Lung
• Muscle
• Spleen

11
The input files appear on the Input Files page (see the next figure). Each file on the page receives a unique
identifier: F1, F2, …, Fn. The Proteome Discoverer application adds each file as a single study file.
Specifying the
Quantification
Method for
Multiple Input
Files
In this step, you specify the quantification method that was used for each of the files. In the example data set, all
samples are labeled with TMT 8plex.
To set the quantification method for each of the input files
1. Click the Input Files tab if it is not already selected.
2. In each sample row, click the Quan Method column and select the quantification method (in this example,
TMT 8plex) from the list.
Setting the
Factor Values
for the Samples
When you select a quantification method for a file, the application generates a sample placeholder for each
quantification channel.
Each sample is associated with a sample type. Currently, only quantification uses sample types. The application
calculates quantification ratios from samples designated as the “sample” or “control” sample type.
• Control sample type: A sample used as a reference sample in a quantification experiment.
• Sample type: A sample not used as a reference sample.
• Blank: A sample consisting only of solvent and no sample mixture.
• Standard: A sample consisting of a standard quality-control peptide mixture.
The Sample Type column on the Samples page of the study displays the sample type of each sample. The default
sample type is Sample. If a file has samples for different quantification channels, mark one of the samples Control.
Marking a sample as a control affects the scaling of quantification values. In this example, the control is the channel
that was used to label the mouse liver tissues.
Each sample is associated with a quantification channel shown in the Quan Channel column and with values for
each of the factors that you specified for your study. Previously, you specified a factor for the acquisition method
used and a factor for the tissue that was extracted and labeled. You now set the correct factor values for each of the
samples in the study.
Each sample has an automatically generated sample name composed of the raw data file name and the appended
name of the quantification channel. You can change this name, but the name must be unique among all samples in
the study.

12
To view the samples
On the Input Files page, click the gray arrow to the left of a sample to display its constituent file entries.
A hierarchical view opens, showing the samples contained in a raw data file. For each of the raw data files in the
following example, there are eight samples for the eight quantification channels of the TMT 8plex method.
To set the factor values for the samples
1. Click the Input Files tab if it is not already selected.
2. Click the gray arrow next to the first sample to expand the information about the sample.
3. For the first factor (in the example, Acquisition), set the value for each sample in each raw data file by selecting
the down arrow in the factor column and then selecting the value from the list.
In the example, select IDA in the Acquisition column (see the next figure).
4. For the second factor (in the example, Tissue), set the value for each sample in each raw data file by selecting the
down arrow in the factor column and then selecting the value from the list.
This figure shows the process for the second factor, Tissue.
Click the gray
arrow to expand a
single file entry.
Click the red arrow
to close a file entry.

13
5. Set the same values in the Acquisition and the Tissue columns for the rest of the samples.
6. After you finish setting the factor values for each sample, confirm that the Input Files page resembles the next
figure. (In the example data set, you must set 128 factor values for eight files, eight samples each, and with two
factors each.)
7. Click the red down arrow next to each sample to close the file entry.
The Sample Information column summarizes the information about the samples contained in a file.
8. (Optional) Click the Samples tab.
Note For instructions on changing the values for factors or other study variables for multiple samples at
once, refer to the Proteome Discoverer User Guide.

14
The Samples page displays the same sample information as the Input Files page.
Setting Values
for Multiple
Samples at the
Same Time
On the Input Files Page
Highly multiplexed data are results obtained from processing several samples from one raw data file mixed and
analyzed together in one LC/MS analysis, where isotopic and isobaric labels were used in quantification to
distinguish the contribution of the individual samples. If you have highly multiplexed data, several files and samples
with many study variables to set (sample type, quantification channel, study factors), or both, you can set values for
study variables for multiple samples at once. You can use either the mouse or the keyboard to set these values on the
Input Files page. For information on these two methods, refer to the Proteome Discoverer User Guide.
On the Samples Page
Use the following procedure to change values for multiple samples on the Samples page.
To set values for multiple samples at the same time on the Samples page
1. Click the Samples tab.
2. If necessary, click the Contains icon, , in the Acquisition column.

15
3. In the box next to the icon, type the name of the filter.
For example, suppose you want to change the acquisition method for a number of samples from IDA to DDA.
To display only samples that contain “DDA,” type dda in the filter box, as shown in this figure.
4. Select the first cell to change, and then drag the cursor to select the remaining cells that you want to change.
5. Press the F2 key to enter multi-cell editing mode.
6. Select the new value from the list in the last cell that you selected.
7. Press the RETURN or ENTER key, or click elsewhere in the application.
8. To return the samples to their unfiltered state, select the Clear All Filters icon, .
Saving a Study You can save a study manually or automatically.
You can save a study manually at any time. An asterisk (*) in the tab after the study name indicates a change in the
study that you must save.
You can set an option to have the application save studies automatically when you click . This option also
saves the results generated in the study. It saves the analysis containing the workflow, but when you close the study
and reopen it, you must access the analysis by clicking the Analysis Results tab and then doing one of the following:
• Click and choose All Analysis Steps (to open both the processing and consensus workflow) or
Last Consensus Step (to open just the consensus workflow).
–or–
• Click .
To save a study manually
Choose File > Save.
The application saves the study in the study_name.pdStudy file in the study directory.
To save a study automatically
1. Before you click , choose Tools > Options.
2. In the Options dialog box, select Study Options in the left pane.
3. Select the Auto Save When Starting Analysis check box.
4. Click OK.
Type dda in the filter box
next to the Contains icon.
Note Studies and analyses in the Proteome Discoverer application are separate, so you must save them
separately. Saving a study does not save an analysis, and saving an analysis does not save a study.

16
Creating an
Analysis
The next general step in performing a search is to create an analysis.
To create an analysis
On the Study: Study_name page, click .
An Analysis window opens on the right side of the Study: Study_name page.
An Analysis window contains the following items:
• A Consensus Step box, which represents the consensus workflow step of the data processing.
• A Processing Step box, which represents the processing workflow step of the data processing.
• A Child Steps bar, which contains an Add button to add another Processing Step box. Multiple Processing Step
boxes are useful when you want to process the same data in different ways—for example, by using different
nodes or different node settings.
In addition, two new tabs appear on the Study: Study_name page: the Workflows tab and the Grouping &
Quantification tab.
If an existing study is open that includes an Analysis window with an existing consensus workflow, processing
workflow, or both, and you want to open a new analysis, close the Analysis window and open a new Analysis
window. To close the window, click X in the upper right corner.
Follow these topics:
• Adding Input Files to an Analysis
• Creating the Workflows
• Saving an Analysis
• Grouping Samples and Ratios
• Performing a Search in Individual Mode
• Performing a Search in Batch Mode
Analysis window containing a
Consensus Step box and a
Processing Step box

17
Adding Input
Files to an
Analysis
To add the input files to an analysis
Select and drag the files from the Input Files page to the Input Files area of the Processing Step box in the
Analysis window.
The input files are listed in the Input Files area of the Processing Step box.
Creating the
Workflows
The next step in creating an analysis is to create the workflows to use for the processing and consensus steps. For
detailed information on creating workflows, refer to the Proteome Discoverer User Guide.
To create the processing workflow
1. Click the Workf low s tab. to open the Workflow Editor.
2. Click the Show Workflow icon, , in the title bar of the Processing Step box to indicate that you want to
create a processing workflow.
The Workflow Nodes pane lists the nodes available for use in the processing workflow. You might need to click
the Workflow Nodes tab to see this pane.
3. Create the appropriate processing workflow in the Workflow Tree pane of the Workflow Editor.
• To create a processing workflow for reporter ion quantification, drag these nodes to the Workflow Tree pane:
Spectrum Files node
Spectrum Selector node
A search engine node (for example, Sequest HT or Mascot)
Reporter Ions Quantifier node
PSM Validator node, Target Decoy PSM Validator node, or Percolator node
• To create a processing workflow for precursor ion quantification, drag these nodes to the Workflow Tree
pane:
Spectrum Files node
Spectrum Selector node
A search engine node (for example, Mascot or Sequest HT)
Minora Feature Detector node
Fixed Value PSM Validator node, Target Decoy PSM Validator node, or Percolator node
• To create a processing workflow for label-free quantification, drag these nodes to the Workflow Tree pane:
Spectrum Files RC node
Spectrum Selector node
Note You can remove a file from the Input Files area of the Processing Step box by clicking the X to the left
of the file name.
Note The Workflows tab does not appear until you add or open an analysis.
18
Minora Feature Detector node
A search engine node (for example, Mascot or Sequest HT)
Fixed Value PSM Validator node, Target Decoy PSM Validator node, or Percolator node
4. Connect the nodes together, as needed.
In the example, the only connections that you must make are from the Spectrum Selector node to the Sequest
HT node to the Percolator node.
5. Set the appropriate parameters for each node as follows:
a. Click the node.
b. (Optional) Click Show Advanced Parameters in the Parameters pane to the left to display all parameters.
c. Set the appropriate parameters.
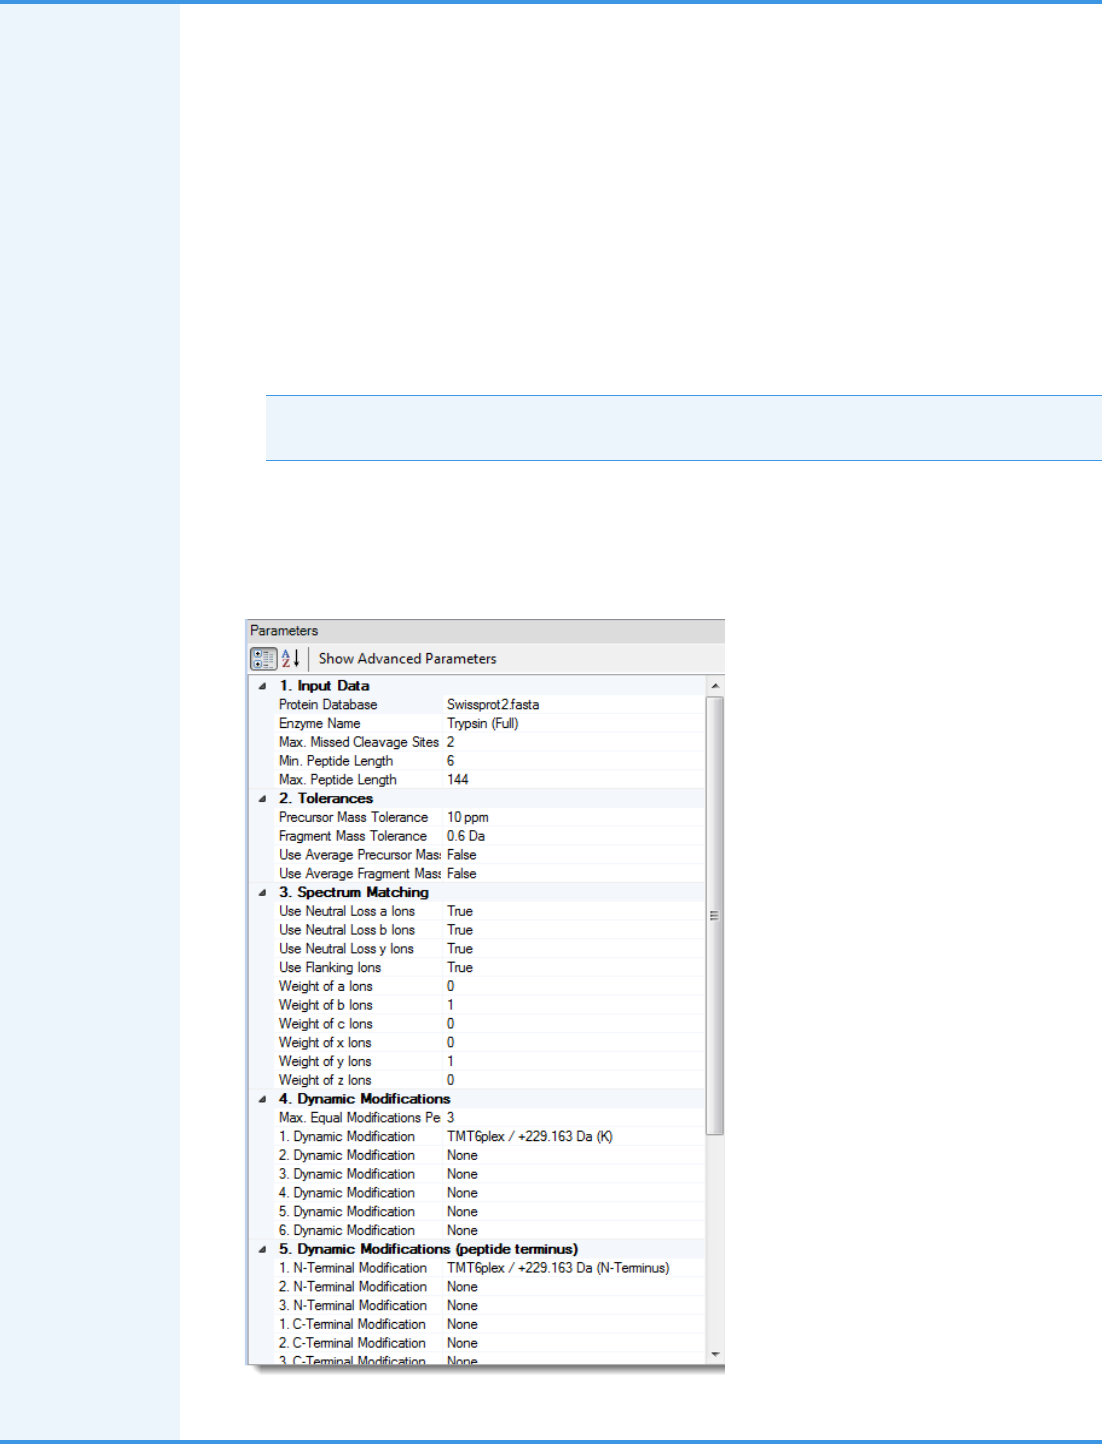
6. For this example, set the parameters of the Sequest HT node as follows:
• Set the Protein Database parameter to an appropriate database, for example, SwissProt.
• Set the N-Terminal Modification parameter under Dynamic Modifications (Peptide Terminus), for example,
TMT 6plex/+229.163 Da.
• Set a Dynamic Modification parameter, for example, TMT6plex /+229.163 Da (K).
• Set a Static Modification parameter, for example, Carbamidomethyl/+57.021 Da (C).
This figure shows the parameter settings.
Note You must download this database before conducting a search with Sequest HT. For instructions,
see “Downloading the FASTA Files” on page 2.

19
The following figures show three examples of the processing workflow—for reporter ion quantification,
precursor ion quantification, and label-free quantification.
Reporter ion quantification
Precursor ion quantification
Label-free quantification
20
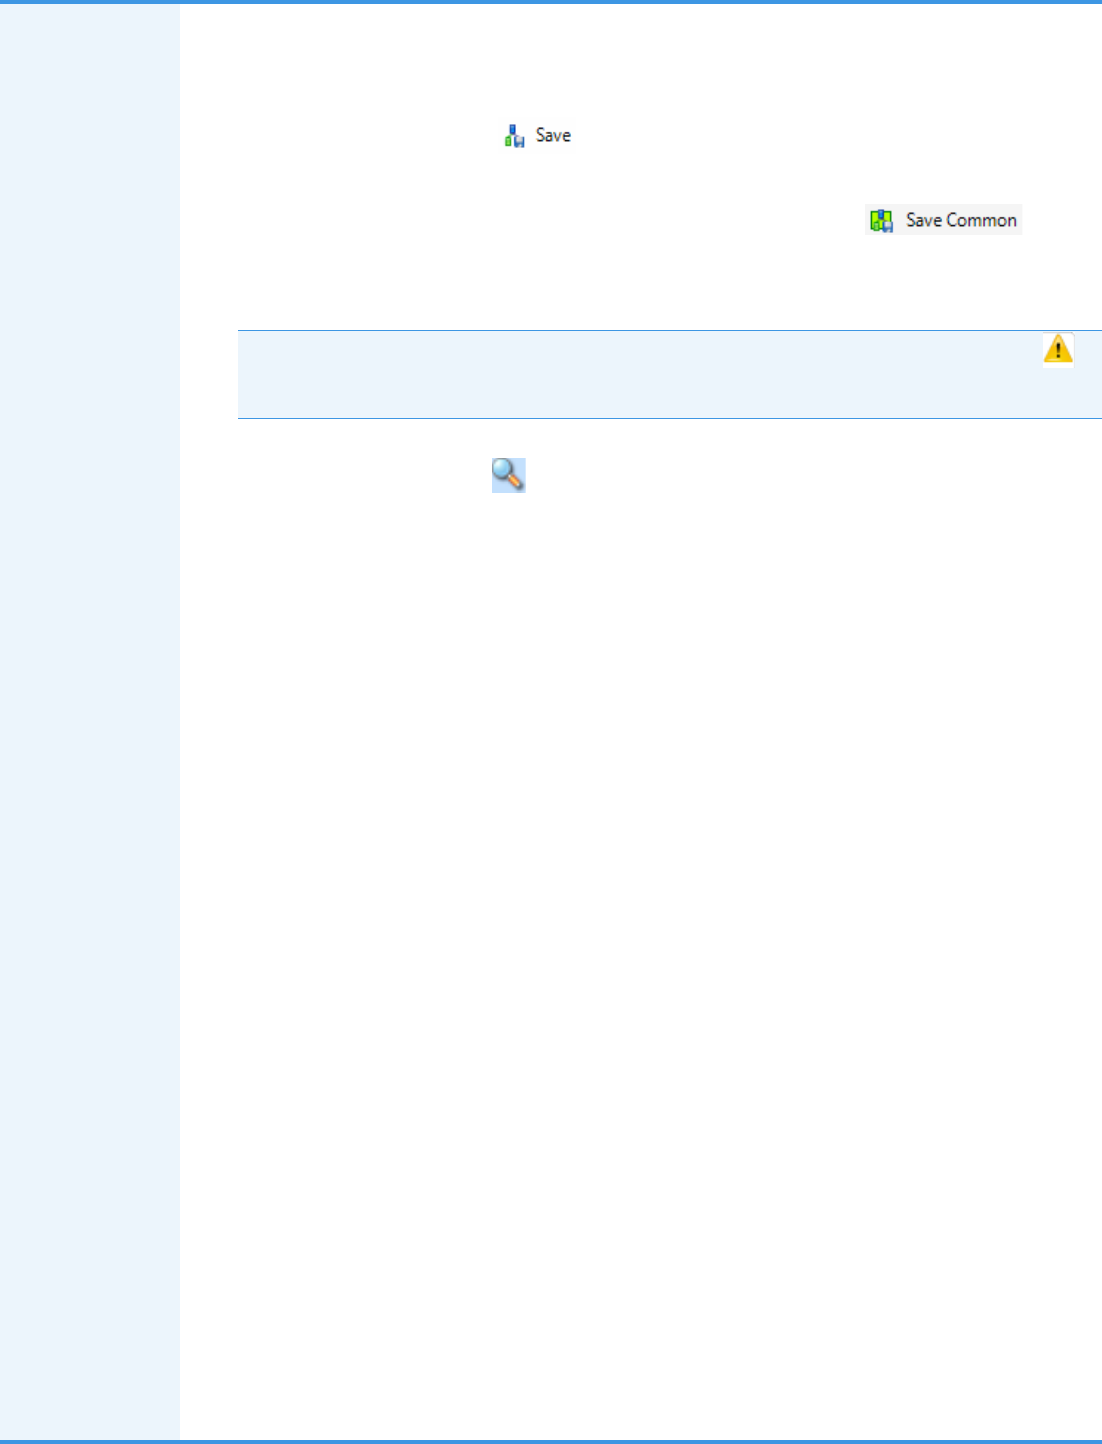
7. (Optional) Save the processing workflow:
a. In the Workflow box above the Workflow Tree pane, type a name for the processing workflow.
b. (Optional) In the Description box, type a brief description of the processing workflow.
c. In the Workflow Editor, click .
d. In the Save Workflow dialog box, do the following:
i. Select the file to save the workflow in, or type a file name in the File Name box. You can save the
workflow in the study folder or in the Common Templates folder (click , in this
case), or in a separate folder of workflows.
ii. Click Save.
The application saves the workflow in the file_name.pdProcessingWF file.
To create the consensus workflow
1. Click the Show Workflow icon, , in the title bar of the Consensus Step box.
The Workflow Nodes pane lists the nodes available for use in the consensus workflow. You might need to click
the Workflow Nodes tab to see this pane.
2. Create the appropriate consensus workflow in the Workflow Tree pane of the Workflow Editor.
• To create a consensus workflow for reporter ion quantification, drag these nodes to the Workflow Tree pane:
• To create a consensus workflow for precursor ion quantification, drag these nodes to the Workflow Tree
pane:
• To create a consensus workflow for label-free quantification, drag these nodes to the Workflow Tree pane:
The example workflow also includes the following nodes in the Post-Processing Nodes area:
• Result Statistics node
• Data Distributions node
3. Connect the nodes together, as needed.
4. Set the appropriate parameters for each node.
Note A yellow triangle with an exclamation mark in the upper right corner of the Processing Step box ( )
indicates that either the workflow or the node parameters are not set up correctly. Point to the yellow triangle
to display information about what is missing.
MSF Files node
PSM Grouper node
Peptide Validator node
Peptide and Protein Filter node
Protein Scorer node
Protein Grouping node
Reporter Ions Quantifier node
MSF Files node
PSM Grouper node
Peptide Validator node
Peptide and Protein Filter node
Protein Scorer node
Protein Grouping node
Feature Mapper node
Precursor Ions Quantifier node
MSF Files node
PSM Grouper node
Peptide Validator node
Peptide And Protein Filter node
Protein Scorer node
Protein Grouping node
Feature Mapper node
Precursor Ions Quantifier node

21
The following figures show three examples of the consensus workflow—for reporter ion quantification,
precursor ion quantification, and label-free quantification.
Reporter ion quantification Precursor ion quantification
Label-free quantification

22
The next figure shows an example of the consensus workflow that includes the Result Statistics node and the
Data Distributions node.
5. (Optional) Save the consensus workflow:
a. In the Workflow box, type a name for the consensus workflow.
b. (Optional) In the Description box, type a brief description of the consensus workflow.
c. In the Workflow Editor, click .
d. In the Save Workflow dialog box, do the following:
i. Browse to the study folder, and select the file to save the workflow in, or type a file name in the File
Name box.
ii. In the Save As Type box, select Consensus Workflow File (*.pdConsensusWF).
iii. Click Save.
The application saves the workflow in a file_name.pdConsensusWF file.
Saving an
Analysis
To use an analysis as a template for later reuse, you can save it as a .pdAnalysis template file.
To save an analysis as a template for later reuse
1. In the upper right corner of the Analysis window, click .
2. In the Save Analysis Template dialog box, browse to the location where you want to store the template.
3. In the File Name box, browse to the study folder, and type or select the template file name.
4. In the Save as Type box, select Analysis Templates (*pdAnalysis).
5. Click Save.
The application saves the analysis in a file with a .pdAnalysis extension.
The .pdAnalysis template file saves the processing and consensus workflows. It saves neither the input files nor
the study variables that were selected to group the samples and quantification ratios.
Note A yellow triangle with an exclamation mark in the upper right corner of the Consensus Step box ( )
indicates that either the workflow or the node parameters are not set up correctly. Point to the yellow
triangle to display information about what is missing.
Note Studies and analyses in the Proteome Discoverer application are separate, so you must save them
separately. Saving a study does not save an analysis, and saving an analysis does not save a study.

23
Grouping
Samples and
Ratios
After you set up the workflow to use for the analysis, you can specify what ratios to report for the quantification and
how to group your samples with respect to the specified factor values. This topic uses an example for reporter ion
quantification. For equivalent information about precursor ion quantification and label-free quantification, refer to
the Proteome Discoverer User Guide.
To open the Grouping & Quantification page
1. On the Study: Study_name page, click the Grouping & Quantification tab to open the corresponding page.
For a description of the areas on this page, refer to the Proteome Discoverer User Guide.
To generate custom quantification ratios semiautomatically
1. In the Study Variables area, select the check box of the study factors, or variables, that you want to use to group
your samples and from which you want to draw the numerators and denominators of the ratios. For the example
in this guide, select the Time (days) check box to indicate that the samples and quantification ratios are grouped
by time point.
After you select the study factors, the Generated Sample Groups area displays the generated sample groups.
When performing the quantification, the application calculates abundance values for each sample and averages
the abundance values of all samples in a sample group.
The order of the study factors is relevant for the semiautomatic generation of ratios.
2. (Optional) To change the placement of a study factor in the list, do the following:
a. In the Study Variables area, select the check box for a study factor.
A placement handle in the form of a green rectangle appears to the left of the selected check box.
Note The Grouping & Quantification tab does not appear until you add input files that are associated with
a single quantification method.
Variable
placement
handle

24
b. Point to the placement handle.
White up and down arrows now appear on the handle.
c. Drag the cursor up or down to move the variable to its new place in the list of variables, or click the up or
down arrow to move the study factor.
3. (Optional) To sort the order of the study factors in the Bulk Ratio Generation area and the order of the sample
groups in the Generated Sample Groups area, click one of the following to the right of each study factor in the
Study Variables area:
• For descending order, click the Sort Descending icon, .
• For ascending order, click the Sort Ascending icon, .
• To leave these items unsorted, click the No Sorting icon, .
4. In the Bulk Ratio Generation area, select the check box for the type of tissue to use in the denominator of the
ratio. For the example, select Time (days): 5.
The Bulk Ratio Generation area displays a list of the denominator values for this type of study factor. If you
select only one study factor, it displays a list of the available denominator values for this factor.
If you select multiple study factors, the Bulk Ratio Generation area displays the denominator values available for
each factor.
5. (Optional) To select the same study factor for all the denominators, do the following:
a. Point to a denominator value.
An icon containing four check boxes in a square appears on the left side of that item, as shown in the next
figure.
b. Click the icon.
The application selects the same study factor for all denominators.
6. Click Add Ratios.
The application generates all possible ratios against the selected denominator values and adds them to the
Generated Ratios area.
Icon for multiple
selections of the
denominator

25
This figure shows the generated quantification ratios and ratio groups in the Generate Ratios area after selecting
Time (days) as the study variable to group by and 5 as the denominator to use.
To generate custom quantification ratios manually
1. On the Study: Study_name page, click the Grouping & Quantification tab.
The Grouping & Quantification tab does not appear until you add or open an analysis.
2. In the Study Variables area, select the check box of the study factors that you want to use to group your samples
and from which you want to draw the numerators and denominators of the ratios. For the example, select the
Time (days) check box to indicate that the samples and quantification ratios are grouped by time point.
3. In the Manual Ratio Generation area, select the numerator value from the Numerator list, for example, 7.
4. Select the denominator value from the Denominator list, for example, 33.
5. Click Add Ratio.
The generated ratio appears in the Generated Ratios area, as shown in this figure.

26
To generate custom quantification ratios based on channels
1. In the Study Variables area, select the Quan Channel check box.
2. To generate quantification ratios semiautomatically, follow the procedure in “To generate custom quantification
ratios semiautomatically” on page 23.
–or–
To generate quantification ratios manually, follow the procedure in “To generate custom quantification ratios
manually” on page 25.
This figure shows the ratios generated in the Generated Ratios area.
To save the settings on the Grouping & Quantification page
1. Click the Analysis Results tab of the study.
2. Select the result on the Analysis Results page, and choose either Reprocess > All Analysis Steps or Reprocess >
Last Consensus Step.
If you select Use Results to Make New (Multi) Consensus, the Grouping and Quantification page no longer
displays ratios.
Performing
the Search
You can perform a search in individual mode or batch mode.
Performing a
Search in
Individual
Mode
To perform a search in individual mode
In the upper right corner of the Analysis window, click .
The application validates the analysis setup before it starts processing and, if it finds errors, issues error or
warning messages in the Analysis Validation Issues box (see the next figure). For example, it might issue an error
message if not all the input files have the same quantification method. Or, it might issue a warning message if
you added several input files with quantification but did not set any of the study variables to group your samples
and quantification ratios.
Note The application does not save the settings on the Grouping & Quantification page with a study or
with an analysis. Instead, it associates the settings with search results, so you must load them from data sets
that have already been processed within the study or recreate them from the beginning.

27
You can ignore warnings that are marked by an exclamation mark inside a yellow triangle. Because warnings are
only hints that the analysis might not be set up correctly, you can click Ignore in the Analysis Validation Issues
box. This figure shows examples of warnings.
You cannot ignore validation errors, which are marked with a red exclamation mark (see the next figure). You
must resolve them.
The validation cannot detect every potential problem but can check for the specific problems or inconsistencies
listed in the Proteome Discoverer User Guide.
After the application validates the analysis, it begins processing it. The job queue opens so that you can monitor
the progress of the job.
The job is done when “Completed” appears in the Execution State column for the processing and consensus
workflows.
The application uses the name of the first raw data file or sample as the default name of the results file as a whole.
Performing a
Search in
Batch Mode
You might want to process each file in a set of files with the same processing workflow and the same consensus
workflow. Processing a set of files in this way is called batch mode. Batch mode is only available if there is more than
one input file and if the analysis has just one processing step—that is, if there is just one Processing box in the
Analysis window. For information on performing a search in bath mode, refer to the Proteome Discoverer User Guide.
For information on interpreting the results of the search, refer to the Proteome Discoverer User Guide.
Trademarks The following are trademarks or registered trademarks or service marks in the United States: Proteome Discoverer
and ProteinCenter are trademarks of Thermo Fisher Scientific Inc. Mascot is a registered service mark of Matrix
Science Ltd. Sequest is a registered trademark of the University of Washington. Uniprot is a registered trademark of
European Molecular Biology Laboratory Incorporated Association.
TMT is a registered trademark of Proteome Sciences plc in the United Kingdom.
All other trademarks are the property of Thermo Fisher Scientific Inc. and its subsidiaries.
