
1 | Page Last Updated December 2020
Request, Modify, and Cancel Time Off
The following describes the process of submitting a time off request, modifying an approved
time off request, and cancelling an in progress time off request in Workday.
Request Time Off – Submitting a new time off request.
Modify Time Off – Deleting, correcting, or updating an already approved time off
request.
Note: To change the date(s) of an existing time off request you must first modify the
existing time off request to delete it. You can then initiate a new time off request for the
new date(s). This also applies to changing the type of time off used on an existing time
off request.
Cancel Time Off – Cancelling a time off request or correction that has not been
approved yet.
If you encounter any errors during this process contact Workday Customer Care (973-655-
5000 option 3 or [email protected]).
Workflow Steps
1) Employee submits a time off request or time off request correction
2) Manager reviews the request and approves, sends back, or denies
Note: There is no approval process when cancelling an in progress request.
Request Time Off
1) From your Workday homepage, click on the Time Off and Leave worklet.
2) Click on the button labelled Request Time Off.

2 | Page
3) A calendar view of the current month will appear. See below for a full-page view of the
time off request calendar page.
You can navigate between months by clicking the backward and forward arrows located
at the top left of the calendar.
You can navigate between the months and years by clicking the downward facing arrow
next to the month and year.

3 | Page
You can see your time off accrual balances on the left side of the page. You can view
your balances as of a specific date by change the date in the Balances as of prompt.
4) Select one or multiple days on the calendar. A blue circle will appear on each day to
indicate that it has been selected.
5) Click on the Request Time Off button located in the bottom left corner of the page.

4 | Page
6) Select the time off type for your request in the Type menu prompt. You can only select
one time off type for each request.
7) The Daily Quantity will automatically fill in based on your employee type. You can
adjust the daily quantity if you are requesting time off for a partial day.
Note: During the summer months you may need to override the hours amount based on
the revised summer schedule. If you usually work 7 hours per day you will enter 8.75
hours. If you usually work 8 hours per day you will enter 10 hours.
8) A reason may be required for some time off requests. This will be indicated by a red
asterisk.
9) A comment for the time off request is optional.
10) Click Submit at the bottom of the page.

5 | Page
Modify Time Off
1) From your Workday homepage, click on the Time Off and Leave worklet.
2) Click on the button labelled Correct My Time Off.
3) Navigate to the existing time off request that you want to delete or correct. Click on the
request.
4) To remove any or all the requested days you can click on the minus button to the left of
each day. Then click Submit.

6 | Page
To adjust the daily quantity for any or all requested days you can click the selection box
to the left of each day. Change the Daily Quantity before clicking Submit.
Cancel Time Off
1) From your Workday homepage, click on the Time Off and Leave worklet.
2) Click on the button labelled My Time Off.
7 | Page
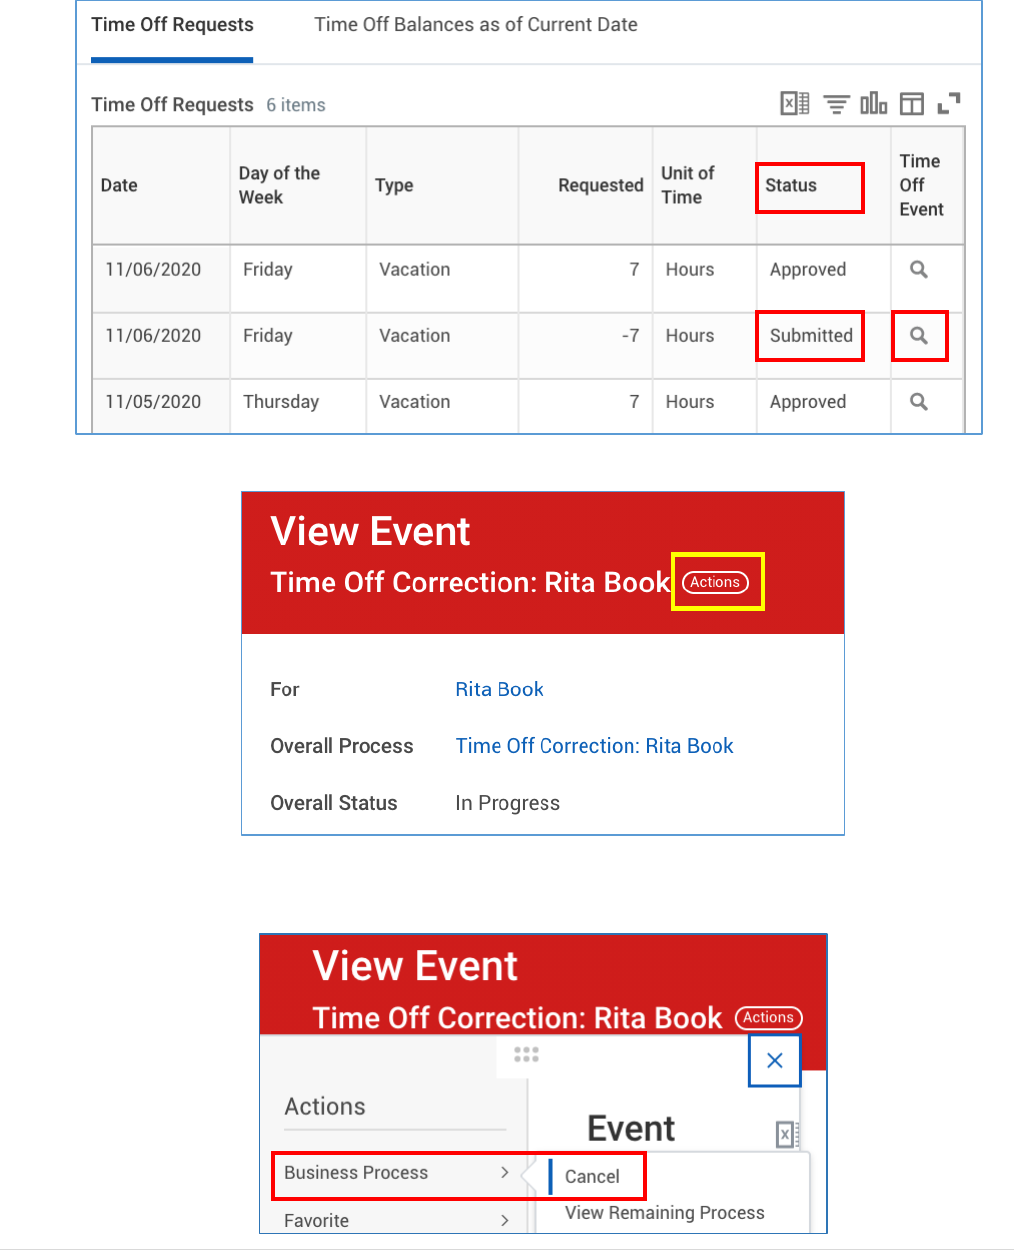
3) Workday will display the details of all your time off requests. You can only cancel
requests that have a status of Submitted in the Status column. Click the magnifying
glass icon to the right of the request that you want to cancel.
4) Click the Actions button at the top of the page next to the event.
On the menu that appears, hover over Business Process and select the Cancel
option.

8 | Page
5) Enter a comment in the comment box at the bottom of the page before clicking Submit.
