
Camtasia Recorder User Document
NOTE: This document has been derived from the Camtasia Recorder Online Help
System. Therefore, sections and organization of information may not seem appropriate
for a typical User Guide. This document is provided strictly in “As-Is” condition for user
convenience and is not intended to represent a professionally-developed user guide.
Copyright 2001, 2001 TechSmith Corporation
Contents Camtasia Producer 3.0 User Document
2
Camtasia Producer 3.0 User Document Contents
Contents
Contents ..............................................................................................................3
Getting Started....................................................................................................7
Welcome to Camtasia Recorder Help............................................................................... 7
Getting Started.................................................................................................................. 7
Installing Camtasia............................................................................................................ 7
System Requirements....................................................................................................... 8
Camtasia Performance ..................................................................................................... 8
Performance Factors during Recording........................................................................................8
Performance Results Tables.........................................................................................................9
Performance Results Graphs......................................................................................................10
Performance Notes .....................................................................................................................11
Camtasia Player ................................................................................................13
Camtasia Recorder Overview .......................................................................... 15
Video Capture Overview ................................................................................................. 15
Introduction .................................................................................................................................15
Uses of Camtasia Video .............................................................................................................15
How Windows Video Works ............................................................................................ 15
Video Quality Tips........................................................................................................... 16
Quality Audio Recordings................................................................................................ 17
Using Camtasia Recorder ................................................................................19
Recording Video.............................................................................................................. 19
Capture Options .............................................................................................................. 19
Set Capture Input Options ..........................................................................................................19
Define a Fixed Region..................................................................................................... 20
Capture Menu > Record Options .................................................................................... 20
Start a Recording ............................................................................................................ 21
Pause a Recording.......................................................................................................... 21
Stop a Recording ............................................................................................................ 22
Delete a Recording ......................................................................................................... 22
Capture Menu > Input Options........................................................................................ 22
Capture Menu > Output Options ..................................................................................... 22
Capture Single Frames ................................................................................................... 23
Capture Menu > Quick Capture ...................................................................................... 23
Capture Automation ........................................................................................................ 24
View Options................................................................................................................... 24
Program View Options ................................................................................................................24
Toolbar View Options..................................................................................................................25
View Menu > ScreenPad ............................................................................................................25
Setting and Applying Effects ........................................................................................... 25
Overview .....................................................................................................................................25
Annotation Effects........................................................................................................... 26
Effects > Settings > Annotation....................................................................................... 26
Caption Options Dialog ...............................................................................................................27
Audio Effects...................................................................................................................28
3
Contents Camtasia Producer 3.0 User Document
Effects > Settings > Audio............................................................................................... 28
Cursor Effects ................................................................................................................. 29
Effects > Settings > Cursor ............................................................................................. 29
Watermark Effects........................................................................................................... 30
Effects > Settings > Watermark ...................................................................................... 30
Zoom and Pan Effects..................................................................................................... 31
Effects > Settings > Zoom............................................................................................... 31
Using ScreenDraw ............................................................................................ 33
Camtasia Recorder Toolbars ........................................................................... 34
Annotation Toolbar.......................................................................................................... 34
Audio Toolbar.................................................................................................................. 34
Cursor Toolbar ................................................................................................................ 34
Zoom Toolbar.................................................................................................................. 35
Camtasia Recorder Menus...............................................................................36
Options > Preferences > AVI .......................................................................................... 36
Options > Preferences > File .......................................................................................... 36
Audio Format Dialog ....................................................................................................... 37
Time-lapse Capture Setup Dialog ................................................................................... 38
Options > Preferences > Hotkeys ................................................................................... 38
Advanced Hotkeys .......................................................................................................... 39
Options > Preferences > Live.......................................................................................... 39
Live Output Feature Description ..................................................................................... 40
Options > Preferences > Program .................................................................................. 40
ScreenPad Annotations ...................................................................................42
Using ScreenPad Annotations ........................................................................................ 42
Creating New Annotations in ScreenPad........................................................................ 42
Importing Background Images into ScreenPad............................................................... 43
Editing Annotation Images .............................................................................................. 44
Editing Annotation Text................................................................................................... 44
Image Editor Drawing Tools............................................................................................ 45
Using ScreenPad Layouts............................................................................................... 47
Creating and Saving Layouts .......................................................................................... 48
ScreenPad Layout Hotkeys............................................................................................. 48
Distributing Movies........................................................................................... 50
Distributing Your Movie ................................................................................................... 50
TechSmith Screen Capture Codec (TSCC) .................................................................... 50
Getting Help ......................................................................................................52
Help Menu.......................................................................................................................52
Camtasia Capture Recovery Tool ................................................................................... 52
Support (Help)................................................................................................................. 53
Camtasia Support ........................................................................................................... 54
Legal and Miscellaneous.................................................................................. 55
Software License Agreement .......................................................................................... 55
4
Camtasia Producer 3.0 User Document Contents
Acknowledgments........................................................................................................... 55
About TechSmith Corporation and Our Products............................................................ 56
About DubIt .....................................................................................................................57
Panning the Video Capture Area .................................................................................... 58
Interleave Audio and Video............................................................................................. 58
Effects > Highlight and AutoHighlight.............................................................................. 58
To Use the Highlight Feature ......................................................................................................59
To Use the AutoHighlight Feature...............................................................................................59
Glossary ............................................................................................................60
Index ..................................................................................................................65
5
Contents Camtasia Producer 3.0 User Document
6

Camtasia Producer 3.0 User Document Getting Started
Getting Started
Welcome to Camtasia Recorder Help
Camtasia™ is a screen camcorder and video
production tool. Use Camtasia to record screen activity
as videos, edit and narrate the clips, and publish the
finished presentation in standard formats.
Develop videos that introduce new software, train new users of existing software, or
create any kind of active documentation. Distribute the videos as standard AVI files or as
streaming presentations from a website.
Camtasia includes all the tools you need to record and produce your videos. Camtasia
Recorder is a desktop camcorder that captures screen activity and applies real-time
effects. You can also add annotations and watermarks to recordings. Recorder can also
act as a software camera feed to live productions (for example, broadcasting the
computer desktop in a live "webcast" using a streaming media encoder).
Camtasia Producer is a non-linear editor producing standard AVI files or streaming
formats. See also Camtasia Producer Help for instructions on that program.
Use this tool to record and present program action to be used in many creative ways:
training videos, multimedia projects, demonstrations of all types, and recording abnormal
events for support and testing purposes. The standard Windows Media Player,
RealNetworks RealPlayer, or any AVI player (such as TechSmith’s Camtasia Player) can
be used to view the captured files.
• If you have not installed Camtasia yet, go to Installing Camtasia.
• If you want to start right away, go directly to Getting Started.
• If you are unfamiliar with video capturing on computers, you can get background
information in the Video Capture Overview.
Getting Started
You can start recording with Camtasia Recorder very easily: Just set the input type
using the Capture > Input menu options, click the red record button, select the area
you want to record.
Note: Alternatives to using the record button: press the Record/Pause hotkey F9 (which
can be changed using the Options > Preferences > Hotkeys tab). You can also make
the menu selection Capture > Record.
When you are ready to stop recording, click the square black stop button, name and
save the file. The player starts automatically.
See also: Recording Video.
Installing Camtasia
The installation program SETUP.EXE installs both Camtasia Recorder and Camtasia
7

Getting Started Camtasia Producer 3.0 User Document
Producer, two related programs you will be using together. See System Requirements
before installing Camtasia.
1 Start Windows, if you haven't already done so.
2 Insert the Camtasia CD-ROM into the CD-ROM drive. Camtasia Setup should start
automatically when you close the drive.
3 If the setup program does not automatically start, or if you have Camtasia on a
diskette, perform the remaining steps.
4 Find the program named setup.exe, either on the CD or diskette. Double-click it.
Camtasia Setup starts.
5 Follow the instructions given by the setup wizard for correct installation of the
product.
System Requirements
To run Camtasia Recorder, your system must meet these specifications:
• Microsoft Windows 95 OSR2, 98, Me, NT 4.0, 2000 or later version.
• 90 MHz processor (400 MHz recommended).
• 16 MB RAM (64 MB recommended).
• Windows-compatible sound card and microphone (recommended).
• 12 MB of hard-disk space for program installation.
Performance Notes
Camtasia Performance
Performance Factors during Recording
Camtasia Recorder program performance is directly dependent on the speed of your
computer. To help give you some guidelines and influence your choices of capture size,
color depth, and codec, we performed some basic speed calculations using Camtasia
Recorder on a standard Windows PC:
• Pentium III 500MHz
• Diamond Riva 128 Graphics Card
• Microsoft Windows 98 (version 4.10.2222 A)
Some graphics cards and/or drivers have better 2D performance than others. Also, some
graphics cards perform better at 32-bit color than at 16-bit color. So, you need to
experiment with capturing at 16 vs. 24 vs. 32-bit color on your particular system. The
following capture frame rates were measured on a Dell PIII 500MHz system capturing a
800x600 screen area with different graphics cards at different desktop color settings:
3dfx Voodoo 3 (color depth: frames/second)
• 8-bit: 21 fps
• 16-bit: 10 fps
• 24-bit: 7 fps
• 32-bit: 6 fps
8

Camtasia Producer 3.0 User Document Getting Started
S3 Savage 4
• 8-bit: 17 fps
• 16-bit: 7 fps
• 24-bit: N/A
• 32-bit: 4 fps
Diamond Viper V770 (uses the NVidia TNT2 chipset)
• 8-bit: 20 fps
• 16-bit: 6 fps
• 24-bit: N/A
• 32-bit: 22 fps
STB nVidia ZX 8MB (uses the NVidia Riva 128 chipset)
• 8-bit: 44 fps
• 16-bit: 30 fps
• 24-bit: N/A
• 32-bit: 20 fps
For results in tabular format for 3 capture sizes, 3 color depths, and 4 codecs, see also:
Performance Results Tables.
For results in graphic format for 3 capture sizes, 3 color depths, and 4 codecs, see also:
Performance Results Graphs.
Performance Results Tables
9

Getting Started Camtasia Producer 3.0 User Document
Performance Results Graphs
10

Camtasia Producer 3.0 User Document Getting Started
Performance Notes
Your computer’s speed and capacity have an impact on the performance you can expect
from Camtasia Recorder. A slow CPU may mean that the recorder appears to lag
behind the actions you are trying to record.
IMPORTANT Note for Windows 2000 Users: See the first bullet under "Some
Performance Improvement TIPS" below for information about improving possible slow
performance when using Windows 2000.
The following factors may slow performance:
• Recording a movie that covers a large portion of your screen and encompasses a
large number of pixels.
• Recording high color content.
• Recording a movie with a high frame rate.
• Running other applications during recording sessions.
Note: Apart from the program you are recording, you should shut down as many
other Windows applications as possible to increase the available CPU capacity for
Camtasia Recorder.
• Recording a movie with zoom effects.
Note: It is better to use the zoom as a "transition" effect rather than setting zoom IN or
OUT for entire long clips.
For additional information, see also: Performance Factors during Recording.
How to Correct It
The remedy is to either reduce these elements in your movie to ease CPU demand or
use a faster computer.
You can increase Recorder performance most dramatically by reducing the size of the
area and reducing capture frame rates.
11

Getting Started Camtasia Producer 3.0 User Document
Configuring Camtasia Recorder
All video recorder preferences are set with the menus Options > Preferences and the
AVI tab. Experiment with different settings to improve quality or performance of the video
capture. For most captures, leaving the default selection under AVI Preferences (Auto
Configure) will most likely achieve the best results. For more information, see also:
Distributing Your Movie.
Some Performance Improvement TIPS
• Disable display acceleration during capture. This option, available on the Options
> Preferences > Program tab is important for Windows 2000 users. The default
setting is OFF. Disabling hardware display acceleration on Windows 2000 or later
can dramatically increase frame rates and/or reduce system load during recording.
Note: When display acceleration is disabled, your screen will momentarily blank at
the start and end of recording. This is normal.
• Use the TSCC video codec during capture. The only exception is at 256 colors, for
which you might try the MS-RLE codec which may be just slightly faster. By default,
Camtasia Recorder has the Auto Configure option enabled in Options >
Preferences > AVI. Auto Configure tries to determine automatically the highest
frame rate that can be captured given the desktop color depth and movie
dimensions that will use 75-95% of the CPU. First, try disabling Auto Configure and
manually raise the capture frame rate. Try frame rates between 8 and 15 frames
per second (fps).
• To get the best capture performance, disable Auto Configure as described above.
Then, click the [Configure] button to configure the TSCC codec. Move the
Compression Control slider all the way to the left (Faster Compression). This
setting will hold whether you use Auto Configure or not. It tells the TSCC codec to
compress as fast as possible rather than make as small an AVI file as possible.
• Use the Quick Capture feature to reduce the system load and improve the
smoothness of mouse movements. For more information, see Capture Menu >
Quick Capture.
• Desktop color depth. Lower color depths result in improved performance. Of
course, some applications require at least 16-bit color. Note that some graphics
cards perform better at 32-bit color than at 16-bit color (see the chart below). So,
you may need to experiment capturing at various color depths on any particular
system.
• Size of the capture area. The smaller the capture area, the better Recorder’s
performance will be.
• CPU speed. The faster the computer, the better Recorder’s performance will be.
This is the most important factor in capture performance when all of the other
parameters are fixed.
• Graphics card. Some graphics cards and/or drivers have better performance than
others. For information on graphic card performance, see also: Performance
Factors during Recording.
• Hard disk speed. Always use the fastest local hard drive available for the
Temporary File Folder set in Options > Preferences >Program.
• Reduce the system load during capture. Don't run any applications that you don't
have to during capture.
• If you have tried every option and still have problems with capture performance, we
suggest you contact technical support. See also: Camtasia Support.
12
Camtasia Producer 3.0 User Document Camtasia Player
Camtasia Player
Camtasia Player comes bundled with the Camtasia product and is installed as the
default AVI viewer for Recorder and Producer. You can easily include the player using
Camtasia Producer’s Pack and Show feature. For more information, see also: Pack
and Show Your Movie.
There are several benefits to using Camtasia Player:
• Provides reliable playback that you can control (for example, you can set it to exit
after playing, or play full screen).
• Always plays back movies at 100 percent of their original size for best readability.
This is important because scaling a movie view window distorts the image and
makes it difficult to distinguish details.
• Camtasia Player is small and self-contained. It works on any 32-bit Windows
platform, even Windows 95. There are no extraneous DLLs or DirectX components
required.
Camtasia Player supports many command line options that allow complete control over
the player when it is run from CD-ROMs, multimedia authoring tools, help files, and
scripting languages or batch files. For more information, see the text file CamPlay.txt in
the Camtasia installation folder.
Note: If you want to use your default Windows movie player instead, in Options >
Preferences > Program, remove the checkmark for Play AVI files with Camtasia
Player.
Camtasia Player is easy to use:
• Camtasia Player opens automatically whenever you play a movie in Recorder or
Producer.
• You can open other AVI files using menu option File > Open.
• Camtasia Player is freely re-distributable for playing Camtasia-created content (see
the text file CamPlayLicense.txt in the Camtasia installation folder for details about
the software license agreement).
• Movie viewing is controlled both with the Play menu options and the VCR-like
player controls on the toolbar. Using these controls, you can:
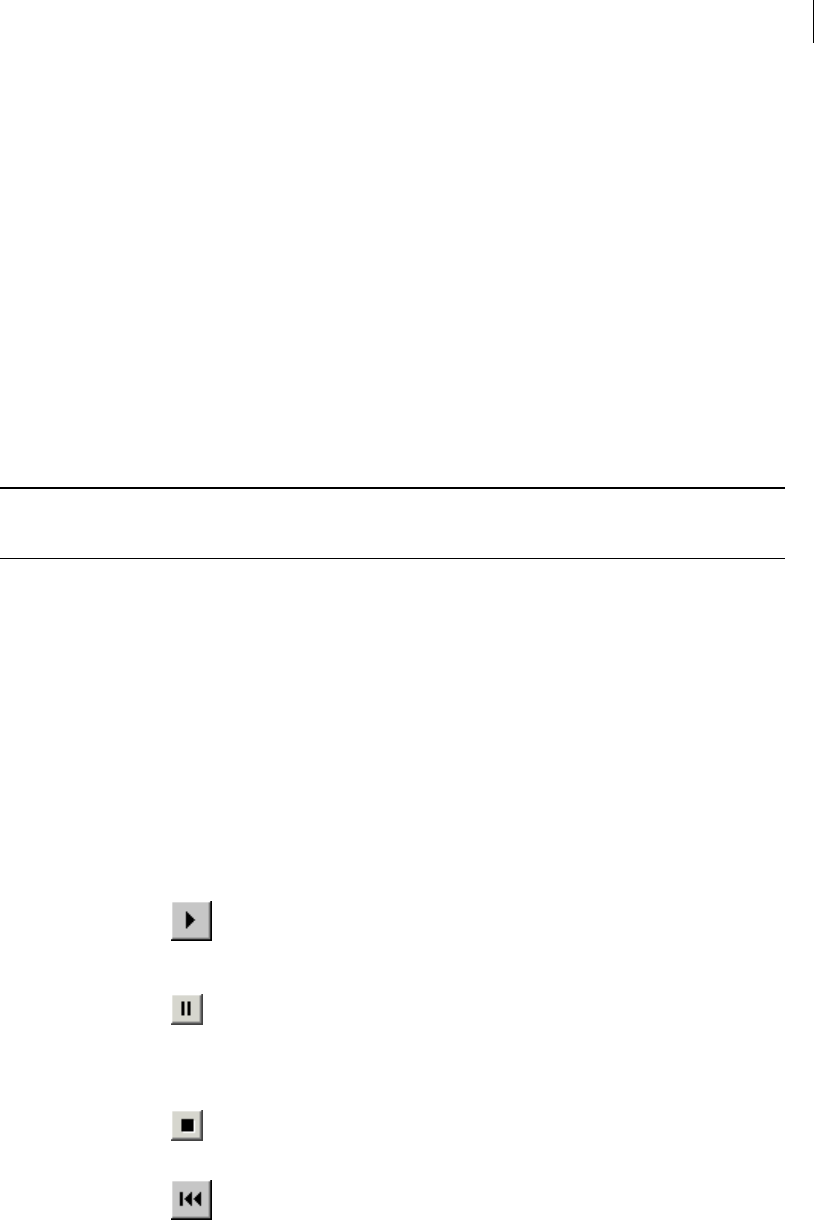
Menu/Shortcut Icon Description
Play
<Ctrl + P>
Plays the movie in the Player. (If you are playing
a movie, the Pause Icon is in view; if a movie is
not currently playing, the Play Icon is in view.)
Pause
<Ctrl + P>
Pauses the movie in the Player. (If you are
playing a movie, the Pause Icon is in view; if a
movie is not currently playing, the Play Icon is in
view.) Restart the movie by selecting Play.
Stop
<Ctrl + S>
Stops the movie and re-cues to the beginning.
Beginning
<Home>
Goes to the first frame of the movie in pause
mode.
13

Camtasia Player Camtasia Producer 3.0 User Document
<Home>
mode.
Rewind
<Page Up>
Rewinds the movie a few frames at a time. Press
the <Page Up> key continuously to fast rewind.
Forward
<Page Down>
Moves the movie forward a few frames at a time.
Press the <Page Down> key continuously to fast
forward.
End
<End>
Goes to the last frame of the movie in pause
mode.
Full Screen None Presents the movies in full-screen view. Since
Player always shows the movie at 100% size, a
border surrounds the play window.
None
Move the Slider Control to any position in the
movie from beginning to end.
14

Camtasia Producer 3.0 User Document Camtasia Recorder Overview
Camtasia Recorder Overview
Video Capture Overview
Introduction
There are many ways moving images impact our lives today. Anyone who has used a
video camcorder knows the value of moving images compared to snapshots. And if you
have gone to the movies lately, you can see the results of computer-enhanced moving
images in animation and special effects. Imagine using some of this power on your own
computer. We’re not promising to make you a movie mogul, but using Camtasia can
dramatically change the way you interact with your computer.
Camtasia can capture the moving action on your computer screen and save it as a
computer movie file. If you type text, move the cursor, click buttons, or select menus,
Camtasia records an image of it that you can save and play back later. There are many
creative ways you can use this capability.
Click [ >> ] above to continue reading the Overview.
Uses of Camtasia Video
Here are some of the ways people are making use of Camtasia videos:
• You can create Windows program demonstrations that show the movement of the
cursor, selection of menus, program interactions (such as entering text or
commands), and results. These demonstrations, when shown to users or potential
users, can show the high points of program features and usage in a few seconds.
• Use Camtasia video to add motion to online help files. Complex procedures can be
shown quickly using captured program operation sequences.
• Add audio to your videos through a microphone while capturing video from the
screen. Or, you can dub the audio in later using the companion program, DubIt.
• You can create videos for use on the World Wide Web to enliven web sites. This
can change a static web site to a more dynamic, dramatic one by including
elements of multimedia. Any movement you can produce on your computer screen
can be captured with Camtasia. This includes animated graphics from any program
that runs on Windows. This is especially useful if the program you are using does
not export to .AVI format.
• Output live desktop activity using Camtasia as your software "camera." This allows
you to include desktop action in live "web cam" productions.
• Record program actions and reactions for any number of reasons. For example,
you could record a sequence of actions to remind yourself later how to perform a
certain task (or to show colleagues).
How Windows Video Works
The Basics
When you make a video using Camtasia, you are actually saving a series of bitmap
graphics, that, when shown rapidly in sequence, shows movement. The more frames per
second (fps) you record, the smoother the motion. These captures are stored as AVI
15

Camtasia Recorder Overview Camtasia Producer 3.0 User Document
files. To learn more about computer-based motion video, see the following article on the
World Wide Web:
AVI Overview, by John F. McGowan, Ph.D. at http://www.jmcgowan.com/avi.html.
Video files can be placed in most any Windows program, including all Microsoft Office
applications. The resulting file will show the video viewer where you pasted the AVI file.
The viewer will be stopped on the first frame of the captured video. The user can view,
pause, stop, replay, and exit the video by clicking the controls on the viewer. See the help
file or documentation for the video viewer on your system for details on using the viewer.
Note: Virtually all Windows systems are shipped with a video viewer. When an AVI file
is activated, this is the viewer that will show it if you have not installed another.
File Size
AVI file size tends to be quite large for long, detailed videos. AVIs over one megabyte are
not uncommon. You can limit the size by:
• Using Camtasia Producer to select a streaming format for the video. A streaming
codec such as Windows Media Format (WMV) reduces the size of the video file
while maintaining most of the quality.
• Limiting the size of the application window being captured. Don’t bother including
extraneous information in your video. HINT: You can use Camtasia’s Region Input
selection to select a smaller area to capture and then "pan" across the screen while
capturing, thereby making a much smaller video file. See also: Panning the Video
Capture Area.
• Limiting the speed at which video frames are captured.
• Limiting the length of the video capture sequence. Camtasia captures video
sequences in real-time seconds and minutes. The shorter your sequence, the
smaller the resulting AVI file will be.
• Changing the compression technique. See also: Options > Preferences > AVI. By
default, Camtasia chooses the best compression technique to use for your capture
and system, but you may try experimenting with these settings.
Video Quality Tips
General Suggestions
• Use the appropriate Camtasia tool: make multiple short clips using Camtasia
Recorder. Use Camtasia Producer to join those short clips together into a longer
video production.
• You may find that you need to rehearse video capture sequences to get the best
results.
• To practice, you can perform several "takes," replaying them after production to see
ways of improving the video.
• For lengthy or involved sequences of action, you may want to write a script before
recording. Think through the actions, in detail, you want to capture, then write them
down in sequential steps.
• Record clips using high quality codec settings (for example, use the TechSmith
Screen Capture Codec for lossless video compression, and use uncompressed
PCM audio). Then use Camtasia Producer to produce a finished video with
whatever final compression you need from the high quality lossless source clips
recorded with Camtasia Recorder.
16

Camtasia Producer 3.0 User Document Camtasia Recorder Overview
• If you are including voice-over audio, write your comments exactly as you want
them and print the script in large type, to make it easy to read while recording. To
eliminate the sound of paper shuffling, you can tape script pages together and hang
them near the monitor so they are easy to read.
• Normal mouse and cursor movement can be jerky, hesitant, or too fast for the
capture to pick up. The cursor appears to jump and the program reacts before the
viewer can see where the mouse is. To eliminate some of these problems, practice
the sequence slowly, then build up speed as you go.
Note: You can also improve cursor behavior using the "Quick Capture" feature. For
more information, see Capture Menu > Quick Capture.
• When showing cursor movement, pause a fraction of a second over the element,
then click. This will allow cursor position to be established in the video before the
next action takes place.
• By viewing glitches and correcting them in succeeding takes, you will eventually
come up with a professional-looking video sequence that you can save.
Quality Audio Recordings
This topic contains some hints to make better quality audio recordings.
1. Silent Recordings
First, make sure Camtasia is ready for audio. Click the microphone icon to turn it on. You
can also enable audio recording with Effects > Record Audio.
If the audio you record from the microphone is silent, check that your microphone is
plugged into the sound card in your computer. Make sure the connection is good. You
can check to see if the microphone is working using either the standard Microsoft
Windows Sound Recorder or another audio application.
2. Set Record Level
If the audio recordings are too low in volume, there may be a number of causes. Some of
the most common:
a Recording level is too low. Check your computer and sound card’s recording level
using Options > Preferences > AVI. Click the [Volume] button to view the Record
Control dialog where you can set input volume.
b You are too far from the microphone. Try several recordings from different distances
to determine the right one. You should probably be about six inches from the
microphone: close enough to record full tones but not so close that plosives, sibilants,
and other noises interfere.
c Speak distinctly. Remember, you are making a recording and need to enunciate
sounds so that it sounds clearer on replay.
3. Noisy Recordings
Noisy recordings are usually caused by environmental elements. Sounds you may not
have noticed in the past suddenly show up on your recordings. You can eliminate most
problems by moving your recording "studio" to a quieter location.
Also, don’t forget that most computers make noise. The disk drives and fan are potential
sources for low level hum in your recordings.
17
Camtasia Recorder Overview Camtasia Producer 3.0 User Document
4. Low Quality, "Tinny" Sounding Recordings
Most consumer-quality recording equipment shipped with computers is fairly low quality
(unless you have purchased higher-quality accessories). Don’t expect to be able to make
studio-quality recordings on cheap equipment. To improve the quality of recordings, you
can upgrade the components responsible for audio on your computer: microphone,
sound card, and speakers.
The audio format you specify determines the quality of the movie audio track and also
affects movie file size. Higher quality audio results in a larger movie file size.
5. Audio Recording Failure and Error Message
If there is an error message relating to audio recording, it might be due to another
application using the sound card to play and/or record audio. Only one application can
record audio at a time on your computer. Some computers with "Full Duplex" sound
cards allow one application (for example, Camtasia) to record from the microphone, while
another application plays sound. In this case, you can even hold the microphone up to
your computer speakers and record what another application is playing. However, many
computers do not have this capability and only allow recording when no other application
is playing sound.
18

Camtasia Producer 3.0 User Document Using Camtasia Recorder
Using Camtasia Recorder
Recording Video
This procedure shows how to record video captures of computer screen activities once
input options and output options have been set.
Note: The video capture process is started by clicking the red record button. Stop
capturing by clicking the black stop button. There are menu and hotkey alternatives.
Follow these general steps:
1 Start Camtasia. If Camtasia is reduced to an icon in the system tray, double-click it to
make it full-sized.
Note: You can position Camtasia Recorder to the side, away from the area of the
screen you intend to record. You can also hide parts of the recorder screen using
view options to show only the toolbar. Recorder also works while closed, but active
in the System Tray. Place Camtasia in the System Tray by clicking the
in the
upper-right corner.
2 Set Capture > Input to the type of recording you want to make: Screen, Window,
Region, Fixed Region. See also: Capture Menu > Input Options.
3 Click the red record button to start the process. At this point, Camtasia starts in
paused mode. If you chose Fixed Region without a starting point, a rectangle
appears for you to place the recording area on screen. Also, the status area shows
statistics about the video you are about to record.
4 Click the red record button again to begin recording. A flashing outline shows the
area being captured on video. (When paused, the outline does not flash.)
5 Step your way through the screen movements to be captured on video. (It is best to
work from a script.)
6 Click the pause button on the toolbar to pause the video capture. If you want to
restart, click the red record button again.
7 Click the black stop button to end the video capture session. The Save Movie File
As Dialog appears and prompts you for a file name. Then the video viewer appears
and shows the captured video.
Make as many takes and clips as needed for your project. When you are done recording,
you can use Camtasia Producer to trim them, add audio, and export to the movie file type
you want (AVI, WMV, or RM).
Capture Options
Set Capture Input Options
You should set Capture Input Options before recording. These options allow you to
define the area and type of video capture.
1 First, click Capture > Input.
2 From the submenu, select your video capture input type (explained below).
19

Using Camtasia Recorder Camtasia Producer 3.0 User Document
Screen
The entire computer screen is captured. You will not be
able to select an area or region and the file size will be
maximum.
Window
Before recording, you can select a window (or any
portion of a window) to be captured. Camtasia allows you
to indicate which one. The cursor changes to a finger-
pointer and when you pass it over areas that can be
selected and captured, they are highlighted.
Region
Before recording, you can define an arbitrary
rectangular region with the mouse. The cursor turns to
cross-hairs, which you use to draw a rectangular region
on your screen. This will be the area captured.
Fixed
Region…
You can capture a fixed-size rectangular region.
Before recording, a dialog allows you to define the size of
the region in pixels. You can add a fixed starting point as
well. Define a Fixed Region.
3 Set other options or perform the recording.
Define a Fixed Region
1 Click Capture > Input and select Fixed Region….
2 The Fixed Region dialog appears.
Note: If you use [Select] to set starting point and dimensions, the numbers are
automatically placed in the appropriate boxes.
3 To set a starting point manually, click a checkmark in the Fixed starting point box.
4 Type the coordinates (in screen pixels) in the Start X and Start Y box.
Alternative: Click the [Select] button to define them with the cursor.
5 To set the Width and Height, type the pixel dimensions in the boxes provided.
Alternative: Click the [Select] button to define them with the cursor.
6 Click [OK] to accept the Fixed Region.
When you proceed with the capture process, you will see the area to be captured framed
by green brackets.
Capture Menu > Record Options
The Camtasia Capture Menu has four recording options:
Record
Begins the recording sequence. Same as pressing F9 on
the keyboard or clicking the record button.
Start a Recording.
Pause
Pauses the recording. Same as pressing F9 during
recording or clicking the pause button. You can press F9 or
the record button to resume.
Pause a Recording.
20

Camtasia Producer 3.0 User Document Using Camtasia Recorder
Stop
Stops the recording so you can save the file. Same as
pressing F10 or clicking the stop button.
Stop a Recording.
Delete
Deletes the recording you just made.
Delete a Recording.
Start a Recording
1 There are three ways to start recording:
a Click the red record button on the standard toolbar.
b Select menu options Capture > Record.
c Press the default Record/Pause hotkey, F9 (if you change hotkeys using Options
> Preferences > Hotkeys, use those).
2 Camtasia’s status area shows statistics about the recording you are about to make.
Take a second to review them.
Note: To cancel recording, click the red "X" on the standard toolbar or select
Capture > Delete.
3 Use any one of the record start options a second time to start actually recording.
You’ll know you are recording because the green brackets in the corners showing the
recording area begin to flash slowly (all inputs except Screen).
4 Perform the actions you want to record.
To stop recording and save the file, click the stop button
on the standard toolbar,
press the default Stop hotkey F10, or select Capture > Stop.
Pause a Recording
1 There are three ways to pause recording:
a Click the pause button on the standard toolbar.
b Select menu options Capture > Pause.
c Press the default Record/Pause hotkey, F9 (if you change hotkeys using Options
> Preferences > Hotkeys, use those).
2 Camtasia’s status area shows statistics about the recording you are currently making.
Take a second to review them.
Note: To cancel recording, click the red "X" on the standard toolbar or select
Capture > Delete.
3 You can begin recording again by pressing the Record/Pause hotkey.
4 You can stop recording and save the video.
To stop recording, click the stop button on the standard toolbar, press the default
Stop hotkey F10, or select Capture > Stop.
21

Using Camtasia Recorder Camtasia Producer 3.0 User Document
Stop a Recording
This finishes and saves the current capture.
1 There are three ways to stop recording:
a Click the stop button
on the standard toolbar.
b Press the default Stop hotkey F10.
c Select menu options Capture > Stop.
2 The Save Movie File As dialog opens for you to specify a filename (unless you
specified automatic file naming using Options > Preferences > File Name).
The Media Player on your computer starts with the movie file loaded and may start
automatically.
Delete a Recording
This cancels and discards the current capture.
1 During any recording, you can delete or cancel the process these ways:
a Click the red "X" on the standard toolbar.
b Select menu options Capture > Delete.
2 The capture pauses and you get a message asking if you are sure you want to delete
the current video capture. If you answer Yes, the recording stops and any captured
frames are discarded.
Capture Menu > Input Options
Set the input option you need for the recording you are going to make:
• If you choose Screen, the entire computer screen will be captured.
• If you choose Window, the cursor changes to a finger for the user to point to the
parts of the window to be captured. Click over the window title bar to capture the
whole window.
• If you choose Region, the cursor changes to a crosshair pointer for you to define
the region of your computer screen to be captured in the video. This region is
shown within green angles at each corner.
• If you choose Fixed Region, a dialog asks you to define the region in pixels. See
also: Define a Fixed Region.
Capture Menu > Output Options
There are two possible output options:
• If you choose File, the captured video will be stored in an AVI (video) file. The name
and location of the saved video file can be set under Options > Preferences, then
choose the File tab. See also: Options > Preferences > File
• If you choose Live, the captured video will be made available to any live encoding
process you have running on your computer. See also: Live Output Feature
Description and Options > Preferences > Live.
22

Camtasia Producer 3.0 User Document Using Camtasia Recorder
Note: When Live Output is ON, all input options are disabled, since video frame size is
determined by the application that is using Camtasia Recorder as a video source (for
example, Windows Media Encoder or NetMeeting).
Capture Single Frames
This is a capture option that makes Camtasia capture only one frame at a time. With this
option selected, Camtasia is always in a paused state. Use the record button like a
camera shutter button to capture one or more stills that can be saved as an AVI file.
1 Select menu options Capture > Single Frame. This is a toggle that you click ON by
selecting the menu option once and OFF by selecting it again. When the option is
ON, a check mark appears next to the menu option.
2 Set any other capture options, including Input, Effects, and Preferences.
3 To capture a frame, use any start recording method: red record button
,
Record/Pause hotkey, or Capture > Record.
4 Repeat the capture as many times as needed. You can change the contents of the
capture region between captures to achieve whatever motion effect you want.
HINT: Single Frame capture can be used to create a slide show or "stop frame
animation" style movies. This option works well with the Time-lapse capture mode
available under Options > Preferences > AVI > Time-lapse Capture Setup Dialog.
For example, by setting the Time-lapse playback frame rate to 1 frame per 10 seconds,
you can use Single Frame capture to add slides, each of which is displayed for 10
seconds.
For another useful periodic frame capture option, see also: Time-lapse Capture Setup
Dialog.
Capture Menu > Quick Capture
Quick Capture mode captures the screen as efficiently as possible, at frame rates from 2
to 7 times faster than normal. This option gives you two advantages:
• Given your system resources, you can obtain a higher capture rate for smoother,
higher quality recordings.
• At any given frame rate you need to maintain, Quick Capture uses less system
resources, possibly enabling you to capture scenes that you would otherwise not be
able to with the computer and graphics capabilities you have.
This is particularly useful for capture sequences that feature a lot of cursor movement
and not much other visual change. This allows better recording of cursor movement by
not capturing static areas repeatedly. It may result in better, smoother cursor movement.
To Use Quick Capture:
1 Turn Quick Capture ON by clicking the menu option once. A checkmark is placed
next to the menu option, indicating Quick Capture mode is ON.
2 Turn Quick Capture OFF by clicking the menu option again to remove the
checkmark.
Note: The default setting is OFF.
Caution: Screen changes that are not user-initiated (like animations) may not be fully
captured when using this option.
23

Using Camtasia Recorder Camtasia Producer 3.0 User Document
Capture Automation
The following Camtasia Recorder command line options allow you to automate and/or
control Recorder from other applications or a batch file.
Command
Option
Function Description
/r
Start/
Resume
Starts/resumes recording using the current
Recorder settings. This option fails if
Recorder is already recording.
/p
Pause Pause recording. This option fails if
Recorder is not running, or if Recorder is
not recording.
/s
Stop Stop recording. This option fails if
Recorder is not running, or if Recorder is
not recording or paused.
/h
Run
Hidden
Hides the Recorder screen and disables
the hide/unhide tray icon hotkey. This
option always succeeds.
/x
Exit Causes the running instance of Recorder
to exit. This option fails if Recorder is not
running. If a recording session is active,
the /x option aborts the capture and
discards any video file. Note: You can
safely perform a /s to stop recording
followed by a /x to cause Recorder to exit.
(Example: CamRec.exe /s/x).
Note: When the command line options are used, Recorder exits with a exit code of 0 on
success and 1 on any failure. The exit code is reflected as the "errorlevel" in DOS batch
files.
View Options
Program View Options
The Camtasia Recorder View Menu allows you to set the view of the program window
you prefer and toolbar options. You can also customize how much screen "real estate" is
used by Recorder so that it does not interfere with what you are recording.
Note: Each View Menu option is a toggle to either turn ON the view of the selected item
or turn it OFF. When the view of the item is ON, there is a checkmark next to it on the
menu.
• Click View > Standard to see the default Recorder view (menu bar at top, toolbar
24

Camtasia Producer 3.0 User Document Using Camtasia Recorder
with program command buttons, and the view window.
• Click View > Compact to remove the view window (leaving only the menu bar and
toolbar).
• Click View > Minimal to remove all except the toolbar.
Note: You can use the view icon
on the toolbar to either restore the
Standard view or to toggle among
the three views.
Toolbar View Options
Note: The following four view options can be selected individually; you may select
none, one, two, three, or all four. A checkmark appears next to selected items.
• Click View > Annotation Toolbar to reveal or hide the Annotation Toolbar.
• Click View > Audio Toolbar to reveal or hide the Audio Toolbar.
• Click View > Cursor Toolbar to reveal or hide the Cursor Toolbar.
• Click View > Zoom Toolbar to reveal or hide the Zoom Toolbar.
View Menu > ScreenPad
Click View > ScreenPad to reveal or hide the ScreenPad. This feature allows you to use
ScreenPad annotations in your captured video. For more information on using this
feature, see also: Using ScreenPad Annotations.
Setting and Applying Effects
Overview
You can set up or customize movie effects using the options under Effects > Settings on
the Effects tabbed dialogs. Then, you can apply the effects using the Camtasia
Recorder Effects menu.
For more information about setting movie effects, see also:
Effects > Settings > Annotation
Effects > Settings > Audio
Effects > Settings > Cursor
Effects > Settings > Watermark
Effects > Settings > Zoom
For more information about applying movie effects, see also:
Annotation Effects
Audio Effects
Cursor Effects
Zoom and Pan Effects
25

Using Camtasia Recorder Camtasia Producer 3.0 User Document
Annotation Effects
Using Annotation Effects, you can include the time and date for a predefined period of
time. You can also create a text option, such as a title, and customize its appearance and
position on screen.
You can choose the following Annotation Effects:
Add Time/Date
Add Caption
Add Watermark
Highlight
AutoHighlight
For more information on Annotation Effects, see also:
Effects > Settings > Annotation
For a different method of applying annotations, see also:
Using ScreenPad Annotations
Effects > Settings > Annotation
Use this tab to set options for video annotations. You can include the time and date for a
predefined period of time. You can also create a text option, such as a title, and
customize its appearance and position on screen.
Time/Date Section
• Show Time/Date for __ seconds - If selected, the time and date stamp will only be
rendered for the specified time from the start of the capture. It automatically turns
off after the time has elapsed.
• Click [Options…] to set up the appearance and position of the time and date
annotation on the Caption Options Dialog.
Caption Section
Caption Textbox - You can specify a text string to be rendered into the movie. Either
type a new one in the box or select a previously-used one from the drop-down list. The
text can be a title for the overall movie, or, you can change the text during each of several
takes to provide text details or captions for the activities being shown.
• Click [Options…] to set up the appearance and position of the text annotation on
the Caption Options Dialog.
• Place a check mark in the Prompt before capture box if you would like to enter the
text annotation for each capture just before recording.
Note: For a different method of applying annotations, see also: Using ScreenPad
Annotations.
Highlight Section
These settings apply to the highlight effect options selected under Effects > Highlight
and Effects > AutoHighlight.
• Width __ pixels - Type the number of pixels of width for the highlight box.
26

Camtasia Producer 3.0 User Document Using Camtasia Recorder
• Click [Color…] to select a color for the highlight box.
For more detail on using the Highlight and AutoHighlight options, see also: Effects >
Highlight and AutoHighlight.
ScreenDraw Section
These settings apply to the screen drawing effect options selected under Effects >
ScreenDraw.
• Tool drop-down list - Select the tool from the available options: Frame, Highlight,
Ellipse, Pen, Line, and Arrow. The Sample on the left side of this section shows
what the effect will look like.
• Color drop-down list - Select one of the eight primary Windows colors for the
ScreenDraw tool.
• Width spinner - Set the width of lines used by the ScreenDraw tool, from 1
(thinnest) to 8 (thickest).
• Translucent checkbox - If the box is checked, the ScreenDraw effect is see-
through. If unchecked, the effect is solid color.
For more detail on using the Highlight and AutoHighlight options, see also: Using
ScreenDraw.
Caption Options Dialog
This dialog allows you to set caption appearance and placement options. The options are
pretty much self-explanatory since the preview on the dialog shows the effect as you
change options.
Style - Sets the text style of the caption.
• Normal: plain text
• Drop Shadow: text is raised and a drop shadow is added
• Outlined Shadow: text is outlined with a heavy drop shadow
Transparent Background - Text is rendered on the movie with a transparent
background, that is, the movie will show through where the text is rendered. Otherwise,
text is written on a solid background color (that is, a colored box appears around the
text).
Word Wrap - Text can only be wrapped if Transparent Background is selected.
Otherwise, text is written on a single line and is truncated when the length exceeds the
available space in the movie capture area.
Position - You can select one of nine positions for the caption to appear in the capture
area. Position is shown in the preview area below.
Font - Select the font from those installed on your computer. You can also select Font
Style and Size.
Text Color, Background Color, Shadow Color, and Outline Color. You can select
individual colors for each of these elements of the caption. The chip and preview area
shows your selections.
27

Using Camtasia Recorder Camtasia Producer 3.0 User Document
Audio Effects
Effects Menu > Audio > Record Audio
Click the Record Audio icon the Audio Toolbar, or select it from the Effects menu, to
capture audio in "real time" while also capturing video.
Note: You must have a sound card with a microphone attached. An audio "level meter"
appears in the Recorder status area to show the relative recording volume level.
To enable the capture of audio along with the video:
1 First, set audio properties using Options > Preferences > AVI tab [Audio Setup…]
button.
2 Click [Record Audio] button on the Audio Toolbar, or select Effects > Audio >
Record Audio. A check mark appears next to the menu option and the Audio
Toolbar shows the option has been selected.
3 Record your video as directed in the topic: Video Capture Overview.
4 While recording screen movements (video), speak into the attached microphone to
add audio in time with screen actions.
Effects Menu > Audio > Cursor Sounds
Click the Cursor Sounds icon on Audio Toolbar, or select it from the Effects menu, to
add the sound of a mouse clicking whenever you perform a mouse click during video
capture. See also: Effects > Settings > Audio.
Effects Menu > Audio > Keyboard Sounds
Click the Keyboard Sounds icon on Audio Toolbar, or select it from the Effects menu,
to add the sound of keyboard keys whenever you type during video capture. See also:
Effects > Settings > Audio.
Effects > Settings > Audio
Use this tab to set up audio sound effects for mouse and keyboard clicks.
Mouse Sound Effects
• Specify in the appropriate box the WAV file to be played to signify mouse button
down and mouse button up. (We provide two sample files, ClickDown.wav and
ClickUp.wav.)
• Use the […] button to search for WAV files if you want to change from the samples.
• Use the speaker button to preview the sounds.
• Use the Volume slider to adjust the relative volume of the effect in the rendered
movie.
Keyboard Sound Effects
• Specify in the appropriate box the WAV file to be played to signify key down. (We
provide a sample file, KeyDown.wav.)
• Use the […] button to search for WAV files if you want to change from the sample.
28

Camtasia Producer 3.0 User Document Using Camtasia Recorder
• Use the speaker button to preview the sounds.
• Use the Volume slider to adjust the relative volume of the effect in the rendered
movie.
Cursor Effects
Cursor effects can help illustrate the action you are recording by drawing attention to the
area where the action happens. When these effects are used in conjunction with mouse
click sound effects, viewers of your video can quickly understand the actions taking
place.
The following cursor effects can be selected:
Hide Cursor
Show Cursor
Highlight Clicks
Highlight Cursor
Highlight Cursor & Clicks
For more information on Setting Cursor Effects, see also:
Effects > Settings > Cursor
Effects > Settings > Cursor
Use this tab to set cursor and mouse click options to be used during capture. These
effects can help illustrate the action you are recording by drawing attention to the area
where the action happens. When these effects are used in conjunction with mouse click
sound effects, viewers of your video can quickly understand the actions taking place.
1 First, turn on the mouse and cursor effects with menu choices Effects > Cursor >
(select the cursor effect option you want to turn ON).
2 Select Effects > Settings to open the Effects tabbed dialog.
3 Click the Cursor tab to set cursor effects.
4 Click [Cursor Setup…] to change the appearance of the cursor pointer on screen.
The Cursor Setup Dialog appears.
5 Select the cursor you would like to use for your video. Click each radio button to see
the options available. (The standard Windows cursor is the default.)
6 Click [OK].
7 Under Highlight Cursor, select a cursor highlight shape from the drop-down list. You
can also set the color (using the [Color…] button), the Size of the highlight area
(using the slider), and select whether the highlight is to be Translucent, Semi-
translucent, or Opaque. The preview area shows the appearance of each of these
selections.
8 Under Highlight Mouse Clicks, you can select a ring or circle pattern to be used for
both right and left mouse button clicks. You can also select the color and size of the
effect.
9 Click [OK] to set the cursor effects for the videos you record. Camtasia saves your
settings.
29

Using Camtasia Recorder Camtasia Producer 3.0 User Document
Watermark Effects
Watermarks can help you stamp ownership on the videos you record using Camtasia.
This effect places a small image into the recording area and allows you to set options for
its appearance. You can make it look like the "bugs" that are placed in the lower right-
hand corner of network TV shows.
The following selections can be made on the Effects > Settings > Watermark tab to
create just the right effect:
Image Path
Overlay Watermark
Underlay Watermark
Emboss
Emboss Depth
Emboss Direction
Positioning Cluster
Image Scale Slider
Horizontal Offset
Vertical Offset
Keep aspect ratio when scaling
Use smooth interpolated scaling
In addition an image Preview Button and Screen help you visualize what the effect will
look like when the recording is complete.
Effects > Settings > Watermark
You can add a watermark, or in TV lingo, a "bug" in any fixed position in the movie
window. This is helpful to stamp ownership on the intellectual property the movie
represents. As such, a unique mark such as a company logo is appropriate. However,
you can use this feature to position any other information you would like into the
production, such as titles, banner ads, etc. As input, you can use graphic files in .BMP,
.GIF, or .JPG format.
Note: Watermarks can also be added in the final movie production using Camtasia
Producer.
To place a watermark in a movie recording:
1 Select Effects > Settings…. The Effects Tabbed Dialog appears.
2 Select the Watermark tab. Watermark options are available and the Watermark
Preview appears to show how the watermark will look.
3 In the Image Path box, either type the path and filename for the image you are using
as the source of the watermark or click the open folder button to find it.
4 The [Preview] button acts as a toggle to either show or hide the preview window,
which shows a model of how the watermark will look in the finished movie.
5 In the Display Effects area, choose if you would like an Overlay or Underlay
watermark. Depending on the option you select, the appropriate sub-options become
available.
6 If you selected Overlay, also place a checkmark in Use Transparent Color if you
30

Camtasia Producer 3.0 User Document Using Camtasia Recorder
would like to use this effect. Use the [Change] button to select the Transparent Color
to be used.
7 If you selected Underlay, also place a checkmark in Emboss if you would like to use
this effect. You also need to specify the Direction and Depth of the embossed image.
Note: You may have to experiment with overlay and underlay effects. Use the
[Preview] button to view changes you make on a Preview screen before recording.
8 In the Image Positioning area, choose the relative position on-screen where you
would like the watermark using the nine-button Positioning Cluster.
9 Using the Image Scale Slider, set the size of the watermark. The percentage figure
represents percentage of the finished movie dimensions.
10 Set the Horizontal Offset and Vertical Offset.
11 Place a checkmark in the Keep aspect ratio when scaling box to use this option.
12 Place a checkmark in the Use smooth interpolated scaling to use this option.
13 Click [OK]. Watermark settings are saved.
Zoom and Pan Effects
You can set up zooming and panning options for your videos. These options can help
follow the action on screen or zoom in or out during recording to show more detail on
screen or cover more area.
Note: Zoom is a processor-intensive operation and depending on the capture area and
configured frame rate, you may not have a fast enough system to zoom properly. The
result is that the effective capture frame rate (that is, the rate shown in the "Statistics"
part of the Camtasia status area) can drop below the configured capture frame rate
(that is, the rate shown in the "Properties" part of the Camtasia status area) when zoom
effects are applied. Video frames are "dropped." However, the results are sometimes
acceptable even when the effective frame rate drops.
The following zoom and pan effects can be selected:
AutoPan
AutoZoom
Zoom Out
Zoom In
Zoom To
Zoom Undo
For more information on Zooming and Panning, see also:
Effects > Settings > Zoom
Panning the Video Capture Area
Effects > Settings > Zoom
This tab configures the zoom effects. You can set up zooming and panning options for
your videos. These options can help follow the action on screen or zoom in or out during
recording to show more detail on screen or cover more area.
AutoZoom speed - This controls the speed of the rendered zooming effect (that is, the
speed of the image scaling).
31

Using Camtasia Recorder Camtasia Producer 3.0 User Document
AutoPan speed - This controls the speed at which the capture area follows the mouse.
Use this when you want to capture a smaller area of a screen where the action is and
ignore the inactive areas. This can help limit file size and help to focus attention.
Zoom level at start of capture - This configures a preset zoom level when the capture
begins. The default value is 100%. Values less than 100% makes Camtasia start
zoomed out. Values greater than 100% makes Camtasia start zoomed in.
Center zoom effect - If selected, when the zoom effect is rendered, Camtasia always
centers the new capture area over the old area. In the final movie, the visual effect is that
Camtasia automatically pans the image so it stays centered over the previous area. The
default setting is OFF.
Use smooth interpolated scaling - If selected, Camtasia uses a smooth scaling
algorithm that makes images more readable when zoomed out. The default setting is
ON.
Note: Enabling this option may degrade the movie frame rate since smooth interpolated
scaling requires much more computer processing to render the effect.
Smooth scale during AutoZoom - If selected, Camtasia uses the smooth scaling
algorithm while rendering the AutoZoom effect. This makes the zooming effect look nicer,
but again the movie frame rate may degrade. This option is OFF by default.
Note: You can zoom in or out on the action during recording by using the Zoom
Hotkeys. For more information, see Advanced Hotkeys.
32

Camtasia Producer 3.0 User Document Using ScreenDraw
Using ScreenDraw
You can draw various shapes on screen while recording to highlight and draw focus to a
particular area. This feature is activated using a hotkey (select your hotkeys using
Options > Preferences > Hotkeys).
1 Select menu option Effects > Settings. On the Annotation tab, set ScreenDraw tool
options. For more information, see also: Effects > Settings > Annotation.
Note: You can also set tool options during recording or when Recorder is paused.
See step 4.
2 Start recording.
3 Start ScreenDraw by clicking the toolbar icon or pressing the ScreenDraw hotkey.
The cursor changes on screen and indicates the drawing tool selected.
4 If you want to set or change options now, you can pause recording to do so. Right-
click over the capture area. Select one of the drawing tool options listed by clicking
on a tool name or pressing the accelerator key listed next to the tool names. The
drawing tools are:
• Frame: Draws a rectangular shape.
• Highlight: Produces a Highlighter pen effect.
• Ellipse: Draws circles and oval shapes.
• Pen: Allows freehand drawing, similar to sportcaster drawings on TV.
• Line: Creates straight lines.
• Arrow: Draws single-headed arrows to point to elements.
5 If you need to set line Width and Color, you may do so on the Options menu.
6 To stop drawing, press <Esc> or the stop hotkey (<F10> is the default). When you
stop, the effect disappears from the screen.
Note: You can change drawing tools during capture by pressing the accelerator key
associated with the tool you want to select.
33

Camtasia Recorder Toolbars Camtasia Producer 3.0 User Document
Camtasia Recorder Toolbars
Annotation Toolbar
Add Time/Date: Select this icon to add an annotation with the
current time and date to your movies.
Add Caption: Select this icon to add a text annotation to your
movies. The caption text can be entered in the Effects > Settings
> Annotation dialog before starting a capture, or while a capture
is paused.
Add Watermark: Select this icon to add a watermark to your
movies. The watermark options are set up in the Effects >
Settings > Watermark dialog.
AutoHighlight: Select this icon to add a highlight border to areas
of the capture (typically a window, dialog, or box) as the cursor
passes over them during capture. An outline area is added during
capture. The width and color of the highlight line are set in the
Effects > Settings > Annotation. Note: You can use Capture >
Pause/Resume to control exactly when and where the
AutoHighlight effect appears.
Highlight: Select this icon to add a fixed highlight border to a
selected area of the capture (typically a window, dialog, or box).
An outline area is added during capture. The width and color of the
highlight line are set in the Effects > Settings > Annotation.
Note: Select Effects > Highlight or the Highlight icon again to
disable (hide) the highlight effect.
ScreenDraw: Select this icon to add a drawing effect over the
screen. You can draw various shapes, such as Frame, Highlight,
Ellipse, Pen, Line, or Arrow. The appearance of ScreenDraw
objects is controlled using Effects > Settings > Annotation. For
more information, see also: Using ScreenDraw.
Audio Toolbar
Select this icon to turn on the recording audio with your
movie.
Select this icon to add sounds for cursor clicks with the
audio of your movie.
Select this icon to add sounds for key clicks with the audio
of your movie.
Cursor Toolbar
Select this icon to hide the cursor during recording of your
movies.
34
Camtasia Producer 3.0 User Document Camtasia Recorder Toolbars
Select this icon to show the cursor during recording of your
movies.
Select this icon to highlight visually the clicking of the cursor
during the recording of your movies.
Select this icon to highlight the cursor with a translucent
outline during the recording of your movies.
Select this icon to turn on highlighting of both cursor clicks
(with a visual hint) and movement (with a translucent
outline).
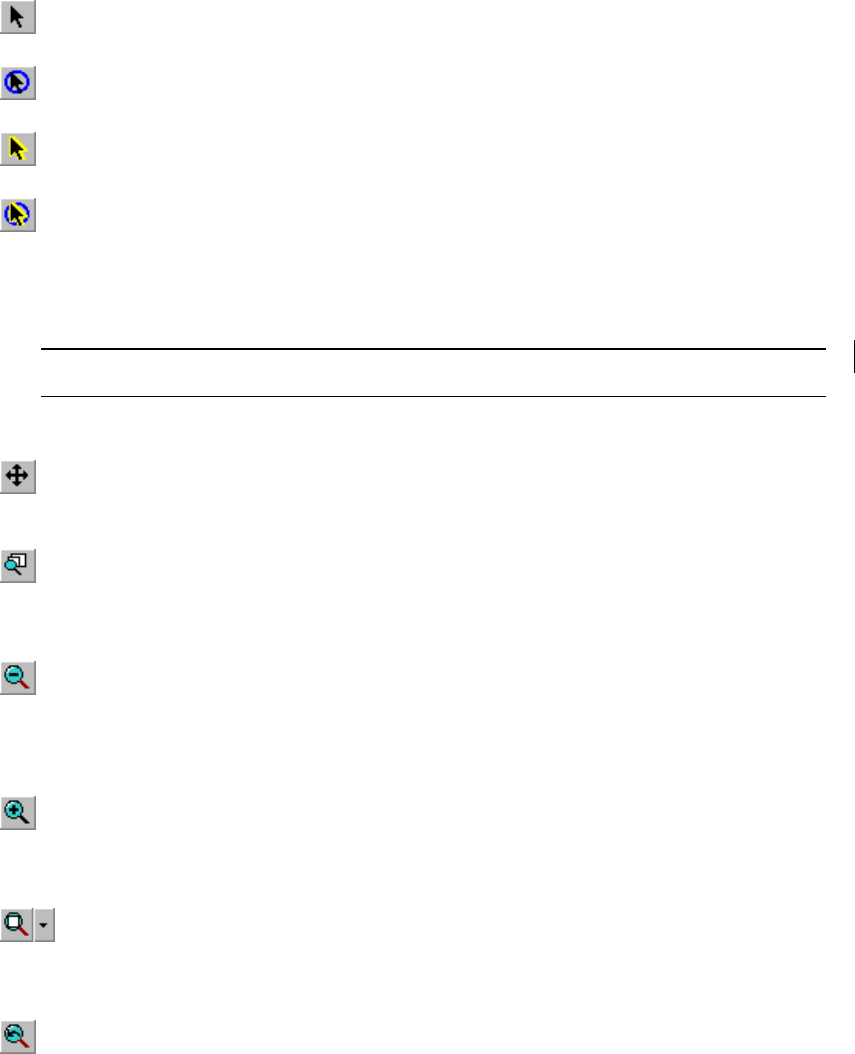
Zoom Toolbar
Note: The Zoom Toolbar is only available during capture. You can use these buttons to
set zoom options while recording is paused (before you press record the second time).
Select this icon to AutoPan the area you are recording.
This option follows the cursor while you are recording with
a floating area that shows where the action happens.
Select this icon to AutoZoom during recording. This
option sets up an automatic zoom in or zoom out on the
action. Set the zoom direction and amount using Effects >
Settings > Zoom.
Select this icon to zoom out on the area you are
recording. This allows you to reduce a portion of the
screen or application area (and therefore capture a larger
area). The percentage of zoom is indicated on the status
display.
Select this icon to zoom in on the area you are recording.
This allows you to enlarge a portion of the screen or
application area (and therefore capture a smaller area).
The percentage of zoom is indicated on the status display.
Select this icon to set the zoom back to 100 percent.
Click the arrow to the right of the icon to zoom to a
specific size, which you can select from the menu that
drops down.
Select this icon to undo the zoom setting and return to
the previous one selected.
35

Camtasia Recorder Menus Camtasia Producer 3.0 User Document
Camtasia Recorder Menus
Options > Preferences > AVI
Use this tab to set preferences for movies recorded using Camtasia. While you can only
record files as AVI in Camtasia Recorder, you can convert them to other output formats,
including .WMV and RealVideo, using Camtasia Producer.
1 Click Options > Preferences… and select the AVI tab.
Video Options
2 Place a check mark in the Auto Configure box if you want to use Camtasia defaults.
The program automatically determines the best frame rate and compression to use
(Recommended).
3 Clear the check mark in the Auto Configure box if you want to set your own and
experiment. For more information, see also: Distributing Your Movie.
4 Click [Video Setup…] to set up video compression. The Video Compression
Dialog appears. You can select the Codec and quality levels that suit your recording.
For best performance from the TechSmith Screen Capture Codec, see also:
Distributing Your Movie and Performance Notes.
5 You can enter the frame rate in frames/sec. While more frames per second usually
produces smoother videos, your resulting movie file will be proportionally larger and
more system resources will be required to record the video.
6 Place a check mark in the Time-lapse Capture box if you want very slow capture
rates. For more information, see also: Time-lapse Capture Setup Dialog.
Note: If Time-lapse capture is ON, audio recording is disabled.
Audio Options
7 If you are recording audio with your video, you should click [Audio Setup…]. For
more details, see also: Audio Format Dialog.
8 Leave the check mark in the Interleave audio every __ box unless you want to
change this default value. For more details, see also: Interleave Audio and Video.
9 Select the Audio Capture Device from the drop-down list. You should select the best
performing device you have on your computer.
10 Click the [Volume] button to reveal a Record Control, where you can set recording
volume levels for the input device selected.
Description:
11 The Description box shows details about the selections you have made on this tab for
the audio and video options of the AVI files you are recording.
Options > Preferences > File
Use this tab to set file naming options for Camtasia Recorder. You can choose to have
the program prompt you for a file name or set the name to be assigned automatically.
Also, you can specify elements of file names and folder for them to be stored.
1 Click Options > Preferences… and select the File tab.
36

Camtasia Producer 3.0 User Document Camtasia Recorder Menus
Note: The file name extension will always be .AVI. This cannot be changed.
2 Click the radio button ON next to one of the file name options:
• Ask for File Name. Select this if you want to name each file separately as it is
recorded.
• Fixed File Name. Select this if you want to set a single file name that will be
overwritten with each recording. Also type the name of the file in the text box.
• Automatic File Name. Select this if you want automatically created and
incremented filenames for your recordings. Also type the name of a destination
Output Folder in the text box provided. This folder must already exist.
Alternatively, you can select an existing folder by clicking on to folder open icon
to locate one. Files will be saved with the prefix you supply and a number, such
as Video-001.avi, Video-002.avi, and so on.
3 Click [OK] to save the options.
4 Click [Cancel] only if you want to loose the changes you have made and start over.
Audio Format Dialog
The [Audio Setup…] button on the Preferences AVI Tab and the Audio Format dialog
allow you to set the audio format for movies that you capture while recording audio. To
use this feature, you must have a sound card with a microphone attached.
1 Click Options > Preferences…. The Preferences tabbed dialog appears.
2 Select the AVI tab and click the [Audio Setup...] button. The Audio Format dialog
appears.
3 If you have a named format you want to use, select if from the Name: drop-down
box. You can skip to step 6 unless you want to make changes to the named format.
4 Select an audio file format from the Format: box. Refer to the file type provider for
information about the individual selections.
5 Select the audio Attributes: from the list. The higher the KB/s number, the larger
your files will be.
6 Click [OK] to save the Audio Format or [Cancel] to abandon any changes you
made on the dialog.
Note: If you want to save your file format settings to a named format for future use, click
[Save As…] to preserve them. You are prompted for a format name, which will appear
in the Name: list on future use.
Audio Format Note
Note: We recommend recording in PCM format (the default selection) for best sound
quality. If you need to change it, you can also do so in Camtasia Producer when
creating the final produced video.
Note: The audio format you specify determines the quality of the movie audio track and
also affects movie file size. Higher quality audio results in a larger movie file size. By
default, Camtasia Recorder uses the PCM (uncompressed audio) format. This is
recommended for the highest quality recording and also for joining clips later in
Camtasia Producer or any other video editor. If you need to produce a movie with
compressed audio, it is best to do this after editing in Camtasia Producer. Recording
your original narrative in uncompressed PCM format allows you to choose many audio
compression/quality options later, during production.
37

Camtasia Recorder Menus Camtasia Producer 3.0 User Document
Time-lapse Capture Setup Dialog
If you configure AVI Options manually, you have the option of setting timing to slow or
very slow frame rates. This may be useful for setting up a "watching" application, for
example, or capturing program activities that take a long time (programs that require
lengthy processing times).
Set up the option as follows:
1 On the Options > Preferences > AVI tab, click OFF the check mark in Auto
Configure.
2 Click ON a check mark next to Time-lapse Capture.
Note: If Time-lapse capture is ON, audio recording is disabled.
3 Click [Time-lapse Setup…]. The Time-lapse Capture Setup dialog appears.
4 Set the AVI Capture Rate on the top portion of the dialog. This controls the timing of
Camtasia "snapshots" of individual frames to be included in the video.
5 Set the AVI Playback Rate on the bottom portion of the dialog. This controls how the
AVI will play back. The playback rate is kept the same as the capture rate by default,
but you can use a faster playback rate to compress the timing, length, and file size of
the video.
6 Click [OK] to accept the changes on the Setup dialog. Click [Cancel] to abandon
your changes. Click [Default] to set the frame rate to Camtasia default setting, 5 fps.
For another useful periodic frame capture option, see also: Capture Single Frames.
Options > Preferences > Hotkeys
There are three standard Camtasia Recorder hotkeys and four advanced ones. A
hotkey or combination of hotkeys allows you to activate some action quickly, without the
need to select menus or click on-screen buttons. The Standard hotkeys and their defaults
are:
Record/Pause
Hotkey
Starts recording if Recorder is
stopped; pauses recording if
Recorder is running.
F9
Stop Hotkey
Stops Recorder. F10
ScreenDraw
Hotkey
Start the ScreenDraw feature. Press
hotkey 2
nd
time to stop.
Not enabled
There are additional Advanced hotkeys. See also: Advanced Hotkeys.
You may have to change the hotkeys if the default ones interfere with some other
program operation.
To Change the Hotkey Combination
1 Click Options > Preferences.
2 Select the Hotkeys tab.
3 To change the hotkeys for any available option, place a checkmark in one or more
38

Camtasia Producer 3.0 User Document Camtasia Recorder Menus
boxes below CTRL, SHIFT, or ALT if you want to include them in your hotkey
combination for the selected action.
4 Select another keyboard key from the drop-down box on the right. You can choose
most keyboard keys here.
Example: If you want to use the key combination <Ctrl> + <Alt> + <C> to record or
pause a recording, you would check the CTRL and ALT boxes, and select the letter C
from the drop-down list. Then, to activate or pause recording, you would hold down the
<Ctrl> and <Alt> keys while you press C.
Advanced Hotkeys
The advanced hotkeys are accessed from the Options > Preferences > Hotkeys tab.
The hotkeys are set up the same way standard hotkeys are. See also: Options >
Preferences > Hotkeys.
The advanced hotkeys and their defaults are:
AutoPan Hotkey
Turns on the AutoPan feature during
recording. Press hotkey 2
nd
time to
turn off.
Not enabled
Hide Hotkey
Hides the Recorder screen and
disables the hide/unhide tray icon
hotkey.
Not enabled
Zoom In Hotkey
Zooms in on the recorded area.
Press hotkey additional times to
zoom farther.
Not enabled
Zoom Out Hotkey
Zooms out from the recorded area.
Press hotkey additional times to
zoom farther.
Not enabled
Options > Preferences > Live
The Live Output option available is turned ON with menus Capture > Output > Live.
The frame rate is set using Options > Preferences > Live. This feature allows you to
feed live desktop video to other applications as a video source. For more information, see
also: Live Output Feature Description.
To Use Live Output
1 Turn the Live Output feature ON by selecting menu choices Capture > Output >
Live. A checkmark is placed next to the menu option, indicating Live Output mode is
ON.
2 Select menu Options > Preferences. The Preferences tabbed dialog appears.
3 Select the Live tab.
4 Set the Live capture rate in frames per second.
Note: The Live capture rate determines how frequently Camtasia updates video
frames during live output. This can be used to control the system resources (CPU,
for example) used by Camtasia.
5 Start the application you are sending live video to.
39

Camtasia Recorder Menus Camtasia Producer 3.0 User Document
Note: This may be a streaming media encoder, such as Windows Media Encoder
or RealProducer, or it may be a video capture application such as Adobe Premiere,
or it may be a live web cam application.
6 In the application you are sending video to, select the Camtasia Video Capture
Device as the live source.
7 Use Camtasia Recorder just as you would for output to a movie file. See also:
Recording Video.
Live Output Feature Description
The Live Output feature allows Camtasia Recorder to appear as a standard video
capture device that can be used as a video source by applications such as: streaming
media encoders, video conferencing applications, video editors, and web cam
applications. The live output option essentially makes Camtasia Recorder a "plug in" that
provides a unique source of content and enhances these applications. These applications
normally use real hardware video cameras as their video source.
The live output feature makes Camtasia Recorder appear as another video camera on
the system. However, Camtasia Recorder's live output is a software camera that records
from the desktop. With the live output option ON, Camtasia Recorder feeds its video
frames to applications like a streaming media encoder instead of saving them to a movie
file. The same VCR-style record/pause/resume/stop controls are used during a live
output session as when recording to a movie file. All of Camtasia Recorder's video effects
(cursor highlights, pan, zoom, and all annotation effects) apply for live output. Input
options are disabled since you are sending your entire screen into the feed.
Note: Some live encoding applications (for example, the free version of RealProducer)
only allow you to choose a single default video capture device. If you have more than
one video capture device on your system, such as a video capture card, then the
Camtasia video capture device may not be available in the encoding application. In this
case, disable the non-Camtasia capture device using the Control Panel Multimedia
applet. In the Multimedia applet, go to the Devices tab, expand the Video Capture
Devices list, select the device to disable, click the [Properties…] button, and choose
Do not use this video capture device.
For information on using this feature, see also:
Capture Menu > Output Options
Options > Preferences > Live
Effects > Settings > Watermark
Options > Preferences > Program
Use this tab to set Camtasia Recorder Program Capture Options. Place a checkmark in
the box next to each option you want to turn ON.
Capture Options
• Minimize before starting capture - default is OFF. Set to ON if you want the
recorder program window to reduce to the system tray while capturing video.
• Pause before starting capture - default is OFF. Pausing before capture allows you
to arrange and position windows and the capture rectangle before beginning the
capture.
40

Camtasia Producer 3.0 User Document Camtasia Recorder Menus
• Boost priority during capture - default is OFF. This gives Camtasia a higher
processor priority which can mean better performance (that is, better or faster frame
rate captures).
• Hide capture rectangle - default is OFF. If you place a checkmark in the box, the
capture rectangle will no long appear before and during captures.
• Solid capture rectangle - default is OFF. The default capture rectangle comprises
short angles at each corner of the rectangle. Place a checkmark in the box to turn it
into a solid rectangle.
• Play movie after saving file - default is ON. If you don’t need to preview the movie
after capturing it, remove the checkmark.
• Play AVI files with Camtasia Player – default is ON. If you do not want to use
Camtasia Player, remove the checkmark. Your selected Windows movie player will
be used instead.
• Report dropped frames - default is OFF. This causes Camtasia to report dropped
frames in the status display. This is helpful to see and understand what the
maximum frame rate Camtasia can achieve.
• Always on top - default is OFF. This puts Camtasia at the top of any layered
applications on your computer desktop.
• Round frame size to a 4 pixel boundary - default is ON. When it is ON, the
horizontal and vertical pixel dimensions of the movie you are creating are forced to
a multiple of 4. This eliminates errors occurring when viewing movies created with
certain codecs (such as Microsoft Video 1) which requires frames that are multiples
of 4 pixels.
Note: The TSCC video codec does not have this limitation—movies are encoded
and decoded with any pixel dimensions.
• Disable display acceleration during capture - default is OFF. Disabling hardware
display acceleration on Windows 2000 or later can dramatically increase frame
rates and/or reduce system load during recording.
Note: When display acceleration is disabled, your screen will momentarily blank at
the start and end of recording. This is normal.
• Capture layered windows - default is OFF. Put a check mark in the box to allow
the capture of translucent or irregularly shaped layered windows. An example of a
layered window is the Office Assistant in Microsoft Office 2000.
Note: This feature only works when capturing on Windows 2000, XP, or later.
Temporary File Folder
Specify a drive and folder where files will be stored temporarily during capture and before
you save them to another location. The default C:\WINDOWS\TEMP is fine if you have
room on your C: drive. Use the fastest local hard drive on your system that has the most
free space. If you need to change the location, click […] to search for a new one.
41

ScreenPad Annotations Camtasia Producer 3.0 User Document
ScreenPad Annotations
Using ScreenPad Annotations
You can add ScreenPad annotations to your captured video. These can be captions,
callouts, logos, stamps, sticky notes, or any fixed visual you want to include in the scene
during recording. The annotations are actually graphics files that can be existing .BMP,
.GIF, or JPG images, or you can use the included graphic editor to create them. You can
also use another graphic program to create your annotations, such as SnagIt Studio or
any graphic program that can save files as images.
Note: Don’t forget you can accumulate annotations into Layouts in the Layout Library,
then "playback" a sequence of layouts using ScreenPad Hotkets. For more information,
see Using ScreenPad Layouts.
1 Select menu options View > ScreenPad or click the ScreenPad icon on the toolbar
. The ScreenPad appears.
2 Choose an Object Library from ScreenPad
.
3 Choose an annotation from the ScreenPad and drag it into the scene to be captured.
Drop it where you want it to appear in the scene.
4 To resize the annotation: right-click over the annotation and select Resize….
5 To type text over the object and set text format: right-click over the annotation
and select Edit Text….
6 Start recorder as usual. The ScreenPad annotation will be included in the recording
in the position you placed it.
7 To remove an annotation from the recording scene: right-click over the annotation
and select Close or Close All Objects (closes all annotations that are currently
open).
Note: You can use as many annotations as you want, but be careful not to create a
cluttered look in your movie.
You can create your own libraries of annotation shapes and save them as ScreenPad
layouts. These saved layouts can be restored on the desktop in their original positions.
For more information, see also:
Creating New Annotations in ScreenPad
Importing Background Images into ScreenPad
Creating and Saving Layouts
Using ScreenPad Layouts
Editing Annotation Images
Editing Annotation Text
Creating New Annotations in ScreenPad
Annotation objects (bitmap images) are managed in the ScreenPad. The ScreenPad
allows you to import new images (.BMP, .GIF, or JPG) for storage there or to create new
images using the included Image Editor. You can also add text to the graphic background
while you create annotations, either by importing images or using the Image Editor. After
creating and storing these images in the ScreenPad, you can drag-and-drop them into
42

Camtasia Producer 3.0 User Document ScreenPad Annotations
scenes you are capturing with Camtasia Recorder or include them in Layouts that can
be shown and sequenced during recording.
To Create a New Annotation:
1 Select menu options View > ScreenPad or click the ScreenPad icon on the toolbar
. The ScreenPad appears.
2 Select the Object Library
in which you want to create a new annotation.
Example: The default "My shapes" is an Object Library.
Note: To create a new Object Library in ScreenPad, right-click over the ScreenPad and
select New.
3 Right-click over ScreenPad (with the library you want open) and select New
Object…. The New Object dialog appears.
4 Enter the Name of the Annotation in the Name: box.
5 To create a new image with a blank background, select the Blank radio button and
set the Image dimensions (in pixels).
6 To create an image from an existing image file, select the Image file radio button and
select the file to import.
7 If you would like to add a text caption over the image, type it in the text box. You can
set text position and format later. See also: Editing Annotation Text.
8 Click [OK]. The new object is created in ScreenPad.
For more information on the drawing tools in the Image Editor, see also: Image Editor
Drawing Tools.
For more information on including your annotations in the Layout Library and controlling
their appearance and sequence during capture, see also: Creating and Saving Layouts.
Importing Background Images into ScreenPad
Annotation objects (bitmap images) are managed in the ScreenPad. The ScreenPad
allows you to import new images (.BMP, .GIF, or JPG) as the background of the
annotation object. You can also add text over the background image in the New Object
Dialog. Once an image has been imported as an annotation object, you can edit the
image using ScreenPad’s image editor (to choose a transparent color, for example). After
creating and storing these images in the ScreenPad, you can drag-and-drop them into
scenes you are capturing with Camtasia Recorder. And any time you need to change
the text over the image background, you can do so on the New Object Dialog.
To Import Background Images into the ScreenPad:
1 Select menu options View > ScreenPad or click the ScreenPad icon on the toolbar
. The ScreenPad appears.
2 Select the Object Library
in which you want to import an image. Example: The
default "My shapes" is an Object Library.
Note: To create a new Object Library in ScreenPad, right-click over the ScreenPad
and select New Object….
3 Right-click over ScreenPad (with the library you want open) and select New
Object…. The New Object dialog appears.
4 Enter the Name of the Annotation in the Name: box.
43

ScreenPad Annotations Camtasia Producer 3.0 User Document
5 To create an image from an existing image file, select the Image file radio button and
select the file to import.
6 If you would like to add a text caption over the image, type it in the text box. You can
set text position and format later. See also: Editing Annotation Text.
7 Click [OK]. The new object is created in ScreenPad.
See also:
Editing Annotation Images
Editing Annotation Text
Image Editor Drawing Tools
Creating and Saving Layouts
Editing Annotation Images
You can edit any image in the ScreenPad using the Image Editor.
To Edit an Annotation:
1 Select menu options View > ScreenPad or click the ScreenPad icon on the
toolbar. The ScreenPad appears.
2 Select the Object Library
in which the annotation you want to edit exists.
3 Right-click over the image you want to edit and select Edit Image…. The Image
Editor appears.
4 Edit the annotation using the drawing tools.
5 Click [OK] to save the edited image in the Object Library.
Note: You can use the Image Editor to set a transparent color for the annotation. This
creates a transparent effect where the background over which an irregularly shaped
annotation is placed shows through in the irregular areas. If you edit an imported
transparent GIF file, the transparent color specified in the file will be used. Otherwise,
transparency is OFF by default.
TIP: Use a simple, low color image file (one of the 16 colors, for example) whenever
possible. Larger, high color images use lots of memory and can slow Recorder
performance.
For more information, see also:
Image Editor Drawing Tools
Editing Annotation Text
Editing Annotation Text
You can add text to any image in the ScreenPad, set the font, format, and position of the
text, and edit it later if you need to make changes.
To Add Text to an Annotation:
1 Select menu options View > ScreenPad or click the ScreenPad icon on the
toolbar. The ScreenPad appears.
2 Select the Object Library
that contains the image to which you would like to add
44

Camtasia Producer 3.0 User Document ScreenPad Annotations
text.
3 Right-click over the image you want to add text to and select Edit Text…. The Text
Viewer Window and Text Tool appear.
4 Type the text you want to add in the box provided on the Text Tool. Set text font,
color, alignment, and format using the toolbar at the top of the Text Tool.
5 In the Text Viewer Window, the text you have added is contained in the rectangular
dashed outline box over the image. Position the text by clicking over the selection
handles around the perimeter of the image, or anywhere inside the dashed rectangle,
and drag until the text is properly positioned.
Note: You can scale the background image using the Scale Image slider controls.
These scale factors can be independent or equal. If you want to scale horizontal
and vertical sizes equally, place a check mark in the Keep Aspect Ratio box.
6 Click [OK] to save the image and text annotation in the Object Library.
Note: You can only save changes when editing an annotation from the Object Library.
Changes made to floating annotations are not saved unless they are added to a Layout.
The changes to the individual annotation are not saved.
For more information, see also:
Image Editor Drawing Tools
Editing Annotation Images
Image Editor Drawing Tools
Icon Name Description
Zoom Slider Adjust the view zoom level to any
magnification.
Cut Cut or delete the selected area from the
drawing.
Copy Copy the selected area to the clipboard for
pasting.
Paste Paste the contents of the clipboard to the
drawing.
Clear Clear the drawing area.
Undo Undo the most recent change to the drawing.
Redo Redo a change that has been undone.
Magnify Magnify the selected area.
Size to fit
Window
Change the view size of the drawing to fit the
Image Editor window size.
45

ScreenPad Annotations Camtasia Producer 3.0 User Document
Resize Resize the drawing to specific pixel
dimensions. Also, change the color depth of
the drawing.
Select Area Select a rectangular area of the drawing for
editing or manipulation using the other tools.
Select Color Click the eyedropper, then left-click over an
area of the drawing to select the foreground
color. Right-click over an area to select the
transparency color.
Flood Fill Click the paint can, then click an area of the
drawing to pour the color into. Color:
Eyedropper or Color Selector.
Add Text Add text over the drawing. You can select
formatting characteristics from the Text Tool
dialog that appears. Color: Eyedropper or
Color Selector.
Air Brush Spray the color in random patterns to partially
color or fill an area. Color: Eyedropper or
Color Selector.
Freehand
Erase
Erase an area of the drawing. Width: Eraser
Width.
Freehand Draw Draw a line freehand in the drawing area. Line
width is set with the Pen Width button. Color:
Eyedropper or Color Selector.
Line Draw a straight line in the drawing area. Line
width is set with the Pen Width button. Color:
Eyedropper or Color Selector.
Eraser Width Use this button to set the size of the Freehand
Eraser tool.
Pen Width Use this button to set the pixel width of
freehand lines, straight lines, and shapes.
Rectangle Draw a rectangle shape in the drawing area.
Color: Eyedropper or Color Selector. Width:
Pen Width.
Rounded
Rectangle
Draw a rounded rectangle shape in the
drawing area. Border width is set with the Pen
Width button. Color: Eyedropper or Color
Selector. Width: Pen Width.
Ellipse Draw an ellipse (circle or oval) in the drawing
area. Border width is set with the Pen Width
button. Color: Eyedropper or Color Selector.
Width: Pen Width.
46

Camtasia Producer 3.0 User Document ScreenPad Annotations
Filled
Rectangle
Draw a filled rectangle shape in the drawing
area using the foreground color. Color:
Eyedropper or Color Selector.
Filled Rounded
Rectangle
Draw a filled rounded rectangle shape in the
drawing area. Color: Eyedropper or Color
Selector.
Filled Ellipse Draw a filled ellipse (circle or oval) in the
drawing area. Color: Eyedropper or Color
Selector.
Foreground
Color
Click the down arrow to select the color, or use
the eyedropper and left-click over the image to
select the foreground color to be used with any
drawing tool.
Transparency
Color
Click the down arrow to select the color, or use
the eyedropper and right-click over the image
to select the color that will be used as
transparent.
Using ScreenPad Layouts
After you have saved a layout in the ScreenPad Layout Library, you can open it and use
it any time you like. Objects remain in the positions and sizes in which they were saved in
the layout.
You can "playback" a sequence of layouts during recording using ScreenPad Hotkeys,
sequencing through layouts to present the information you want, at the right time, and in
the right order. Right-click on the layout library to set hotkey properties. You can also
change the sequence of layout appearance by simply dragging them to new locations in
the Layout Library.
1 If ScreenPad is not open, select menu options View > ScreenPad or click the
ScreenPad icon on the toolbar
. The ScreenPad appears.
2 Click the Layout Library to open it
.
3 Double-click a layout to open it on your desktop. Alternatively, drag-and-drop it
anywhere on the desktop. The layout opens, with all objects in proper placement.
Note: You cannot make changes to a layout and save it with the changes.
However, you can make changes to a layout and save it as another layout.
4 The appearance and sequence of layouts during recording can be controlled using
ScreenPad Hotkeys. This allows you to control how objects (such as titles or
callouts) appear during the movie. For more information see ScreenPad Layout
Hotkeys.
5 To change the sequence of layout appearance while sequencing through them with
the hotkeys, simply drag individual layouts to new locations in the Layout Library.
Layout’s position in the library controls the sequence in which they appear.
See also:
Creating and Saving Layouts
ScreenPad Layout Hotkeys
47

ScreenPad Annotations Camtasia Producer 3.0 User Document
Creating and Saving Layouts
You can place one or more annotation objects on your desktop, then save their position
and size as a Layout. The saved objects and layouts include any annotation text you
have added. This is very handy for doing more than one "take" to get a scene right. After
saving a layout, you can always call it up again from the ScreenPad Layout Library. And,
you can use the ScreenPad hotkeys to "playback" a sequence of layouts during
recording.
1 Place ScreenPad annotations where you want them for the scene. See also: Using
ScreenPad Annotations.
2 When you have the position and size of objects exactly as you want them, click the
Layout Library in ScreenPad
.
3 Right-click anywhere over an object or ScreenPad and select Save Layout.
4 A new layout is placed in the Layout Library.
5 You can rename the layout by clicking over the name and typing a new one.
6 You can change layout characteristics by changing the layout, then saving it as a
new one.
See also:
Using ScreenPad Layouts
ScreenPad Layout Hotkeys
ScreenPad Layout Hotkeys
You can navigate easily between ScreenPad layouts using hotkeys. None of these
hotkeys are defined by default, so if you want to use them, you must define them. Select
hotkey sequences that will not interfere with other programs you may have operating and
are unique in Camtasia (not the same ones used to operate Recorder).
This feature can be very valuable if you want to change layouts during a recording
session. For example, you can start recording with no annotation layouts visible. Then, at
a predetermined point during recording, use the Show/Hide Layout Hotkey to show the
first layout. Then, using the Next or Previous Layout Hotkeys, you can cycle through a
set of layouts that illustrate the action on screen in real time. Use the Show/Hide Layout
Hotkey again to make them disappear.
To Select ScreenPad Hotkeys:
1 In ScreenPad, select a Layout Library.
2 Right-click over the Layout Library. The Layout menu appears.
3 Select ScreenPad Hotkeys…. The ScreenPad Hotkeys Dialog appears.
4 To change the hotkeys for any available option, place a checkmark in one or more
boxes below CTRL, SHIFT, or ALT if you want to include them in your hotkey
combination for the selected action.
5 Select another keyboard key from the drop-down box on the right. You can choose
most keyboard keys here.
Note: Select hotkey sequences that will not interfere with other programs you may have
operating and are unique in Camtasia (not the same ones used to operate Recorder).
48
Camtasia Producer 3.0 User Document ScreenPad Annotations
The ScreenPad Layout Hotkeys are:
• Next Layout Hotkey. Use this hotkey to cycle forward through multiple layouts in
the Layout Library individually until you have the one you want to use. Layouts
appear ready-to-record on screen.
• Previous Layout Hotkey. Use this hotkey to cycle backward through multiple
layouts in the Layout Library individually until you have the one you want to use.
Layouts appear ready-to-record on screen.
• Show/Hide Layout Hotkey. Use this hotkey to toggle between showing and hiding
the selected layout on screen.
49

Distributing Movies Camtasia Producer 3.0 User Document
Distributing Movies
Distributing Your Movie
To create a finished production for distribution, you will probably want to touch up your
video captures in Camtasia Producer. Before you do, there are some things you should
know about distribution methods, recorded movie quality and codecs, and distribution
quality and codecs.
During Recording:
To get the best quality recording, use the TechSmith Screen Capture Codec (TSCC) as
the recording codec and use uncompressed PCM audio. These are the default options
for Camtasia, however, if they have been changed, you can change them back using
menu choices Options > Preferences and selecting the AVI tab. See also: Options >
Preferences > AVI for more details on setting configuration options.
During Production:
When you import all of the captured movies into Camtasia Producer, you can choose to
leave the movie codec as TSCC (which means you will likely be required to distribute the
codec with the movie) or you can change it to another codec or format as required by
your users.
For more information on shipping the TSCC codec with your movie, see also: TechSmith
Screen Capture Codec (TSCC).
TechSmith Screen Capture Codec (TSCC)
TSCC stands for TechSmith Screen Capture Codec. It is a video encoder-decoder that
takes advantage of the unique characteristics of desktop video and produces a superior
quality movie at reasonable compression rates. It is the default method of encoding in
Camtasia Recorder, which can easily be changed to any of the standard Windows
codecs when recording. But we recommend TSCC as a high quality, lossless video
codec that is especially well suited for desktop videos.
However, when using TSCC to encode a final production for distribution, you must also
distribute the free codec to any users who will view the movie. There are no charges,
royalties, or licensing requirements involved in distributing movies encoded with TSCC or
with distributing the codec to others for viewing.
If you do not want to distribute your movie encoded with TSCC, we recommend you still
use TSCC during capture with Camtasia Recorder. Also, select the uncompressed PCM
audio format. Then, when the movie is produced in Camtasia Producer, select another
codec and audio format for distribution (such as a standard Windows video codec,
compressed audio, or a streaming file format). This approach trims the final file size while
maintaining some of the quality of the original.
To make distribution of TSCC-encoded movies easier, we have created a codec installer
and have included it on the Camtasia CD-ROM. It is also always available at our web
site,
www.techsmith.com. Look for the file named TSCC.EXE.
Copy TSCC.EXE onto the same media where your movie distribution resides and either
50

Camtasia Producer 3.0 User Document Distributing Movies
have your installer run it at installation time or instruct the user to do so.
Note: You can also ship TSCC by "packaging" your video with it when you produce the
movie in Camtasia Producer. For more information, see also: Pack and Show Your
Movie.
51

Getting Help Camtasia Producer 3.0 User Document
Getting Help
Help Menu
Under the Camtasia Help menu, you have the following options:
Quick Help... - Displays a simple dialog outlining the basic steps to make a Camtasia
Recording.
Contents and Index - Opens Camtasia's Help table of contents.
Using Help - Opens the standard How to Use Windows Help system for the operating
system you are using.
Tip of the Day - This selection displays the Tip of the Day. Remove the check mark in
Show tips at startup to turn them OFF. Put a check mark there to show them each time
Recorder is started.
Support… - Opens the Camtasia Diagnostics dialog, which will help you assemble the
information needed by Camtasia Support Personnel. This will produce a file for you to
send via e-mail to Camtasia Support. See also: Support (Help).
Check for Update - Launches your Internet Browser and goes to the update page on the
TechSmith web site. This page allows you to download program updates.
Frequently Asked Questions - Launches your Internet Browser and goes to the
Frequently Asked Questions page on the TechSmith web site. This page gives you
information about SnagIt in FAQ format.
TechSmith Products - Launches your Internet Browser and goes to one of two selected
product description pages on the TechSmith web site: SnagIt and DubIt.
TechSmith on the Web - Launches your standard Internet Browser and displays
www.techsmith.com. From there, you can obtain support information or information of
other TechSmith products.
About Camtasia… - Presents program version information. If you are using an
Evaluation Version, this menu choice displays registration and information about the
evaluation period.
Register Camtasia… - (Evaluation version only) Opens a 3-step dialog the allows you to
purchase and register Camtasia.
Sales Information… - (Evaluation version only) Opens the Camtasia help file to
additional information on how to contact TechSmith and buy our products, including
information about international distributors.
Camtasia Capture Recovery Tool
Audio and video streams are saved in temporary files and folders during a capture.
• The video stream is saved in a temporary AVI file with a name like
_captureb42e35.avi.
• The audio stream (if any) is saved in a temporary WAV file with a name like
52

Camtasia Producer 3.0 User Document Getting Help
_captureb42e35.wav.
After a successful capture, these files are converted to the .AVI file name you have
chosen.
If the capture is interrupted by system failure (the disk becomes full, for example), then
the temporary files remain on your system. You can recover these files using the
Camtasia Capture Recovery Tool. The program, Recovery.exe, is located in you
Camtasia installation directory and must be started from there to recover files.
To recover interrupted Camtasia Recorder sessions:
1 Find the temporary capture files. They are located in the folder specified in Options >
Preferences > Program.
Note: If you cannot locate these files, use Windows Explorer to search for
*_capture*.avi. You can find audio files by searching for *_capture*.wav.
2 Record an AVI recovery reference file to recover the capture video stream. See
Record Reference File for details.
3 Go to the Camtasia installation directory and find the file named recovery.exe.
Double-click this file to start the Camtasia Capture Recovery Tool.
4 Under Select AVI recovery reference file, click [AVI File…] and select the
reference file created in step 2.
5 Under Select temporary capture files to recover, click [AVI File…] and select the
temporary AVI file you found in step 1. If you are recovering an audio track as well,
click [WAV File…] and select the temporary WAV file you found in step 1.
Note: If you want to just recover the audio stream, you only need to specify the
temporary capture WAV file.
6 Click [Recover…]. The Save As dialog asks you to select a name and folder for the
recovered files.
7 Program messages are shown in the Status box. It should eventually show "File
Recovery Successful!"
Note: When you have verified you have useful files that can be reassembled in DubIt,
you can delete the temporary files to save disk space.
Note: The Recovery tool does not modify either the temporary capture files or the
recovery reference file.
Support (Help)
Clicking Support from the Help menu displays detailed setup and diagnostic information
about Camtasia and your system. This information can help you and the Camtasia
support staff troubleshoot problems you might have.
You may be asked to send or fax a copy of the diagnostics when you report a problem
that is not fixed quickly and easily. If you are asked for diagnostics, perform the following:
1 Click Help > Support on the Camtasia main screen.
2 Click [Copy to Clipboard].
3 If you want to send an e-mail report of the problem to Camtasia support, compose a
message with the following information:
• Your name, e-mail address, fax and phone numbers
53

Getting Help Camtasia Producer 3.0 User Document
• A description of the problem and what you were trying to do
• Paste the text from the Camtasia Diagnostic Information box on the Support
window.
When complete, send the message to [email protected].
4 Alternatively, click [Save to File…] to save the diagnostic information in a separate
text file. Then, attach the file to your e-mail and send it to support@techsmith.com or
print the information and fax it to Camtasia support, along with the other information
requested in step 3.
5 Click [OK] to close the Camtasia Support window.
Camtasia Support
You can contact our Technical Support department in one of the following ways:
E-mail:
support@techsmith.com
Fax:
(517) 333-1888
Phone:
(517) 333-2100
Mail:
TechSmith Corporation
Attn.: Camtasia Support
PO Box 4758
East Lansing, MI 48826-
4758
If you are reporting a problem with Camtasia, please provide the following information:
• The product name and version number (Camtasia Recorder, version 3.0).
• Your name, e-mail address, fax number and phone number.
• A Diagnostic Information printout (using Help > Support…).
• A description of the problem, and what you were trying to do when the problem
occurred.
54

Camtasia Producer 3.0 User Document Legal and Miscellaneous
Legal and Miscellaneous
Software License Agreement
See the file license.txt in the Camtasia install folder for the Software License Agreement.
Acknowledgments
TechSmith Corporation provides this manual "as is", makes no representations or
warranties with respect to its contents or use, and specifically disclaims any expressed or
implied warranties of merchantability or fitness for any particular purpose. TechSmith
Corporation reserves the right to make changes to the content of this manual, at any
time, without obligation to notify any person or entity of such changes.
The software described in this document is furnished under a license agreement. The
software may be used or copied only in accordance with the terms of the agreement. It is
against the law to copy the software on any medium except as specifically allowed in the
license agreement.
No part of this manual may be reproduced or transmitted in any form or by any means,
electronic or mechanical, including photocopying, recording, or information storage and
retrieval systems, for any purpose other than the purchaser's personal use, without the
express written permission of TechSmith Corporation.
Copyright © 2000, 2001 TechSmith Corporation.
All Rights Reserved. Printed in the United States of America.
Trademarks:
TechSmith is a registered trademark and SnagIt is a registered trademark of TechSmith
Corporation.
Camtasia and DubIt are trademarks of TechSmith Corporation.
Microsoft, MS, Windows, Word and MS-DOS are registered trademarks and Windows NT
is a trademark of Microsoft Corporation.
All other brands and product names referred to in this manual are the trademarks or
registered trademarks of their respective holders.
Association of Shareware Professionals
TechSmith Corporation is an Approved Vendor and a member of the Association of
Shareware Professionals (ASP). ASP wants to make sure that the shareware principle
works for you. If you are unable to resolve a shareware-related problem with an ASP
member by contacting the member directly, ASP may be able to help. The ASP
Ombudsman can help you resolve a dispute or problem with an ASP member, but does
not provide technical support for members’ products. Contact the ASP Ombudsman at:
Ombudsman, Michael Marshall
55

Legal and Miscellaneous Camtasia Producer 3.0 User Document
Association of Shareware Professionals
157-F Love Avenue
Greenwood, IN 46142
E-mail: [email protected]
About TechSmith Corporation and Our Products
Company Overview
For the latest information, see http://www.techsmith.com/.
TechSmith Corporation develops practical screen capture software and video screen
recording & production tools to capture and manipulate images, video and voice.
Applications for our products range from technical documentation and software
demonstrations to developing streaming content for web sites and broadcasting desktop
activity over the Internet.
SnagIt, our popular advanced screen capture software introduced in 1990 has a large
and loyal following. It has become "The Screen Capture Standard" in the Windows world.
Camtasia, our multimedia video screen capture and production tool was unveiled at Fall
Comdex, 1999. It has quickly established itself as a must have tool for people who want
to capture the action from the Windows desktop and save it in industry standard video
formats.
Free trial versions of all of our products are available from our web site as well as from
hundreds of other sites around the globe.
Established in 1987 and located in East Lansing, Michigan, USA, TechSmith initially
provided custom Windows software development and LAN remote access consulting and
solutions. The shift to product development was completed in the early 1990s.
TechSmith is a privately held Michigan corporation rated 3A1 by Dun & Bradstreet. Our
Duns Number is 60-672-4680. TechSmith holds several registered trademarks and
domain names, including techsmith.com, snagit.com, dubit.com and camtasia.com.
TechSmith's co-founder and president is William Hamilton.
Contact Information
U. S. Postal Service Address
TechSmith Corporation
P.O. Box 4758
East Lansing, MI USA 48826-4758
UPS / FedEx Address
TechSmith Corporation
1780 E. Grand River Ave.
East Lansing, MI USA 48823
Telephone
Voice:+1 517 333-2100
Fax:+1 517 333-1888
E-mail
Sales: [email protected]
Marketing: [email protected]
56

Camtasia Producer 3.0 User Document Legal and Miscellaneous
Technical support: [email protected]
Personnel / Job Queries: personnel@techsmith.com
Website, FTP or connectivity issues: [email protected]
Other TechSmith Products
SnagIt
SnagIt is the screen capture, print and file program for Microsoft Windows. Users can
capture an entire screen, a portion of the screen or a single window. SnagIt sends the
captured area to the Windows Clipboard, printer or a file for later use in other
applications, such as word processors. SnagIt is a fully functional Windows DDE server
so it may be incorporated into custom or commercial applications for printing.
An evaluation version is available at http://www.techsmith.com/
Send email requests for additional information to [email protected].
DubIt
DubIt is a multimedia tool which lets you easily add audio to movie clips and images.
Unlike video editors and presentation authoring products, DubIt adds audio in real-time
as you watch the movie or image.
With DubIt, it is easy to narrate a video clip and synchronize your voice with the video.
DubIt is the perfect tool to quickly add voice annotation and sound effects to a movie or
image.
DubIt uses a familiar VCR-style "Media Player" interface that anyone can use. There is
no complicated setup or long learning curve with DubIt. Simply open a movie or image
and hit the record button. Just because DubIt is small and simple does not mean it is not
powerful.
An evaluation version is available at http://www.techsmith.com/.
Send email requests for additional information to dubit@techsmith.com.
TechSmith and SnagIt are Registered Trademarks of TechSmith Corporation. Camtasia
and DubIt are trademarks of TechSmith Corporation.
About DubIt
DubIt is a multimedia tool which lets you easily add audio to movie clips and images.
Unlike video editors and presentation authoring products, DubIt adds audio in real-time
as you watch the movie or image.
With DubIt, it is easy to narrate a video clip and synchronize your voice with the video.
DubIt is the perfect tool to quickly add voice annotation and sound effects to a movie or
image.
DubIt uses a familiar VCR-style "Media Player" interface that anyone can use. There is
no complicated setup or long learning curve with DubIt. Simply open a movie or image
and hit the record button. Just because DubIt is small and simple does not mean it is not
powerful.
An evaluation version is available at http://www.techsmith.com/.
Send email requests for additional information to dubit@techsmith.com.
57

Legal and Miscellaneous Camtasia Producer 3.0 User Document
Panning the Video Capture Area
This feature is available for any video Capture input setting, but it is most useful if you
select Capture > Input > Region for your video capture. You can use this feature to
"pan" the video capture area across the screen while recording or during pause. Follow
these general steps:
1 Select Capture > Input > Region. This sets Camtasia to expect a capture region of
the screen to be defined.
2 Select Effects > AutoPan.
3 Click the red record button to start Camtasia in pause mode. The cursor changes to a
crosshair pointer for you to define the region of your computer screen to be captured
in the video. This defined area becomes a highlighted rectangular border that can be
"panned" across the screen before, during, and after video capture. The rectangle
flashes during capture but not while paused.
4 Click the record button again to start recording.
5 Begin the screen actions you want to capture.
Note: Use the Pause button to pause the movie and move to a new region for
capture. Click the record button again to resume recording.
6 Click the stop button to end the new capture sequence. The Save Movie File As
Dialog appears to save the file.
Interleave Audio and Video
Interleaving the audio and video data allows it to playback smoothly when the movie file
is played from a slower device (such as a floppy disk, or CD-ROM). The only reason to
disable interleaving would be to speed up movie file "Rendering" time.
The box for Interleave audio every X video frames specifies how much to interleave
audio and video data. The lower the number specified for "X," the smoother the playback
will be.
Note: Interleaving every 1 video frame is full interleaving which always results in the
smoothest playback. Interleaving with higher numbers of video frames results in
progressively less interleaving and potentially less smooth playback. However, the
movie file may be smaller with less interleaving. This can be an important consideration
for long movies with large pixel dimensions and detail.
Effects > Highlight and AutoHighlight
You can create an outline effect around object being captured with Camtasia Recorder
to call attention to that object. There are two methods available:
Highlight: Allows you to select a static area of a window or the whole window to have a
highlight rectangle around it. As you record the movie and move the cursor on screen,
the highlight area does not change.
AutoHighlight: You can turn this feature ON before capturing, then while recording, the
highlight is applied to areas of windows or whole windows over which the cursor passes.
The highlight area changes dynamically with the cursor position.
58

Camtasia Producer 3.0 User Document Legal and Miscellaneous
To Use the Highlight Feature
1 Select menu options Effects > Settings and then select the Annotation tab.
2 In the Highlight section, adjust the line width (in pixels) and color. Click [OK] to apply
the options.
3 Select menu options Effects > Highlight to apply a static highlight area. The cursor
becomes a finger-pointer and allows you to select the desktop element you want to
apply the highlight to.
4 When the highlight is applied to the area you want highlighted, click once. The area is
selected and the highlight is applied.
5 Record your video. The highlight area is included in the movie.
6 Select Effects > Highlight or the Highlight icon again to disable (hide) the highlight
effect.
To Use the AutoHighlight Feature
Note: You can use Capture > Pause/Resume to control exactly when and where the
AutoHighlight effect appears.
1 Set highlight options as shown in steps 1 and 2 above.
2 Select menu options Effects > AutoHighlight to apply a dynamic highlight area.
3 Begin recording as always. Notice that when you move the cursor about in the area
being captured, the highlight area is dynamically applied to different desktop
elements. These highlighted elements are included in the movie.
59

Glossary Camtasia Producer 3.0 User Document
Glossary
Add Caption
This option turns ON the Caption Effect. A checkmark appears next to the menu item
when the option is ON. This allows you to type a caption to be affixed to the video being
captured. Set options for this effect in Effects > Settings > Annotation.
Add Time/Date
This option turns ON the Time and Date Annotation Effect. A checkmark appears next
to the menu item when the option is ON. The time and date are affixed to the video being
captured. Set options for this effect in Effects > Settings > Annotation.
Add Watermark
This option turns ON the Watermark Effect. A checkmark appears next to the menu item
when the option is ON. This allows you specify an image to be used as a watermark in
the video being captured. Set options for this effect in Effects > Settings > Watermark.
Audio Attributes
This box lists the audio format attributes. The attributes are (from left to right):
• Sample Rate in kHz - Number of audio samples per second, or the fidelity of the
audio recording.
• Sample Size in Bits - How much data to record for each audio sample.
Note: An 8 Bit sample size may be fine for voice recording. Since using a 16 Bit
sample size doubles the size of the audio data you record, you should only use it if
you must have the highest quality recording.
• Mono or Stereo - The number of audio channels to record. Mono means record
one audio channel, Stereo means record two audio channels (right and left).
Note: Stereo is only useful if you are recording with a stereo microphone. Since
using a Stereo audio format doubles the size of the audio data you record, you
should only use Stereo if you know you are recording with a stereo microphone.
• Data Rate - The data throughput of the audio stream in kilobytes per second (kbps).
Note: For most of the attributes, the higher the number, the higher the quality of the
recording will be and the larger the movie file will be.
Audio Format: Format
This box lists the audio format type. Choose from one of the many audio formats listed on
the drop-down list.
Audio Format: Name
This box lists the name, if there is one, of the Audio Format you select or save. This
allows you to choose an audio format using a simple understandable name. There are
usually several names already assigned. For example, on most computers you can select
Telephone Quality in the Name list box, instead of the more cryptic 11.025kHz, 8 Bit,
Mono in the Attributes list. Note that the two are the same because they have the same
audio format and attributes.
60

Camtasia Producer 3.0 User Document Glossary
You can add an audio format name using the [Save As…] button and remove an existing
audio format name using the [Remove] button.
Audio-Video Interleave (AVI)
This is a computer video specification by Microsoft Corporation for use on PCs. AVI is
one of several motion-oriented file formats for computing and is the one most often
associated with PCs and Microsoft Windows.
.AVI is actually a rapidly moving series of captured bitmaps that shows movement of
screen elements. The size of video captures depends on the size of the window being
captured, the speed at which the "frames" of video are captured, and the duration of the
video capture. To limit file size, try lowering the frame rate, eliminating extraneous
elements on the captured window, and keeping the length of the capture short.
AutoHighlight
This option turns ON the Caption Effect. A checkmark appears next to the menu item
when the option is ON. This allows you to add a highlight border to areas of the capture
(typically a window, dialog, or box) as the cursor passes over them during capture. An
outline area is added during capture. The width and color of the highlight line are set in
the Effects > Settings > Annotation.
AutoPan
AutoPan allows the capture area to follow the mouse position on screen during capture.
Use this when you want to capture a smaller area of a screen where the action is and
ignore the inactive areas. This can help limit file size and help to focus attention.
AutoZoom
Select this effect to AutoZoom during recording. This option sets up an automatic zoom in
or zoom out on the action. Set the zoom direction and amount using Effects > Settings >
Zoom.
Emboss
Use this option to create an embossed underlay watermark. This can be used to create a
watermark effect similar to those used by commercial television stations, where the "bug"
appears translucent and slightly raised.
Emboss Direction
Choose the embossing "direction." The direction refers to a shadow effect on the
embossed image and a rough indication of the direction of a light source. Use the
[Preview] button to see how the direction changes the embossing effect.
Emboss Depth
Changes how pronounced the embossing effect appears.
Hide Cursor
The cursor is hidden during video capture. This selection toggles with Show Cursor.
61

Glossary Camtasia Producer 3.0 User Document
Highlight
This option turns ON the Highlight Effect. A checkmark appears next to the menu item
when the option is ON. This allows you add a fixed highlight border to a selected area of
the capture (typically a window, dialog, or box). An outline area is added during capture.
The width and color of the highlight line are set in the Effects > Settings > Annotation.
Highlight Clicks
When this option is ON during video capture, mouse clicks result in a circle effect being
applied to the area the click occurred. This helps call attention to the action of clicking
and can be supplemented with the audio click effect.
Highlight Cursor
When this option is ON during video capture, the cursor has a highlight area applied
around it. This helps call attention to the movement of the cursor.
Highlight Cursor & Clicks
When this option is ON during video capture, two effects are applied to the mouse cursor:
a highlight area is applied around the cursor and whenever the mouse is clicked, a circle
effect appears in the area of the click. This helps call attention to the movement of the
cursor and the action of clicking.
Horizontal Offset
Changes the horizontal offset of the watermark image from the edge of the movie frame.
You can use this option to refine watermark positioning. Use the [Preview] button to see
the offset effect.
Image Path
This must be the complete Windows path and file name for the watermark image file. The
watermark image file can be one of the following file formats: .BMP, .GIF, or .JPG.
Image Scale Slider
Changes how big the watermark image appears relative to the movie frame size. 100%
means the watermark image completely covers the movie frame.
Keep aspect ratio when scaling
Use this option to maintain horizontal and vertical size aspect ratio when scaling the
watermark image. When selected, the watermark appears normal, not stretched or
distorted. Default setting is ON.
Layout Library
Layout libraries contain collections of annotation objects that you have placed on screen
and saved as a layout, using the right-mouse button menu choice Save Layout. These
libraries are shown in ScreenPad under the
icon.
The Layout Library is always the first library listed in the ScreenPad window. There can
only be one layout library open at any time; however, multiple layouts may be placed on
the desktop at one time. You can create new Layout Libraries as needed by using the
62

Camtasia Producer 3.0 User Document Glossary
right-click menu Layout Library > New.
Object Library
Object libraries contain individual annotation objects that you have added to the library by
import or by drawing. These libraries are shown in ScreenPad under the
icon.
Overlay Watermark
Use this option if you want your watermark to be an opaque overlay on the produced
movie. This produces a solid image that blocks out the view of any action occurring
underneath.
Positioning Cluster
The nine-button image cluster allows you to position (or anchor) the watermark image in
a region of the movie frame.
Preview Button and Screen
Click the [Preview] button to see a live preview of the watermark feature. Note that you
can change the watermark options and watch the effect immediately in the preview
window.
Prompt Before Capture
Place a check mark in the box if you want Camtasia Recorder to prompt you for the
caption before recording. You can either accept the one previously entered or type a new
one.
RealVideo File
For details on RealNetwork’s RealVideo (RM) file Streaming Format, refer to the Web
Site http://www.real.com/.
Record Reference File
An AVI recovery reference file is used to tell Camtasia Capture Recovery Tool the
video format to use when recovering the video stream, since that information is not in the
temporary capture AVI file. The reference file is a short AVI file that uses exactly the
same settings that were used during the failed capture. The video codec, screen color
depth, and frame rate must be exactly the same as during the failed capture. If
necessary, the AVI recovery reference file width and height can be larger than during the
failed capture (if you cannot remember the exact dimensions, for example).
Note: The recovery reference file does not need to contain an audio stream.
Show Cursor
The cursor is shown during video capture (the default selection). This selection toggles
with Hide Cursor.
System Tray
An area in the lower right corner of the taskbar in Windows 95/98, Windows 2000, and
Windows NT 4.0 or later. Applications displayed in the system tray are usually
background tasks that are activated by the system clock or application specific hotkeys.
63
Glossary Camtasia Producer 3.0 User Document
Transparent Color
The transparent color you select must match exactly the areas you want to be
transparent in the watermark image. Use the [Preview] button to verify that the
transparent effect works. (The preview will not show it as transparent until the right color
is selected.)
Underlay Watermark
Use this option if you want to show the watermark as a translucent underlay under the
movie. This option allows any action that occurs under the watermark to show through.
Use smooth interpolated scaling
This option applies a smooth scaling algorithm to the watermark image for less
jaggedness. Default setting is ON. Turn this option OFF if it interferes with the
transparency of your watermark.
Use Transparent Color
Use this option to make part of the watermark image transparent. When selected, the
areas of the watermark image that match the transparent color are hidden so that the
movie shows through the watermark. You can use a transparent color to create
watermark images that have any arbitrary non-rectangular shape (for example, a circle or
an arrow).
Vertical Offset
Changes the vertical offset of the watermark image from the edge of the movie frame.
Use the [Preview] button to see the offset effect.
Zoom In
Select this option to zoom in on the area you are recording. This allows you to enlarge a
portion of the screen or application area (and therefore capture a smaller area). The
percentage of zoom is indicated on the status display.
Zoom Out
Select this option to zoom out on the area you are recording. This allows you to reduce a
portion of the screen or application area (and therefore capture a larger area). The
percentage of zoom is indicated on the status display.
Zoom To
Select this option to set the zoom back to 100 percent. Click the arrow to the right of
the icon to zoom to a specific size, which you can select from the menu that drops
down.
Zoom Undo
Select this option to undo the zoom setting and return to the previous one selected.
64
Camtasia Producer 3.0 User Document Index
Index
800x600 ..........................................8
capturing .........................................8
About DubIt...................................57
About TechSmith Corporation ......56
About TechSmith Corporation and
Our Products.................................56
Acknowledgments ........................55
Add Caption..................................34
Add Time/Date..............................34
Adobe Premiere............................40
Advanced Hotkeys........................39
Agreement ....................................55
Annotation............ 26, 33, 42, 43, 44
Edit................................................44
Annotation Catalog .......................42
Annotation Effects ........................26
Annotation Text ............................44
Annotation Toolbar .................25, 34
Annotations.......................42, 43, 44
Applying Effects............................25
ASP Ombudsman.........................55
Association .............................55, 56
Shareware Professionals..............55
Audio.............................................28
Audio Capture Device...................36
Audio Effects.................................28
Audio Format Dialog.....................37
Audio Recording Failure............18
Audio Setup ............................28, 37
Audio Toolbar .........................25, 34
Audio-Video Interleave .................61
AutoHighlight ....................26, 34, 59
Automation....................................24
AutoPan ..................................32, 35
AutoPan Hotkey............................39
AutoZoom .........................31, 32, 35
AVI ................................................61
AVI Capture Rate .........................38
Set ................................................38
AVI file ....................................52, 53
AVI Playback Rate........................38
Set ................................................38
AVI Player.....................................13
AVI Preferences ...........................36
AVI Recovery................................53
Background Color.........................27
Background Image .......................43
Bitmap images..............................43
CamRec.exe.................................24
Camtasia.................................53, 54
Support .........................................53
Camtasia Capture Recovery Tool 52
Camtasia CD-ROM.........................7
Camtasia Player .......................... 13
Camtasia Producer ...................... 50
Camtasia Recorder........ 7, 8, 19, 36
Camtasia Recorder Effects menu 25
Camtasia Recorder hotkeys ........ 38
Camtasia Recorder View Menu... 24
Camtasia Recovery Tool ............. 52
Camtasia Region Input ................ 15
Camtasia Setup ............................. 8
Camtasia Support .................. 52, 54
Camtasia Video............................ 15
Uses............................................. 15
Camtasia Video Capture Device.. 39
Caption Options Dialog................ 27
Capture .................................. 39, 40
Capture Automation..................... 24
Capture Input Options.................. 19
Capture Menu ........................ 20, 22
Capture Menu > Input............ 19, 22
Capture Menu > Input Options .... 22
Capture Menu > Output Options.. 22
Capture Menu > Quick Capture... 23
Capture Menu > Record Options. 20
Capture Options........................... 40
Capture Single Frames................ 23
CD-ROM .................................. 8, 58
Center zoom effect ...................... 31
Change ........................................ 38
Hotkey Combination .............. 38, 39
Codec..................................... 16, 50
Command Option......................... 24
Company Overview ................... 56
Configuring................................. 12
Camtasia Recorder .................... 12
Contact......................................... 55
ASP Ombudsman ........................ 55
Contact Information ..................... 56
Control Panel ............................... 17
Creating ................................. 42, 43
New........................................ 42, 43
New Annotation............................ 42
Creating and Saving Layouts....... 48
Creating New Annotations in the
ScreenPad ................................... 42
Cursor .......................................... 29
Cursor Effects .............................. 29
Cursor Setup................................ 29
Cursor Setup Dialog .................... 29
Cursor Toolbar....................... 25, 34
Define a Fixed Region ................. 20
Delete a Recording ...................... 22
Distributing Your Movie................ 50
Drawing Tools.............................. 45
65
Index Camtasia Producer 3.0 User Document
Drop Shadow................................27
DubIt .......................................56, 57
Edit................................................44
Annotation.....................................44
Edit Image.....................................44
Edit Text........................................45
Editing Annotation Images............44
Editing Annotation Text ................44
Editing Annotations.......................44
Effects............ 25, 26, 28, 29, 30, 31
Effects > Highlight and
AutoHighlight ................................58
Effects > Settings > Annotation ....26
Effects > Settings > Audio ............28
Effects > Settings > Cursor...........29
Effects > Settings > Watermark....30
Effects > Settings > Zoom ............31
Effects Menu.................................28
Effects Tabbed Dialog ..................30
Evaluation Version........................52
F10................................................38
F9............................................21, 38
Faster Compression .....................11
File ..........................................36, 37
select ......................................36, 37
File Name ...............................36, 37
Ask................................................37
File Preferences ...........................36
Fixed File Name ...........................36
Fixed Region...........................20, 22
Font Style......................................27
Frames/second...............................8
Full Duplex....................................17
Full Screen....................................14
General Suggestions..................16
Getting ............................................7
Started ............................................7
Getting Help Menu........................52
Getting Started ...............................7
Help ..............................................54
Help Menu ....................................52
Hide Hotkey ..................................39
Hide/unhide.............................24, 39
Hides.............................................24
Recorder .......................................24
Highlight............................34, 58, 59
Hotkey.....................................19, 39
Hotkey Combination .....................38
Change .........................................38
Hotkey Preferences ......................38
Hotkeys.......... 31, 38, 39, 47, 48, 49
ScreenPad....................................47
How Windows Video Works .........15
Image Editor .....................43, 44, 45
Image Editor Drawing Tools .........45
Images ..........................................44
Import Image dialog ..................... 43
Import Images.............................. 43
Importing Images into the
ScreenPad ................................... 43
Input Options.......................... 19, 22
Setting.......................................... 19
Insert .............................................. 8
Camtasia CD-ROM........................ 8
Installing Camtasia ........................ 8
Interleave ............................... 36, 58
Interleave Audio and Video.......... 58
Keyboard Sound Effects .............. 28
Keyboard Sounds ........................ 28
Layout Library .............................. 48
Layouts ............................ 47, 48, 49
License......................................... 55
License.txt.................................... 55
Live .............................................. 39
Live Output................. 22, 23, 39, 40
Live Output Feature Description.. 40
McGowan..................................... 16
Media Player................................ 57
Microsoft Windows Sound Recorder
..................................................... 17
Mouse Sound Effects................... 28
Movie ........................................... 50
Movie viewing .............................. 13
Movies.............................. 13, 14, 19
Restart ......................................... 13
NetMeeting................................... 22
New Annotation............................ 42
Create .................................... 42, 43
New Object .................................. 43
New Object dialog........................ 42
Noisy Recordings ...................... 17
Object Library......................... 42, 44
Select ..................................... 44, 45
Opaque ........................................ 29
Options............................. 38, 39, 40
Options > Preferences > AVI ....... 36
Options > Preferences > File ....... 36
Options > Preferences > Hotkeys 38
Options > Preferences > Live ...... 39
Options > Preferences > Program40
Other TechSmith Products ....... 57
Output Folder............................... 36
Output Options............................. 22
Overview ................................ 15, 16
Pan Effect .................................... 31
Pan Effects................................... 31
Panning........................................ 31
Panning the Video Capture Area. 58
Pause........................................... 21
Recording..................................... 21
Pause a Recording ...................... 21
Pause Icon................................... 13
66
Camtasia Producer 3.0 User Document Index
Performance Factors during
Recording .......................................8
Performance Improvement TIPS
......................................................12
Performance Notes.......................11
Performance Results Graphs .......10
Performance Results Tables ..........9
Play AVI ........................................13
Play Icon .......................................13
Player................................13, 14, 57
Preferences ......... 36, 37, 38, 39, 40
Preferences AVI Tab ....................37
Press.............................................33
ScreenDraw hotkey ......................33
Production.....................................50
Program ........................................40
Program Preferences ...................40
Program View Options..................24
Quality Audio Recordings .............17
Quick Capture.........................16, 23
Quick Help ....................................52
RealVideo File ..............................63
Record ......................................7, 21
Start ..............................................21
Record Audio..........................18, 28
Record Options.............................20
Record video captures..................19
Record/Pause hotkey .............21, 38
Record/Pause hotkey F9 ................7
Recorder .......................................24
Hides.............................................24
Recording ...............................21, 22
Delete ...........................................22
Pause............................................21
Stop ..............................................22
Recording Video ...........................19
Recording Volume ........................17
Recovery.......................................53
Region ..........................................22
Register Camtasia ........................52
Registered Trademarks ..........56, 57
TechSmith Corporation...........56, 57
Restart ..........................................13
movie ......................................13, 14
Run Hidden...................................24
Sales Information..........................52
Save..............................................37
Audio Format ................................37
Save As ........................................37
Save Movie File As Dialog......19, 58
Saving Layouts .............................48
Screen ..........................................22
ScreenDraw..................................38
ScreenDraw Annotation................33
ScreenDraw Hotkey................33, 38
ScreenPad..... 25, 42, 43, 44, 48, 49
ScreenPad Hotkeys ..................... 47
ScreenPad Layout Hotkeys ......... 48
ScreenPad Layouts ..................... 47
Using............................................ 47
Select hotkey ............................... 48
Selecting .............. 13, 36, 39, 42, 44
Audio Capture Device.................. 36
AVI ............................................... 36
Camtasia Video Capture Device.. 39
Live ........................................ 39, 40
Object Library................... 43, 44, 45
Play .............................................. 13
Semi-translucent.......................... 29
Set................................................ 38
AVI Capture Rate......................... 38
AVI Playback Rate....................... 38
Set Capture Input Options ........... 19
Set Record Level........................ 17
Setting and Applying Effects........ 25
Setting Capture Input................... 19
Setting Cursor Effects.................. 29
Setting Effects.............................. 25
Settings .......... 26, 27, 28, 29, 30, 31
SETUP.EXE............................... 7, 8
Shadow Color .............................. 27
Shareware Professionals....... 55, 56
Association................................... 55
Show Time/Date .......................... 26
Show/Hide Layout Hotkey ........... 49
Silent Recordings ...................... 17
Single Frame capture .................. 23
Single Frames.............................. 23
Capture ........................................ 23
Slider Control ............................... 13
SnagIt..................................... 56, 57
Software License Agreement....... 55
Standard hotkeys......................... 38
Start ....................................... 21, 38
Recording..................................... 21
ScreenDraw ................................. 38
Start a Recording......................... 21
Start Camtasia ............................. 19
Starts/resumes............................. 24
Stop.............................................. 22
Recording..................................... 22
Stop a Recording ......................... 22
Stop Hotkey ................................. 38
Stop hotkey F10........................... 22
Support .................................. 53, 54
Camtasia...................................... 53
Support (Help).............................. 53
[email protected] ............. 54
System Requirements ................... 8
Technical Support........................ 54
TechSmith.................................... 52
Web.............................................. 52
67
Index Camtasia Producer 3.0 User Document
TechSmith Corporation.....54, 55, 56
Registered Trademarks ................56
TechSmith Screen Capture ..........16
TechSmith Screen Capture Codec
................................................36, 50
TechSmith Screen Capture Codec
(TSCC)..........................................50
Techsmith.com .............................56
Temporary File Folder ............11, 41
Text.........................................44, 45
Text Color .....................................27
Time-lapse..............................23, 38
setting ...........................................23
Time-lapse Capture ................36, 38
Time-lapse Capture Setup Dialog 38
Time-lapse Setup .........................38
Tinny Sounding Recordings .........17
Toolbar..............................25, 34, 35
Annotation.....................................34
Audio.............................................34
Cursor .....................................34, 35
Zoom.............................................35
Toolbar View Options ...................25
Tools .............................................46
Translucent ...................................29
Transparency Color ................46, 47
Transparent Background ..............27
TSCC ..........................12, 41, 50, 51
TSCC.EXE....................................50
TSCC-encoded movies ................50
Uses........................................15, 16
Camtasia Video ............................15
TechSmith Screen Capture ..........16
Uses of Camtasia Video ...............15
Using Camtasia Producer.............15
Using Live Output .........................39
Using ScreenDraw........................33
Using ScreenPad Annotations......42
Using ScreenPad Layouts ............47
Using the Annotation Catalog.......42
VCR-like player.............................13
Video Capture Area ......................58
Panning.........................................58
Video Capture Overview...............15
Video Options ...............................36
Video Quality Tips ........................16
Video Setup ..................................36
View Menu....................................24
View Menu > ScreenPad..............25
Watermark ........................30, 31, 34
Watermark Effects ........................30
WAV file ..................................52, 53
Web ..............................................52
TechSmith.....................................52
Welcome.........................................7
Welcome to Camtasia Recorder
Help................................................ 7
William Hamilton .......................... 56
Windows codecs.......................... 50
Windows Explorer........................ 53
Windows Media Format ............... 16
Word Wrap................................... 27
World Wide Web.......................... 15
Zoom...................................... 31, 35
Zoom and Pan Effects ................. 31
Zoom Effects................................ 31
Zoom Effects Setting ................... 31
Zoom Hotkeys.............................. 32
Zoom In Hotkey............................ 39
Zoom Out Hotkey......................... 39
Zoom Toolbar......................... 25, 35
68
