
Creating an event registration form in JotForm from an Airstream Club
template.
A few notes about using JotForm. Generally the registration form should ECHO information
about an event that is provided elsewhere, i.e. newsletter, website. The form may remind
users of the fee (per person, per rig, etc.) but it isn’t well suited to providing details about an
event because that extends the form unnecessarily.
JotForm has excellent tutorials at https://www.jotform.com/help/ and their tech support is very
helpful and speedy. Don’t hesitate to use it.
The following are directions if you want to use an existing form / template for an Airstream
Club event. You can also “start from scratch” and build your own form, which may be even
easier. Your choice.
To USE A TEMPLATE: Go to [email protected] and locate the template you want to use (luncheon,
rally with fixed fee, rally with variable fee, rally with no payment, etc.) Copy the URL
(https://jotform.form.Xxxxxxxxxxxxxx)
Open your club’s/unit’s/region’s JotForm account. Click on Create Form.

Choose Import Form
Choose From a Web Page and Paste the URL you copied into the URL box.

Enter the URL you copied You will see the Empty Template Form appear. You’re halfway to being done!
Now you need to customize the form according to your needs. You can add or delete any field you wish.
First, EDIT THE NAME of the form. Click on the Text and type your changes.
The BUILD tab is where you create/edit the form fields.
To ADD an element, click on the “Add Form Element” in the upper left. There are many choices. It is
suggested that you “play” with these options when learning to use JotForm. See what each will do. You
can’t hurt anything. It’s like a sandbox.
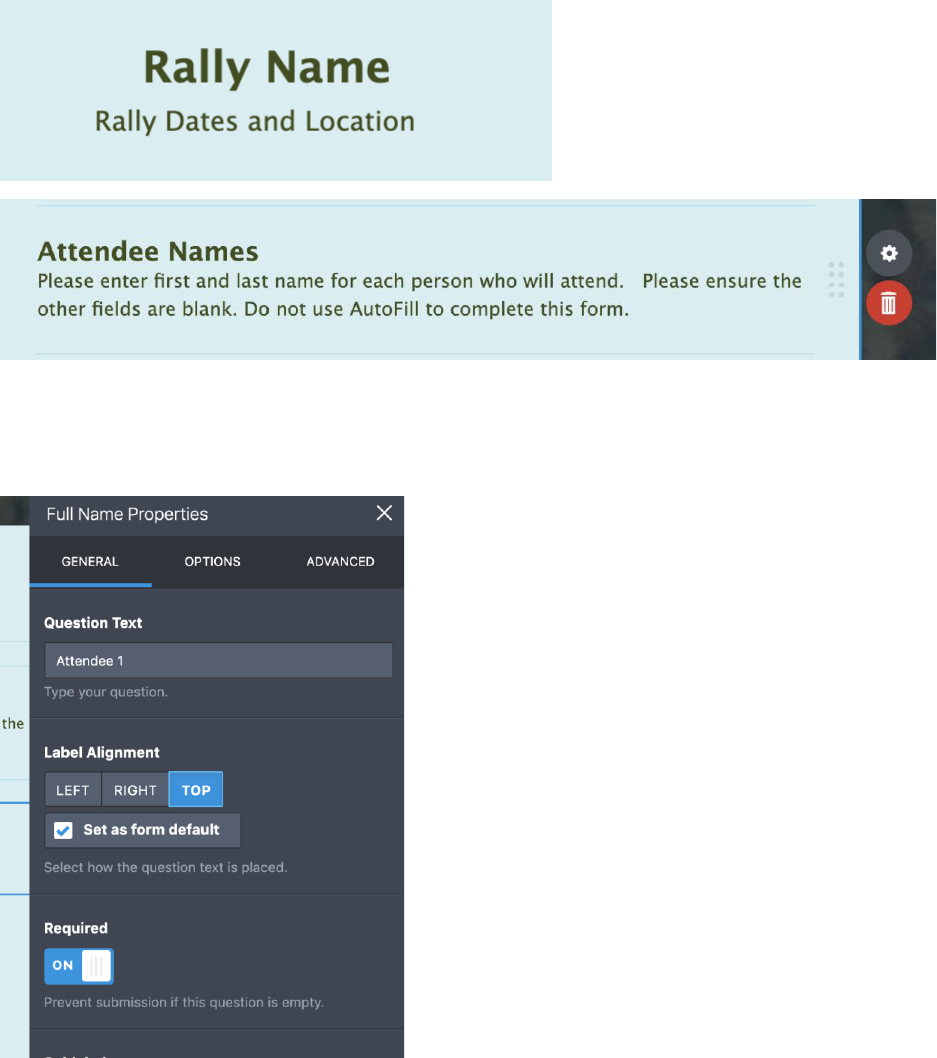
Edit Heading - Name of the event, Date, Location
Above is a Text field, designed to provide information to the user.
To change how a field works, make it required, change the size of the input box, etc. click on the field
itself, then the “gear icon.” Be sure to explore the “Options” menu.
To delete the field, use the red Trash Can.

• For Luncheons, Edit options if applicable (the pull down widget) under each name (have to do 4
times),
o Description of entrée option (ex. chicken, beef or adult, child or adult beef, child
chicken?) or an Adult/Child option
▪ May only have 1 option
▪ Might include price to remind users.
o Enter the Price of menu option under “properties” (gear icon) -> “options” (tab)
Edit contact name and information and deadline in this text box.
Edit “Total ‘Month’ Rally/Luncheon/Event Fee to show month/name of the event. This shows the user
what they owe.
o Click on the “wizard” wand / Widget Settings on the right side to verify the math
calculation is correct for the event. THIS WILL VERY WITH EVERY EVENT. Edit the
formula.
IT IS VERY IMPORTANT THAT YOU TEST THE FORM CALCULATIONS BEFORE PUBLISHING THE
FORM. Use basic mathematical functions, referencing field to add/multiply but clicking on Form
Fields.
If you allow payment by check: Edit the name and address of who is supposed to get checks if paid by
check. If you do_not_ allow payment by check, you can delete the “Pay online or by check” field and
pertinent information.
Below the Paypal text
o Edit the Edit “Total ‘Month’ Rally/Luncheon/Event Fee to the month of the event
o Edit the ‘Month’ in the sub label to the month (or name) of the event
▪ This sets the description in the PayPal emails to the treasurer so they can
better track and assign the revenue.
▪

To set the COLORS of your form – this is fun – use the icon in the upper right.
This allows you to choose background, form and text colors, even shades of colors, and images. Be sure
to maintain good contrast for easy readability and avoid glaring colors. The users will thank you.
To TEST your form, use the preview button in the upper right.
On the “settings” tab
• Set the form status
o Disable on submissions, date, or submissions and date
▪ Make sure you set the hour to 23:59
• Edit the warning message, if needed
• On the “conditions” side tab
o Click on the purple box ( 2 of them and
▪ Edit the emails of who gets the notifications
• Host Support Lead (Lori), Host ( the one who’s your designated
contact), and maybe yourself for a while to see how it works
• On the “emails” side tab
o Click on the “Autoresponder “box(es) ~ 2 again, online and check) and verify the
text is sufficient for the person registering to see what they did. Should be fine
o Click on the “Notifier “box(es) 2 again, online and check ) and verify the text
▪ Do not add more information to this email as hosts then try to use
emails to do their data collection versus using the spreadsheet
download. Due to SPAM filter etc., every time some used the emails in
the past, errors occurred. They used them because they were not
comfortable trying to download the spreadsheet or use it to track
submissions. We needed to take that option away.
▪ Don’t worry about the email addresses****you might want to say
where, confusing…, they are overridden by the emails from the
“conditions” tab
On the “Publish” tab
• Click on the “pencil “on the left side of the “Direct Link to your Form “
box. This will give you a human readable URL.
o Good for debugging when things go wrong
o You can copy the resultant URL or use the “copy link” button to
capture the URL for the Host Support Lead to put in the “Event
Announcement”
Testing
Yes we test and multiple eyes help a lot.
• Using “Preview Form” on the “Build” tab,
o Fill out the form using all the combination of options to see that
the total is correct in the “Total ‘Month Event’ fee is correct
o Click on pay by “Check”
o Put “Test submissions” in the “notes to host” box
o Submit
• Verify email delivery and appearance
o You should get an autoresponder
o All the emails in the Notifier should get emails
• Go to the “Forms” Page
o It should show one new submission
o Check the box and under “more” click “view submissions”
o Verify the information is correct and you can try the “down
load” as “Excel” button
▪ May not work on mobile devices
• Fix Form etc. as needed.
